Introduction
Welcome to AI RAG Wrapper, a professional Retrieval-Augmented Generation (RAG) backend built with Laravel 12. This system turns your documents into searchable knowledge for AI, enabling intelligent, context-aware interactions with your data.
What is RAG?
Retrieval-Augmented Generation (RAG) combines your private documents with AI language models. When users ask questions, the system retrieves relevant chunks from your documents and feeds them to the AI for accurate, context-aware responses.
🚀 Quick Start
5-Minute Quick Start
.env.example to .env./install to verify your license and set up your super admin account.GEMINI_API_KEY in Settings → RAG Settings for free embeddings (recommended for getting started).php artisan queue:work (Required for document processing!)Key Features
🤖 AI & RAG Engine
Smart Chunking
Intelligent text splitting with configurable chunk size (1000 chars) and overlap (100 chars) for maximum AI accuracy.
Semantic Search
Vector embeddings enable high-accuracy retrieval of document segments based on meaning, not just keywords.
Reranking Pipeline
Optional reranking stage uses specialized models to score and re-order retrieved chunks for improved precision.
Query Rewriting
Dynamically modifies user queries to better align with document language and structure.
Semantic Caching
Reduces latency and API costs by caching semantically similar previously answered questions (24-hour cache).
Streaming Responses
Real-time typewriter-style AI responses via Server-Sent Events (SSE) for better user experience.
Exponential Backoff Retry
Automatic retry logic (3 attempts, 2000ms delay) for transient AI provider failures.
Chat Rate Limiting
Configurable limit on conversation history messages to control context window size and API costs.
📄 Document Management
Multi-format Support
Upload PDF and plain text/markdown files for ingestion.
Automatic Text Extraction
PDF parsing via smalot/pdfparser with intelligent text extraction.
Background Processing
Queued job batches for scalable document ingestion without blocking the UI.
Real-time Progress
Track document processing status with percentage completion indicators.
Custom Instructions
Per-document system prompts and instructions for tailored AI behavior.
UUID Identification
Secure, non-sequential document identifiers for enhanced security.
Cascade Deletion
Automatic cleanup of associated knowledge chunks on document deletion.
⚙️ Technology Stack
Laravel 12
Latest LTS framework with modern PHP 8.3+ features.
Filament v5
Enterprise-grade admin panel with beautiful UI components.
Livewire 4
Full-stack framework for dynamic interfaces without JavaScript.
Flux UI
Modern, reactive UI components with Tailwind CSS v4 styling.
Pest 4
Expressive testing framework ensuring 100% feature reliability.
Tailwind CSS 4
Utility-first CSS for premium design aesthetics.
System Requirements
| Component | Requirement |
|---|---|
| PHP Version | 8.3+ |
| Database | MySQL 8.0+ or PostgreSQL |
| Required Extensions | BCMath, Ctype, Fileinfo, JSON, Mbstring, OpenSSL, PDO, Tokenizer, XML |
| Memory Limit | 256MB+ (Required for PDF parsing) |
| SSE Requirements | mod_security disabled or exception made; fastcgi_buffering off for Nginx |
Installation Guide
Standard Installation
- Upload: Zip the main_files folder and upload the
mail_files.zipto your server. -
Configure Environment: As for CodeCanyon, the
.envfile will not be present. Create a.envfile by doing ONE of the following:- Option A (Recommended): Rename
.env.exampleto.env - Option B: Copy
.env.exampleand save the copy as.env - Option C: Create a new blank file named
.envand paste the contents of.env.exampleinto it
💡 Tip: The.envfile stores your database credentials, API keys, and app settings. Never share this file publicly. - Option A (Recommended): Rename
- Run Wizard: Navigate to
your-domain.com/install. - License: Enter your Purchase Code. The system will verify this with the Envato API.
- Database: Enter your credentials and let the wizard migrate the tables.
- Super Admin: Create your first administrator account.
What Happens During Installation
The installation wizard automatically configures the complete Role-Based Access Control (RBAC) system using Filament Shield. When you create your first administrator account, the system performs the following actions behind the scenes:
Runs shield:install to create the Roles resource and initial permission structure in Filament.
Executes shield:generate --all to automatically generate permissions for all Filament resources (Resources, Pages, and Widgets).
Runs shield:super-admin to assign the super_admin role to your first user, granting full access to all features.
Creates a default user role with basic permissions for regular users.
your-domain.com/admin/settings/roles.
License Verification Behavior
The installer verifies your purchase code with the Envato API. To ensure legitimate users aren't blocked during API outages while still protecting against invalid licenses, the system implements graceful degradation with distinct behavior for installation vs. runtime:
| Scenario | Phase | Behavior | Why? |
|---|---|---|---|
| API Down (503/502) | Installation | ⚠️ Allow + Warning | Records purchase code, marks as unverified. Auto-retries later. Prevents blocking legitimate users during outages. |
| Runtime | ✅ Allow (Cached) | If previously verified, use cached license. Does not lock users out during daily use. | |
| Rate Limited (429) | Installation | ⚠️ Allow + Warning | Records purchase code, waits for rate limit to reset. Auto-retries after cooldown. |
| Runtime | ✅ Allow (Cached) | Relies on local cache until rate limit resets. No user disruption. | |
| Connection Error | Installation | ⚠️ Allow + Warning | Network issues shouldn't block installation. Purchase code recorded for later verification. |
| Invalid Code (404) | Installation | ❌ Block | API explicitly returns "Invalid". User must check and re-enter code. |
| Runtime | ⚠️ Log Warning | Previously valid license now invalid? Log and alert admin, but don't abruptly lock out. | |
| Wrong Item ID | Installation | ❌ Block | Purchase code is for a different product. User must verify correct item. |
| Valid License | Runtime | ✅ Allow | License verified and cached. Full access granted. |
Key Design Principles
Legitimate users should not be locked out when Envato API experiences downtime. Cache and grace periods protect users.
When the API explicitly returns "Invalid", block immediately to prevent unauthorized use.
Runtime verification runs at most once per hour to avoid rate limits and minimize API dependency.
Detailed cPanel Installation Guide
The installation of this script is super easy. If you can install normal php based scripts on your server, you can install our script. We will tell you how to install this script step by step on a server.
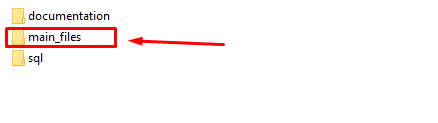
If you extract the zip file, you will see that there are total two folders.
The folder names are: documentation and main_files. The "main_files" folder contains the complete Laravel source code.
Creating Database using Cpanel
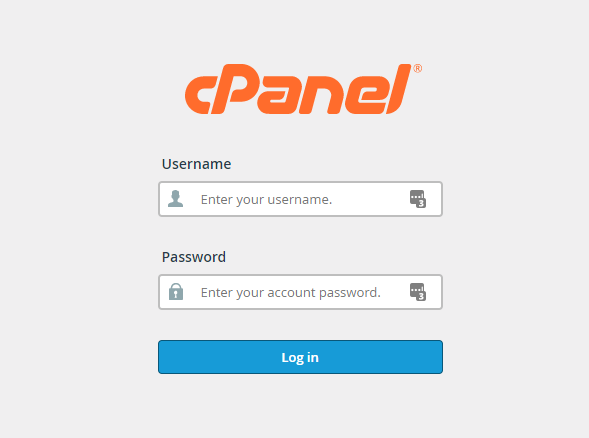
- Login to your hosting's cpanel using the login information. You will see an interface like this:
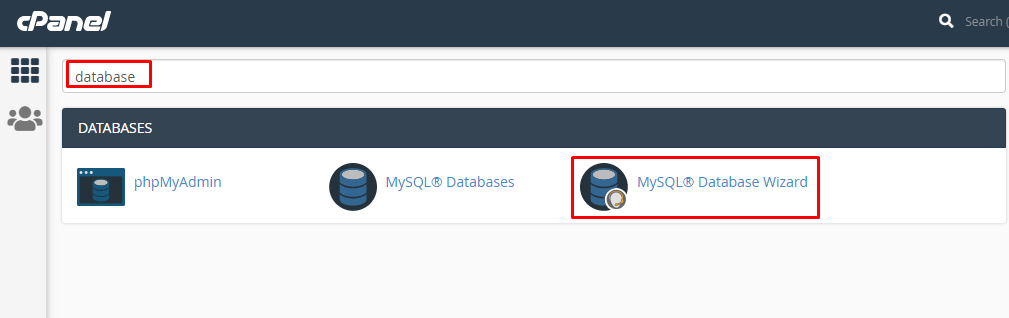
- You will get a search section in the cpanel. Search there by writing the word "database". You will get some options. Click on "MySQL® Database Wizard" option.
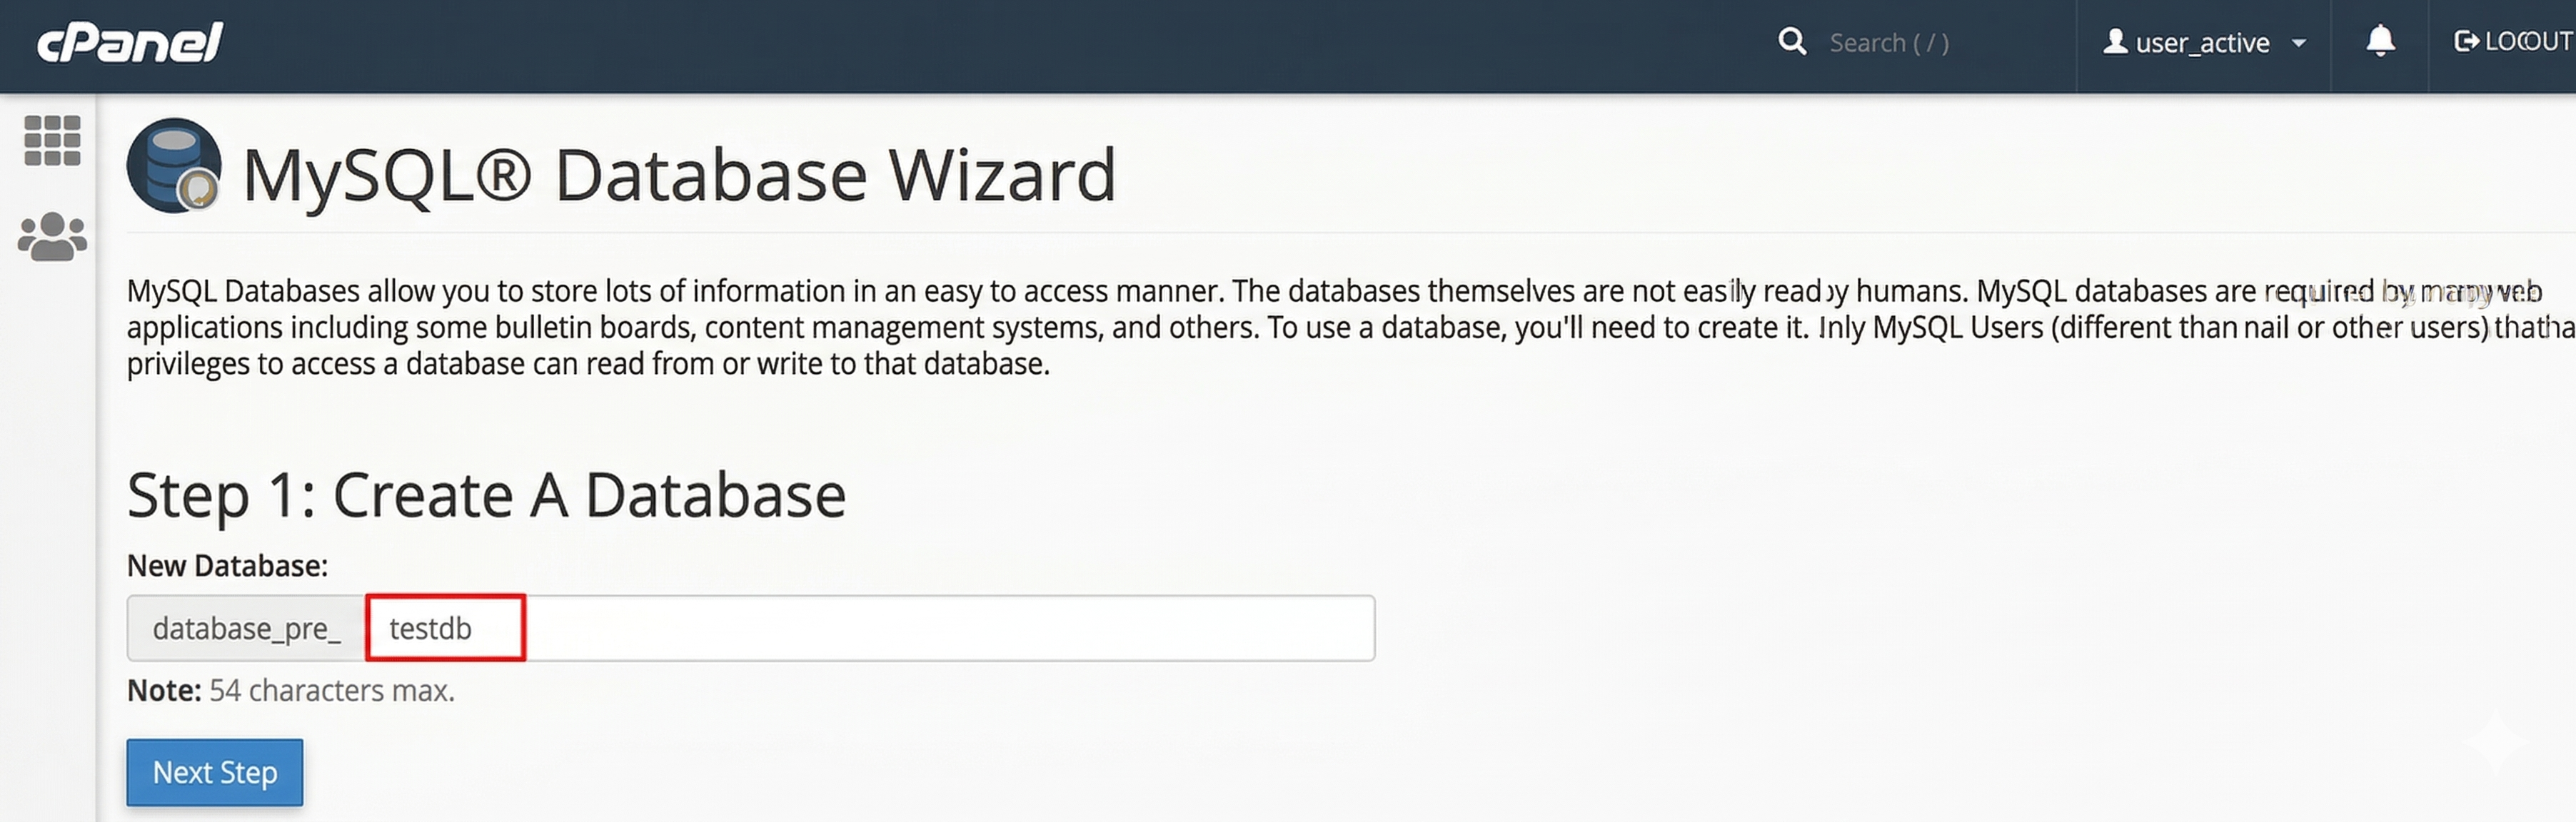
- Then in Step 1, you will have to create a database. In the text field, give your database name and click on next step.
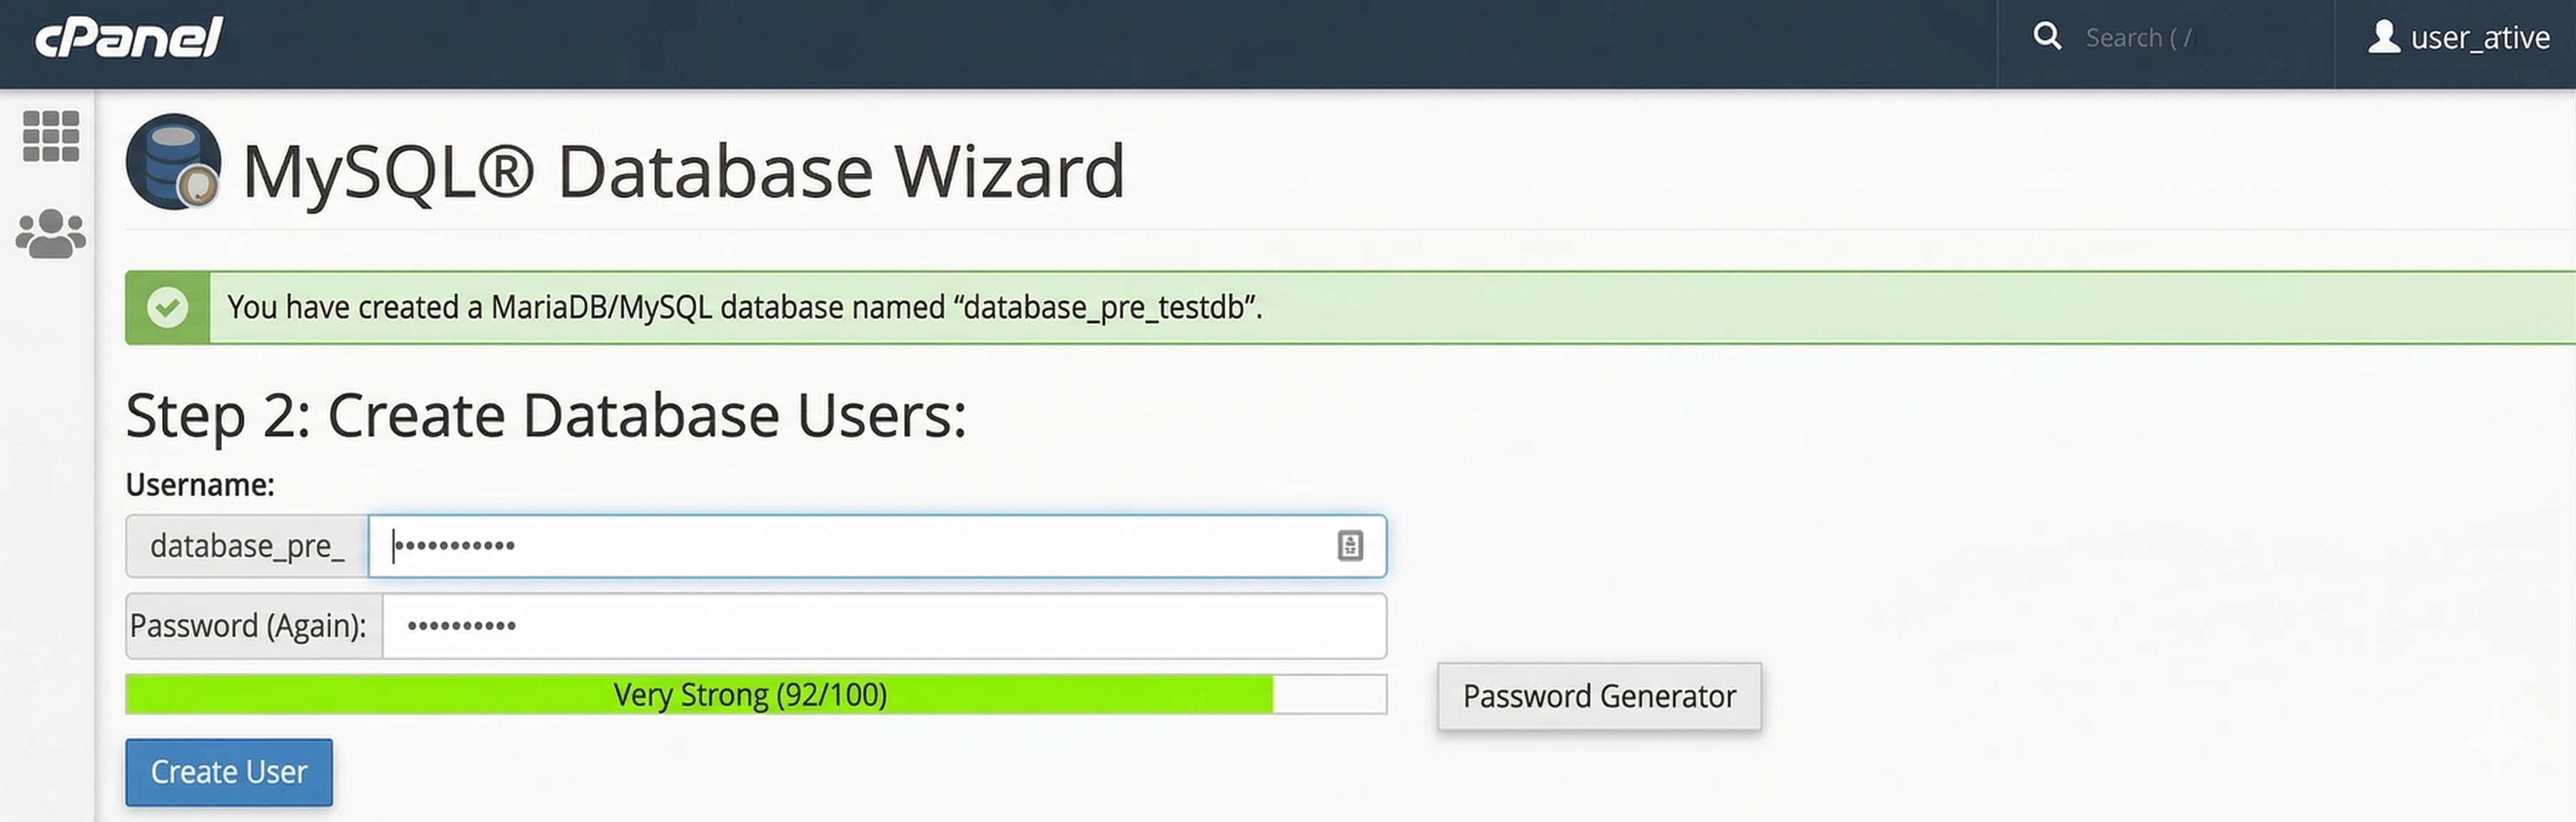
- Then in Step 2, you will have to create a database user. Give your username and passwords here. Then click on "Create User" button.
- Now a permission page will come. Just check the tick mark on "ALL PRIVILEGES" and you will see all the options will be automatically checked.
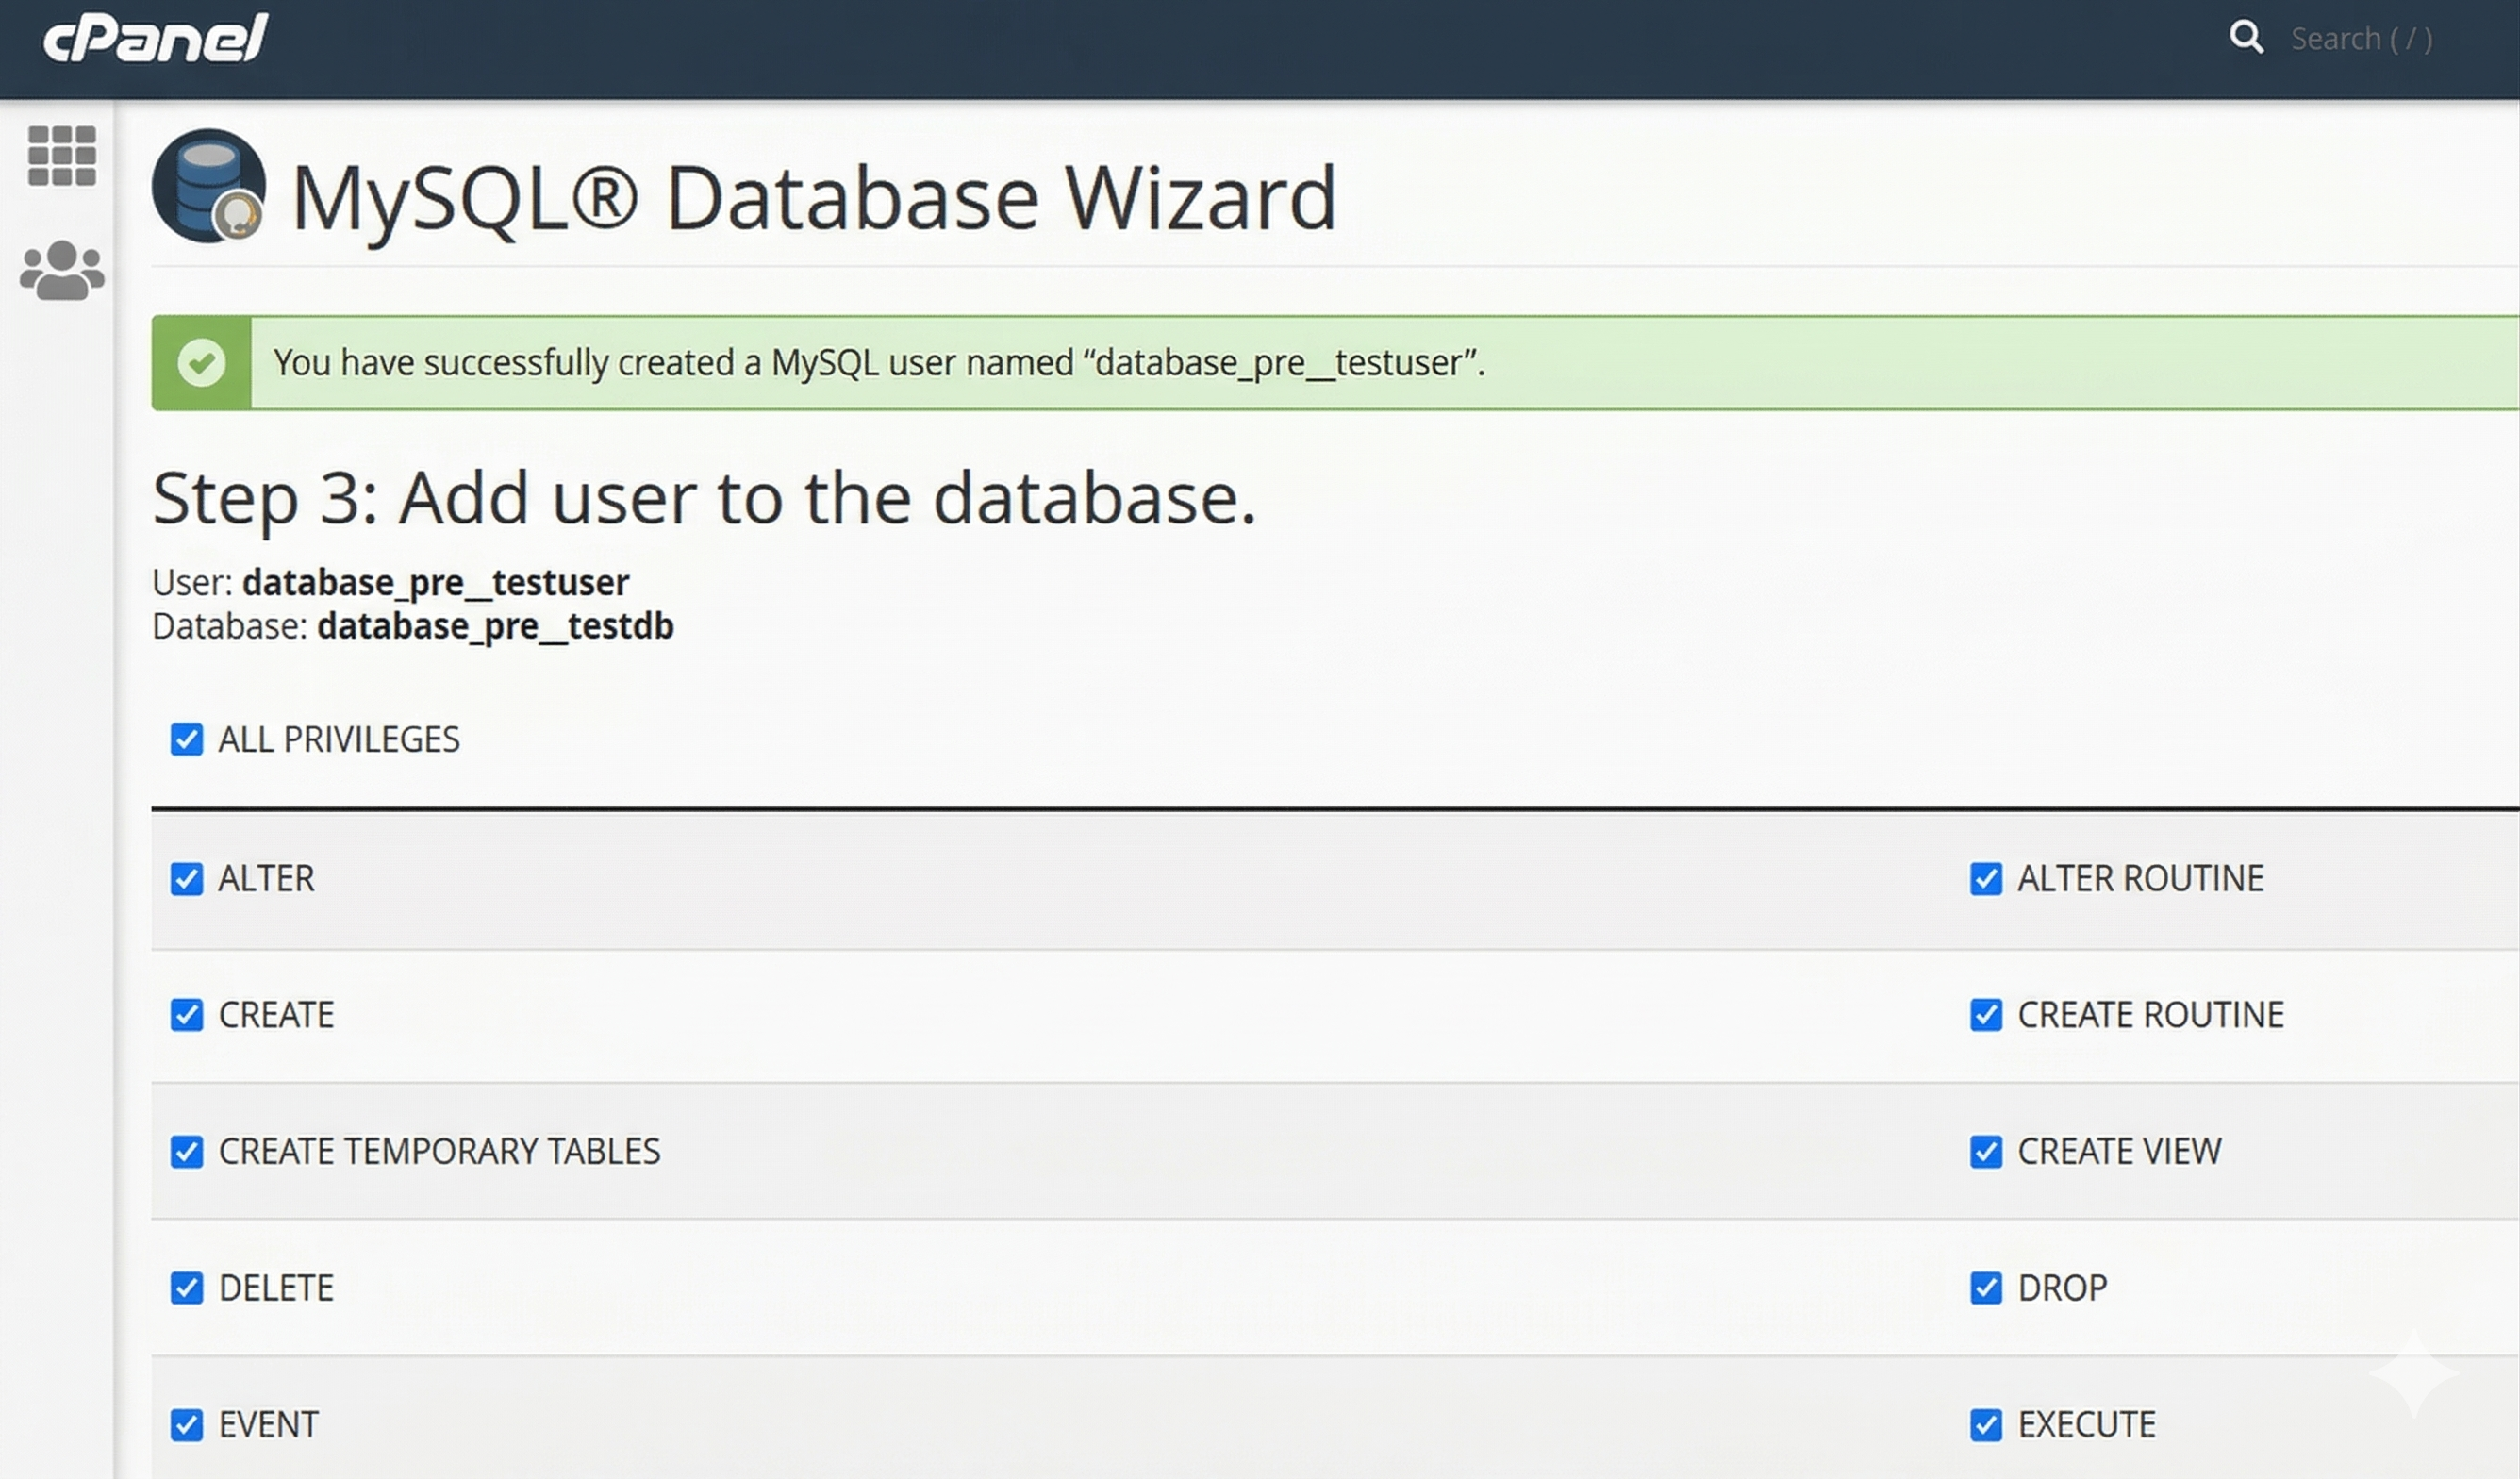
- Click on the "Next Step" button in the bottom.

- Done! Your database and user are now ready. The application installer will automatically create all necessary tables and initial data during the setup process in the next section.
Uploading Files using Cpanel
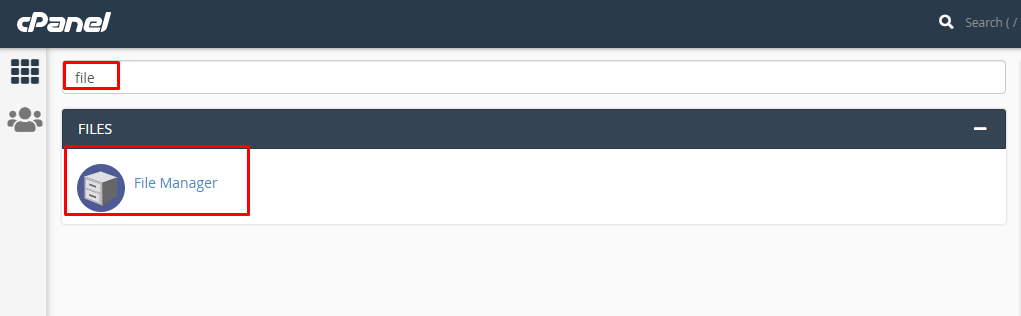
- In the search field of your cpanel, write the word "file". You will get a "File Manager" option. Click on that option.
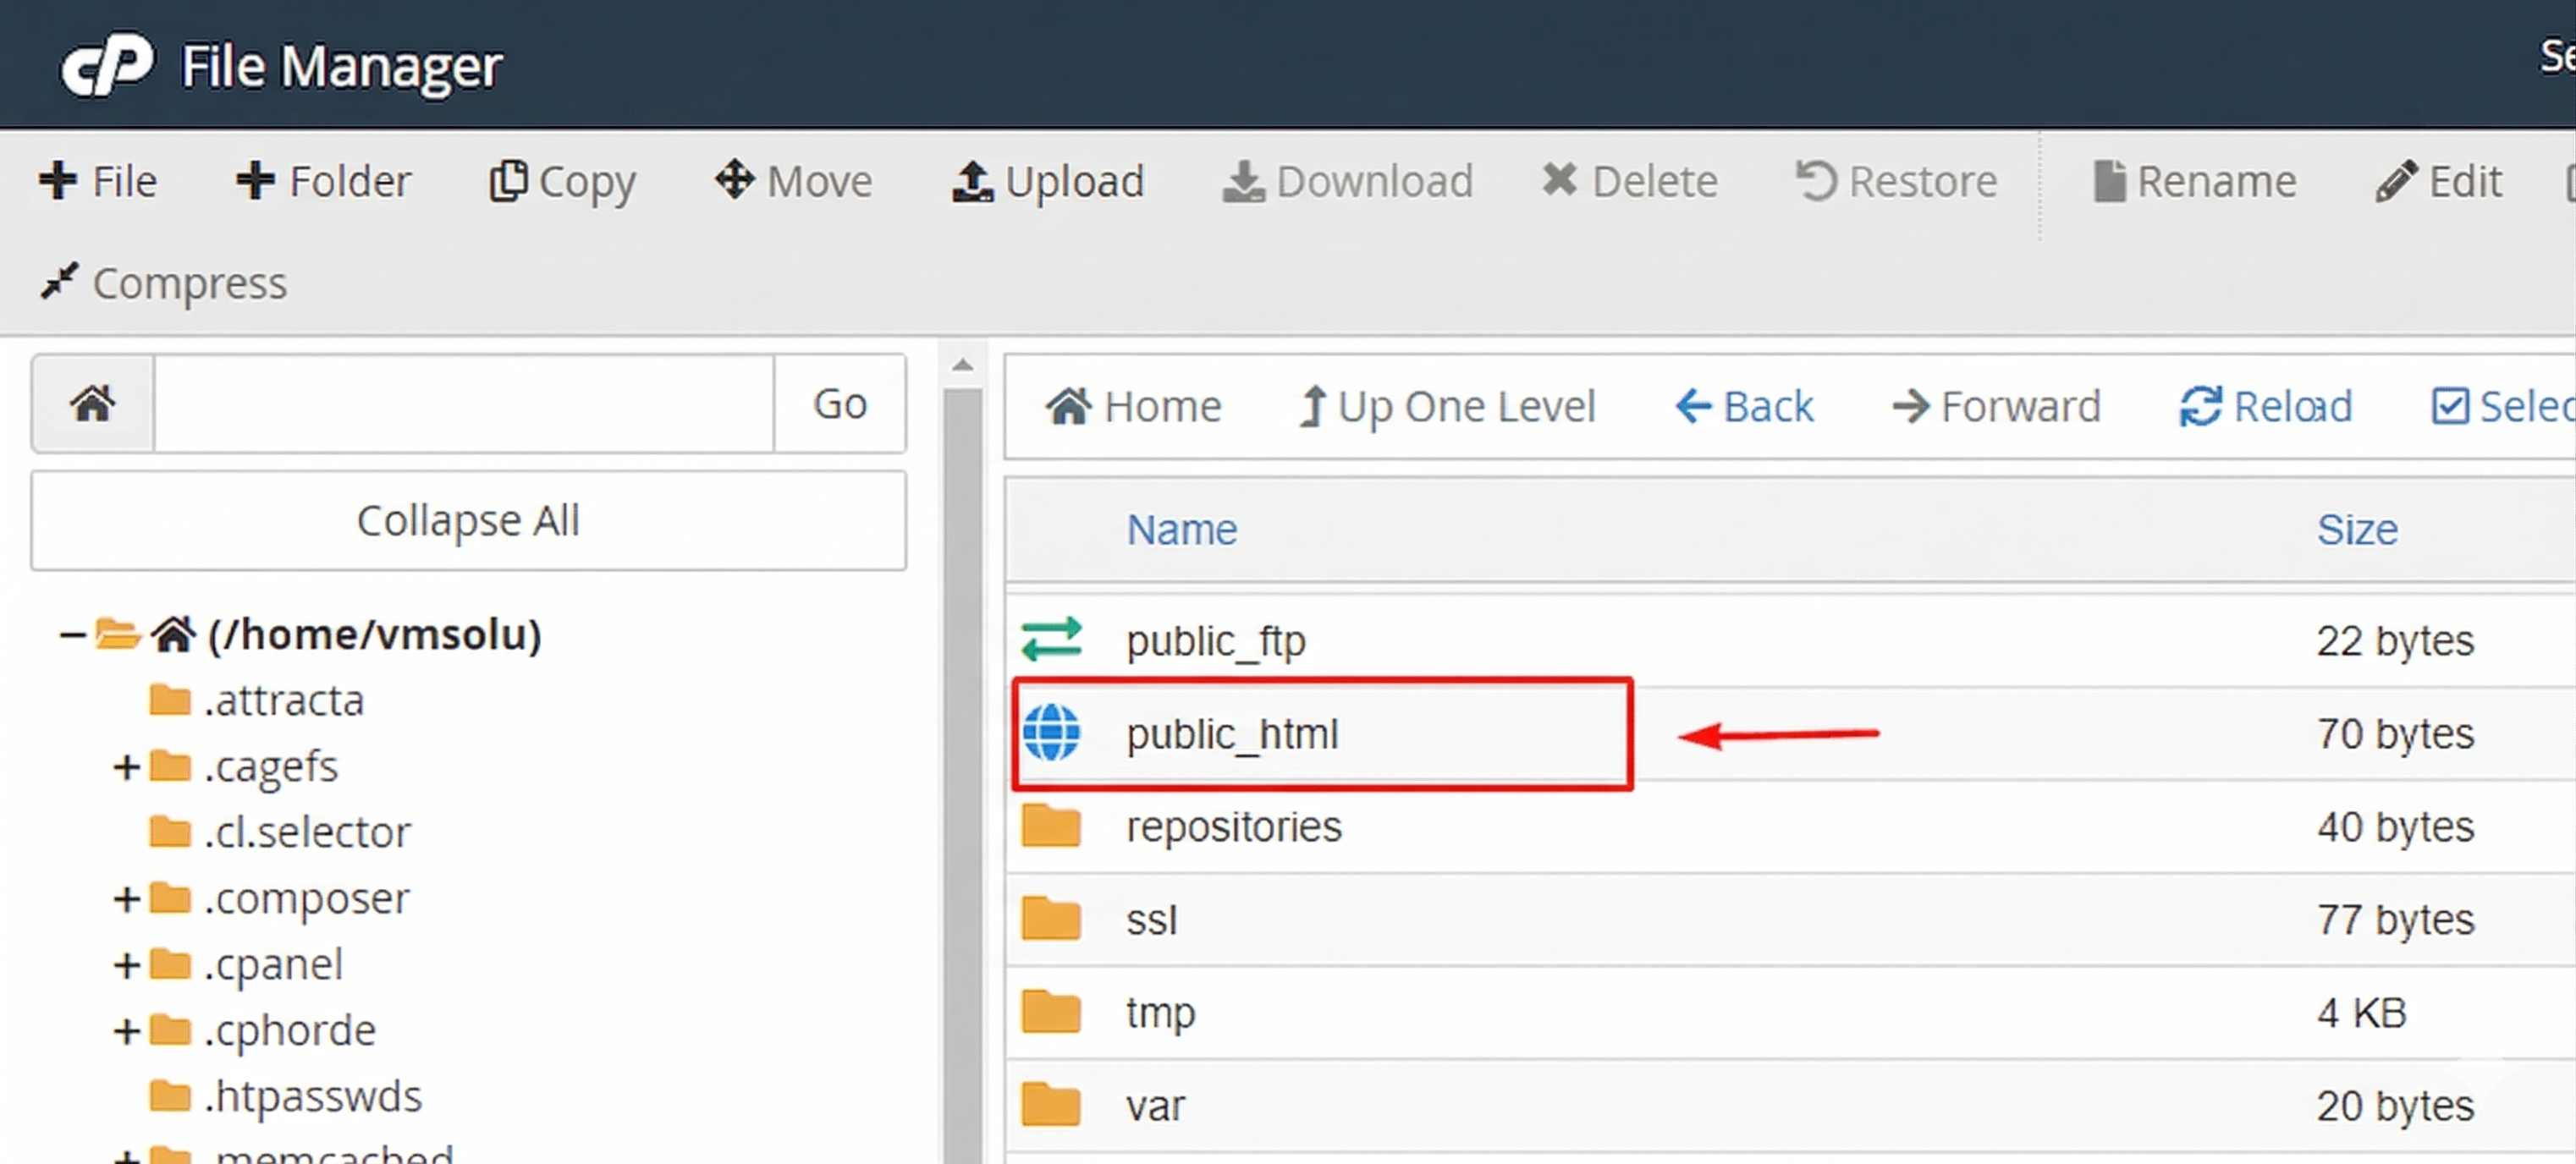
- Search for the "public_html" and go into there.
- Now go to the folders that you got after extracting the main zip and compress the folder "main_files" using any software like winrar.
- The zip file will be like this.
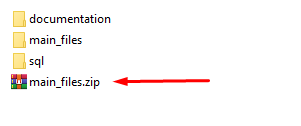
- In the cpanel's "public_html", upload this zip file.
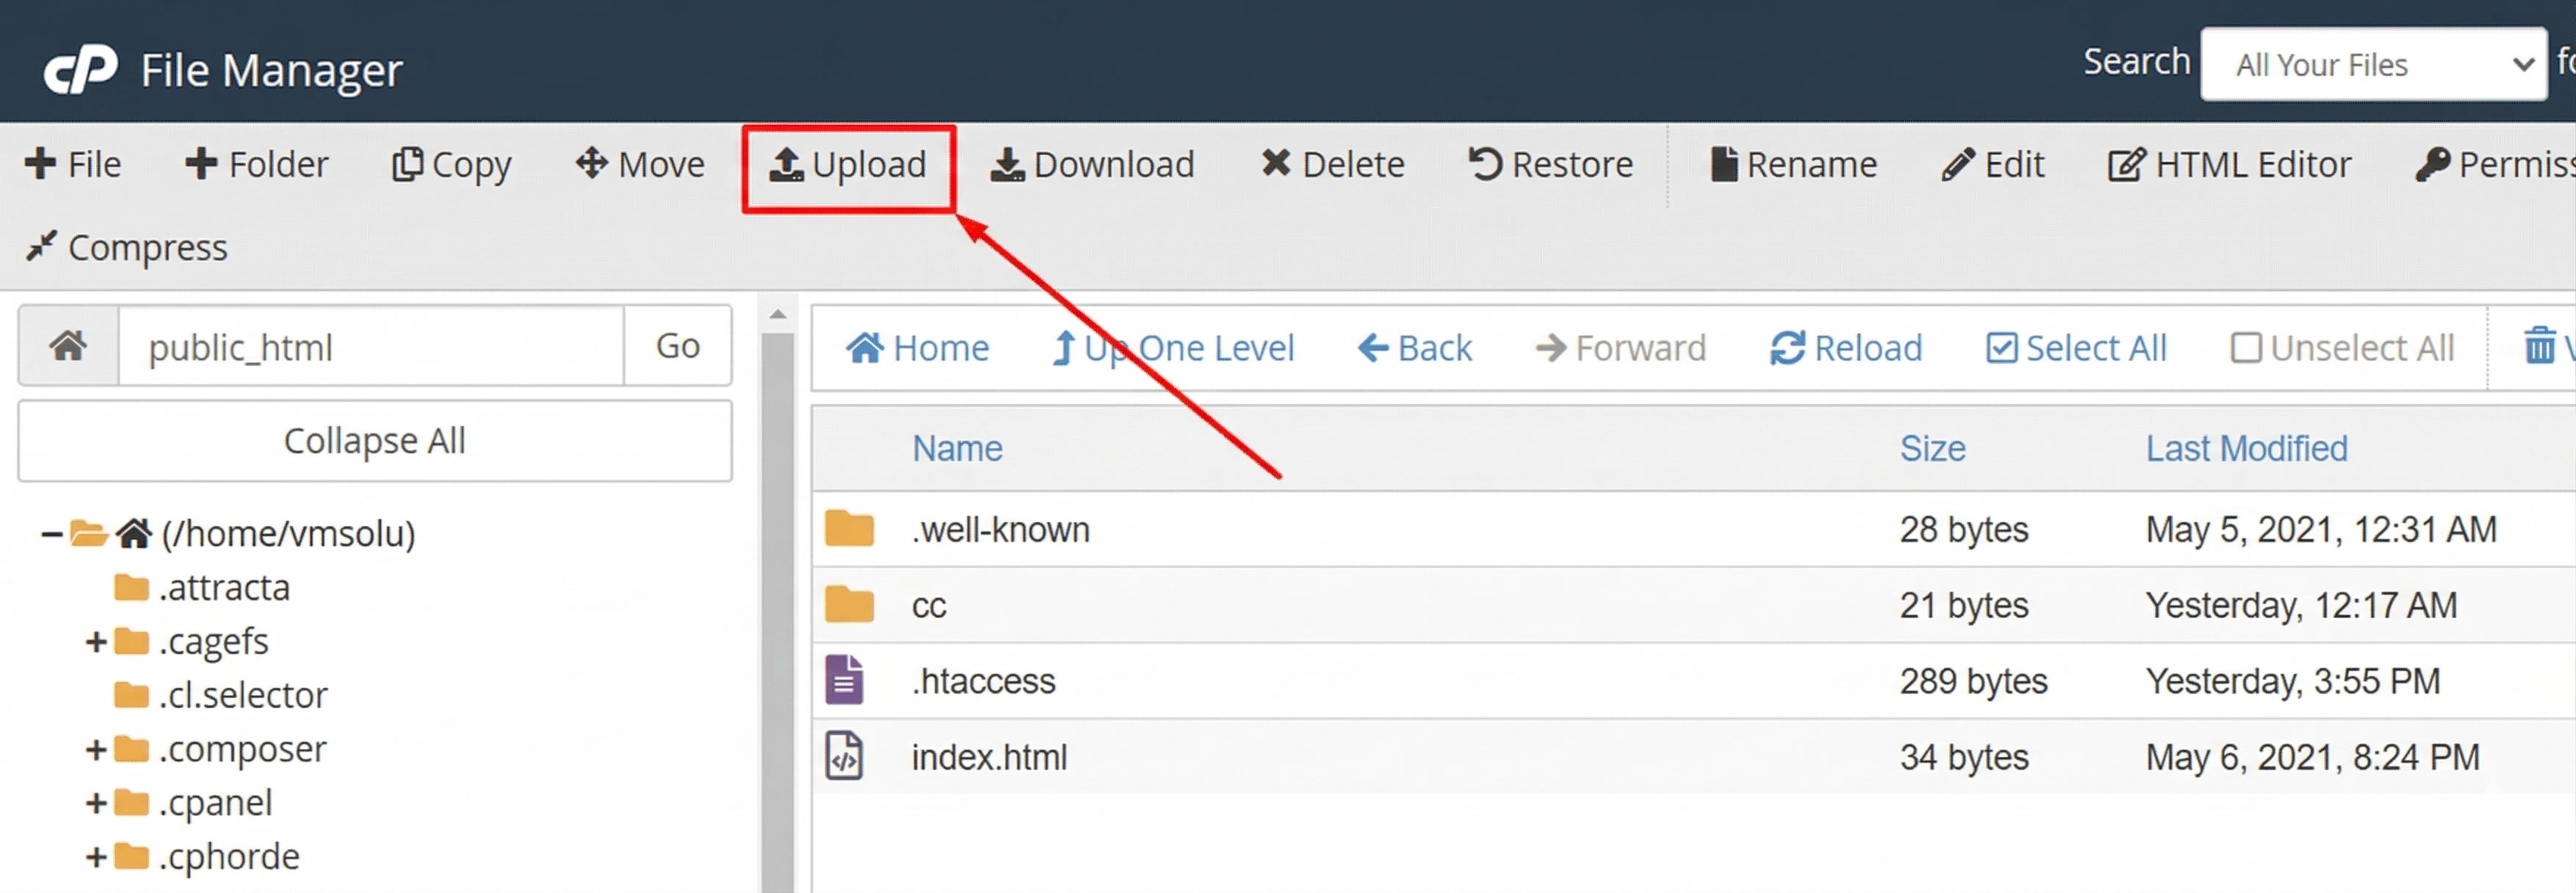
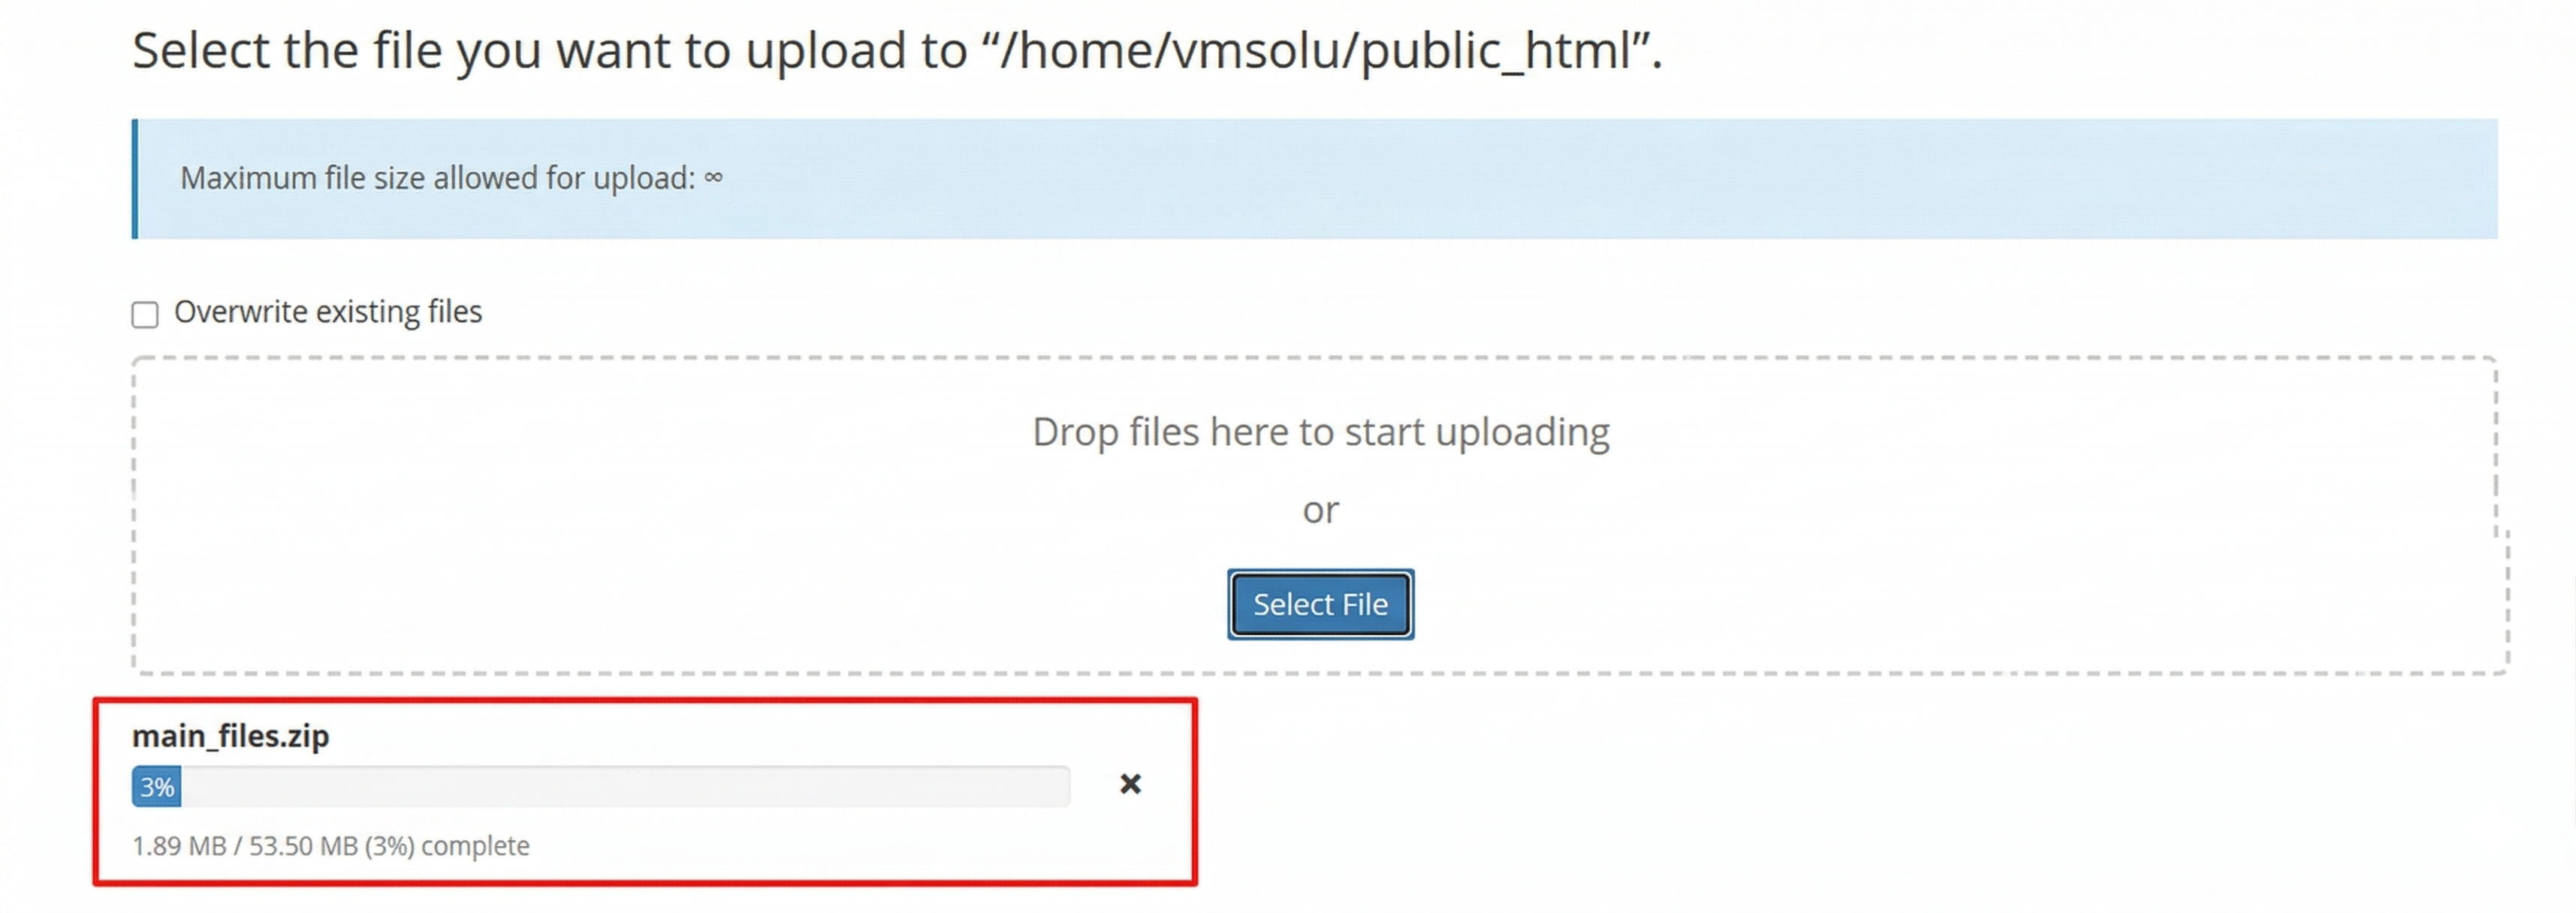
- You will get an interface like this.

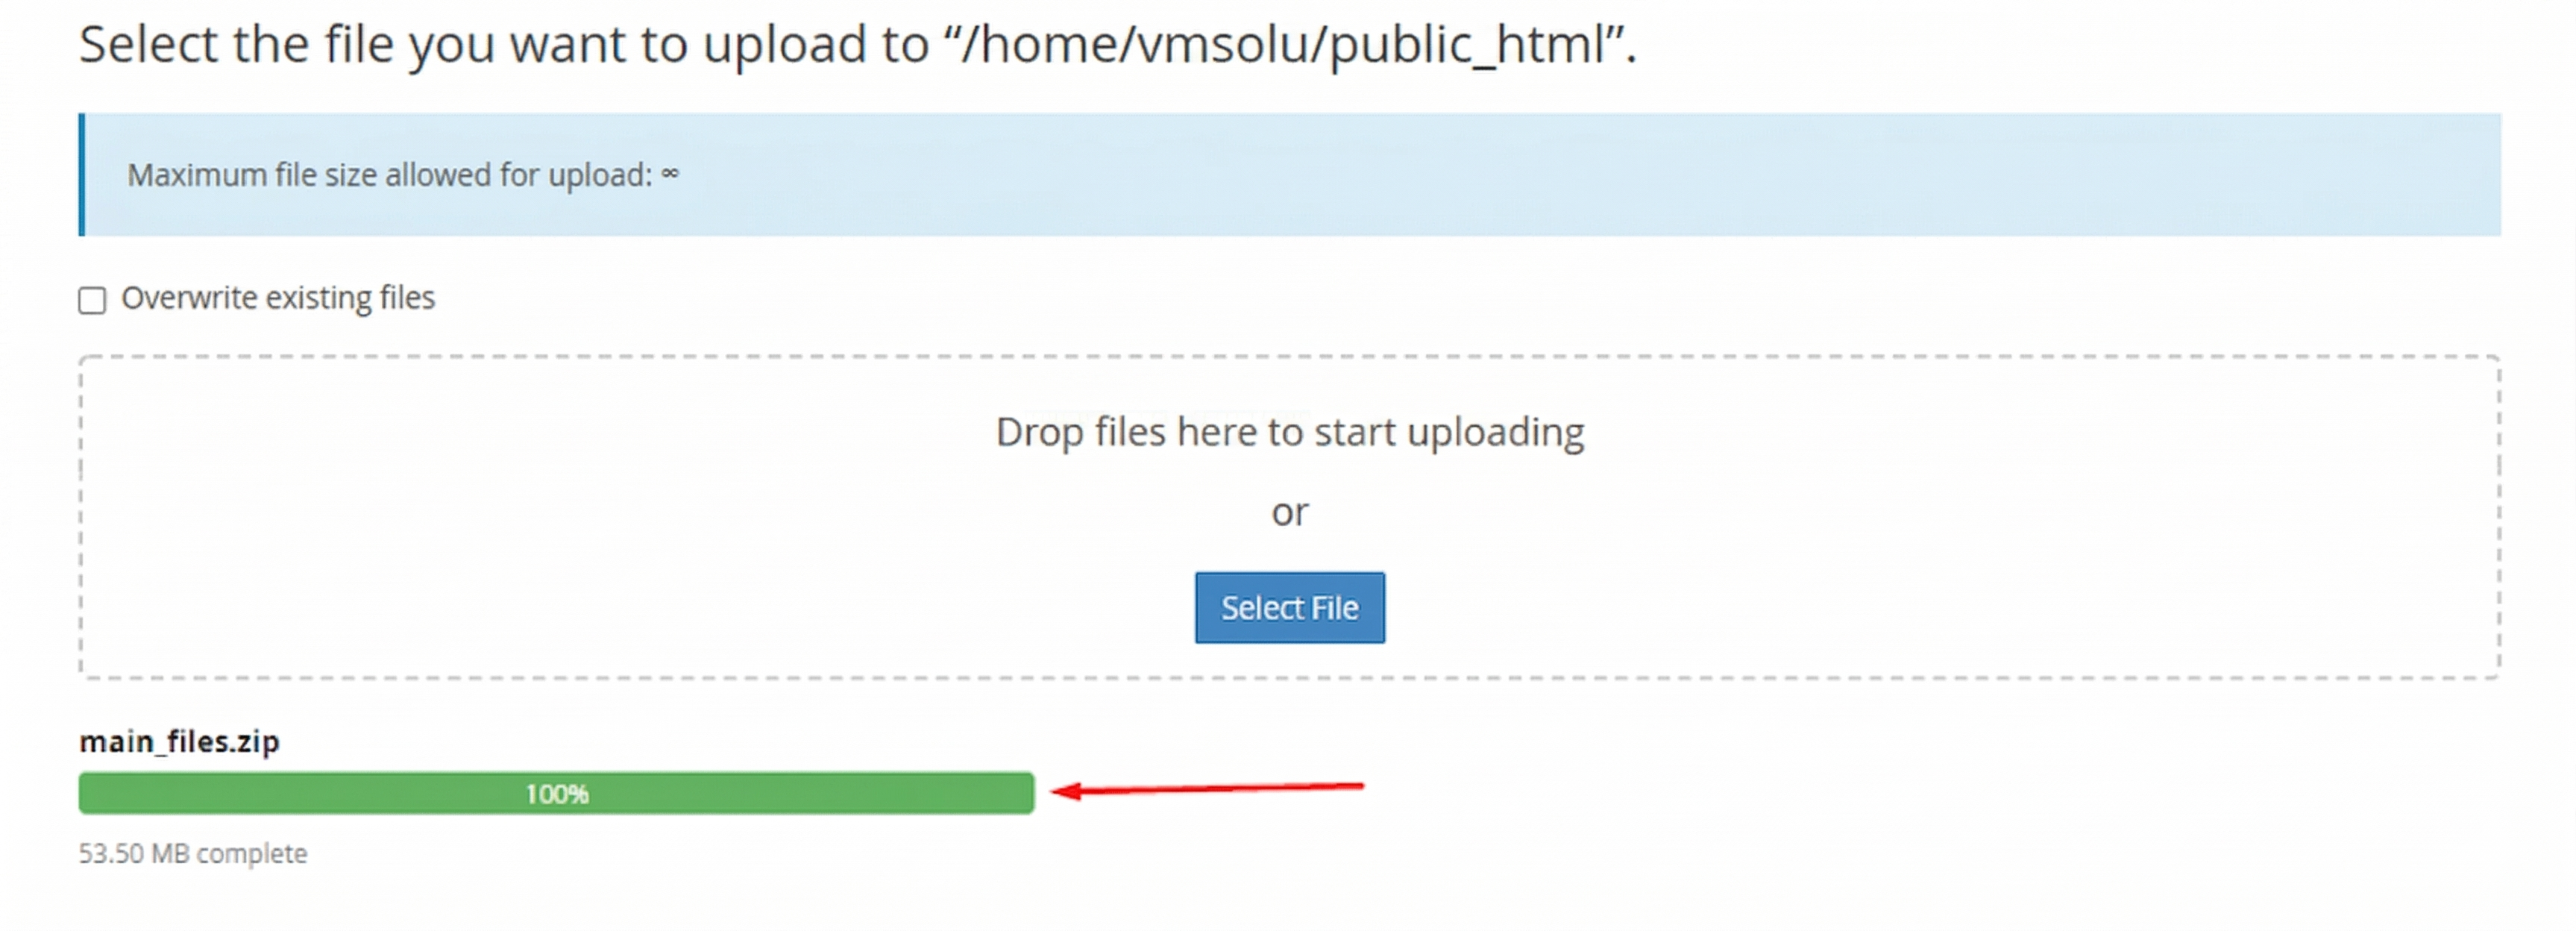
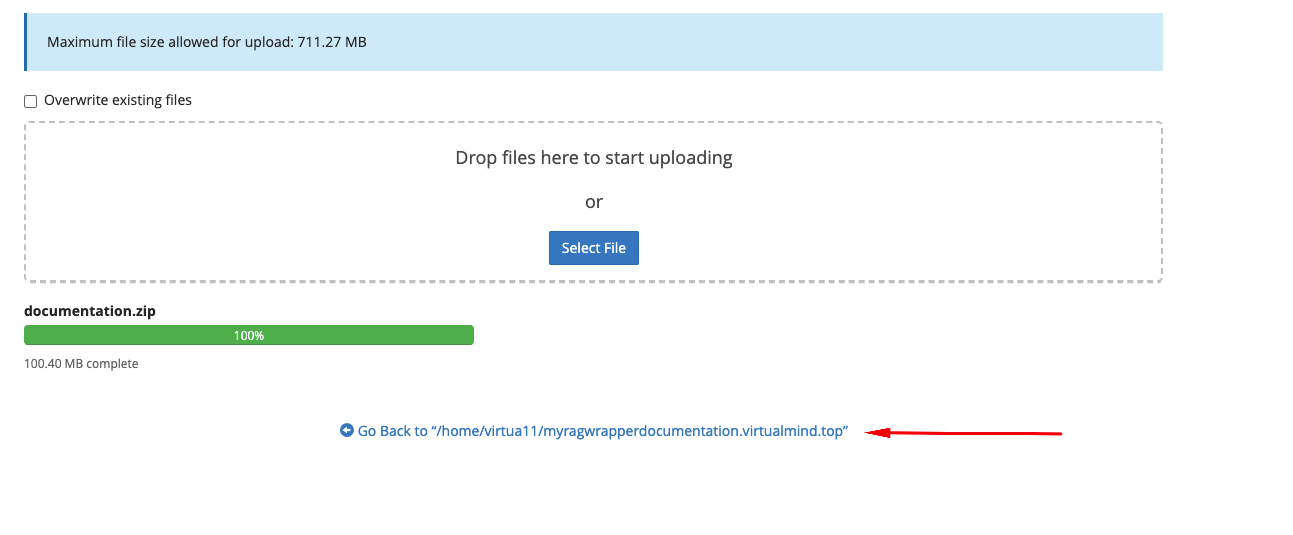
- Drag and drop the zip file here or just click on the "Select File" and select the file from your computer. You will see a progress of uploading file. Wait until it is finished.
- After finishing the upload, you will see a green bar. It indicates that upload is successful.
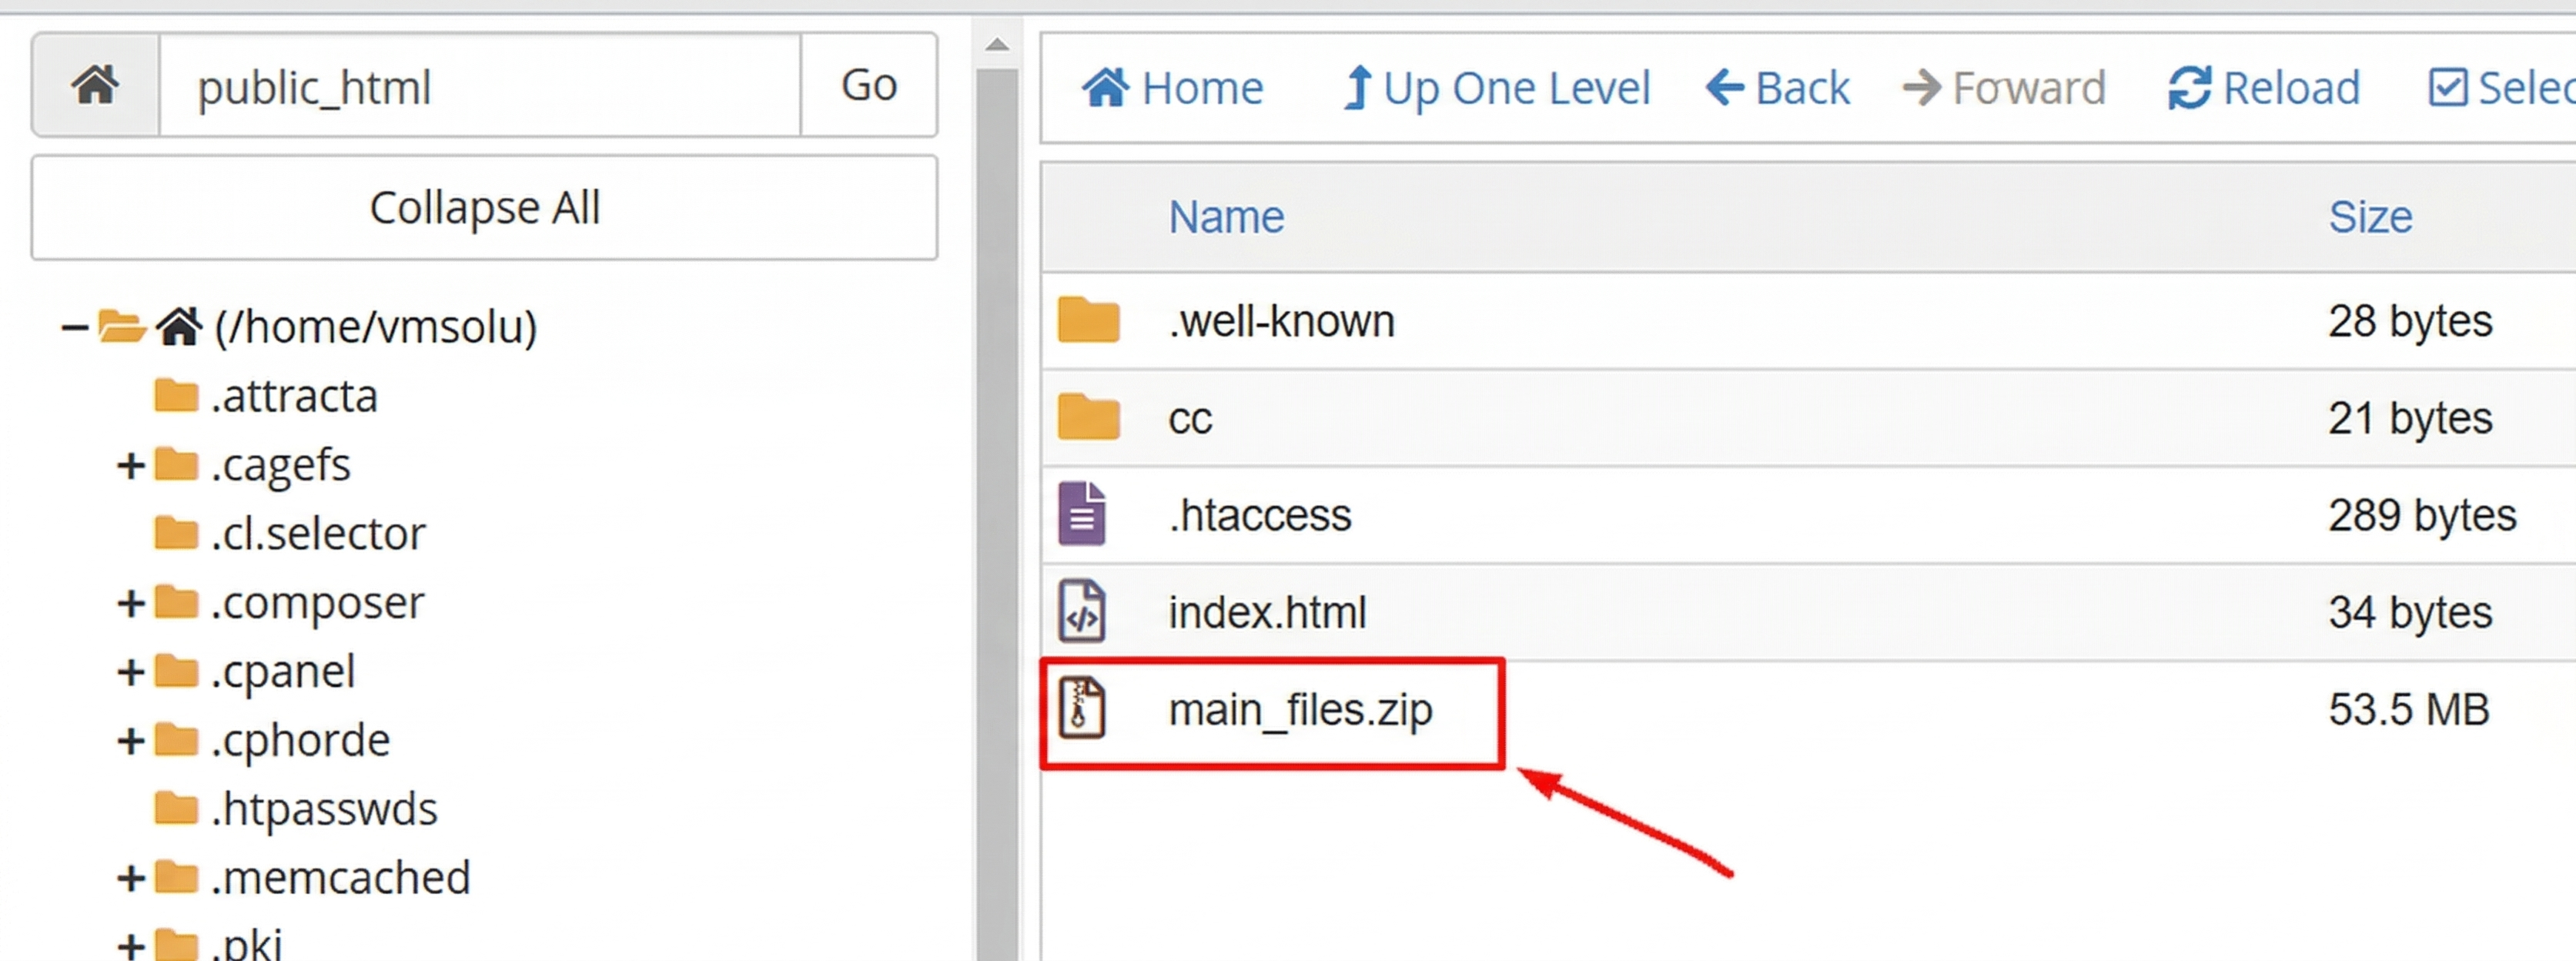
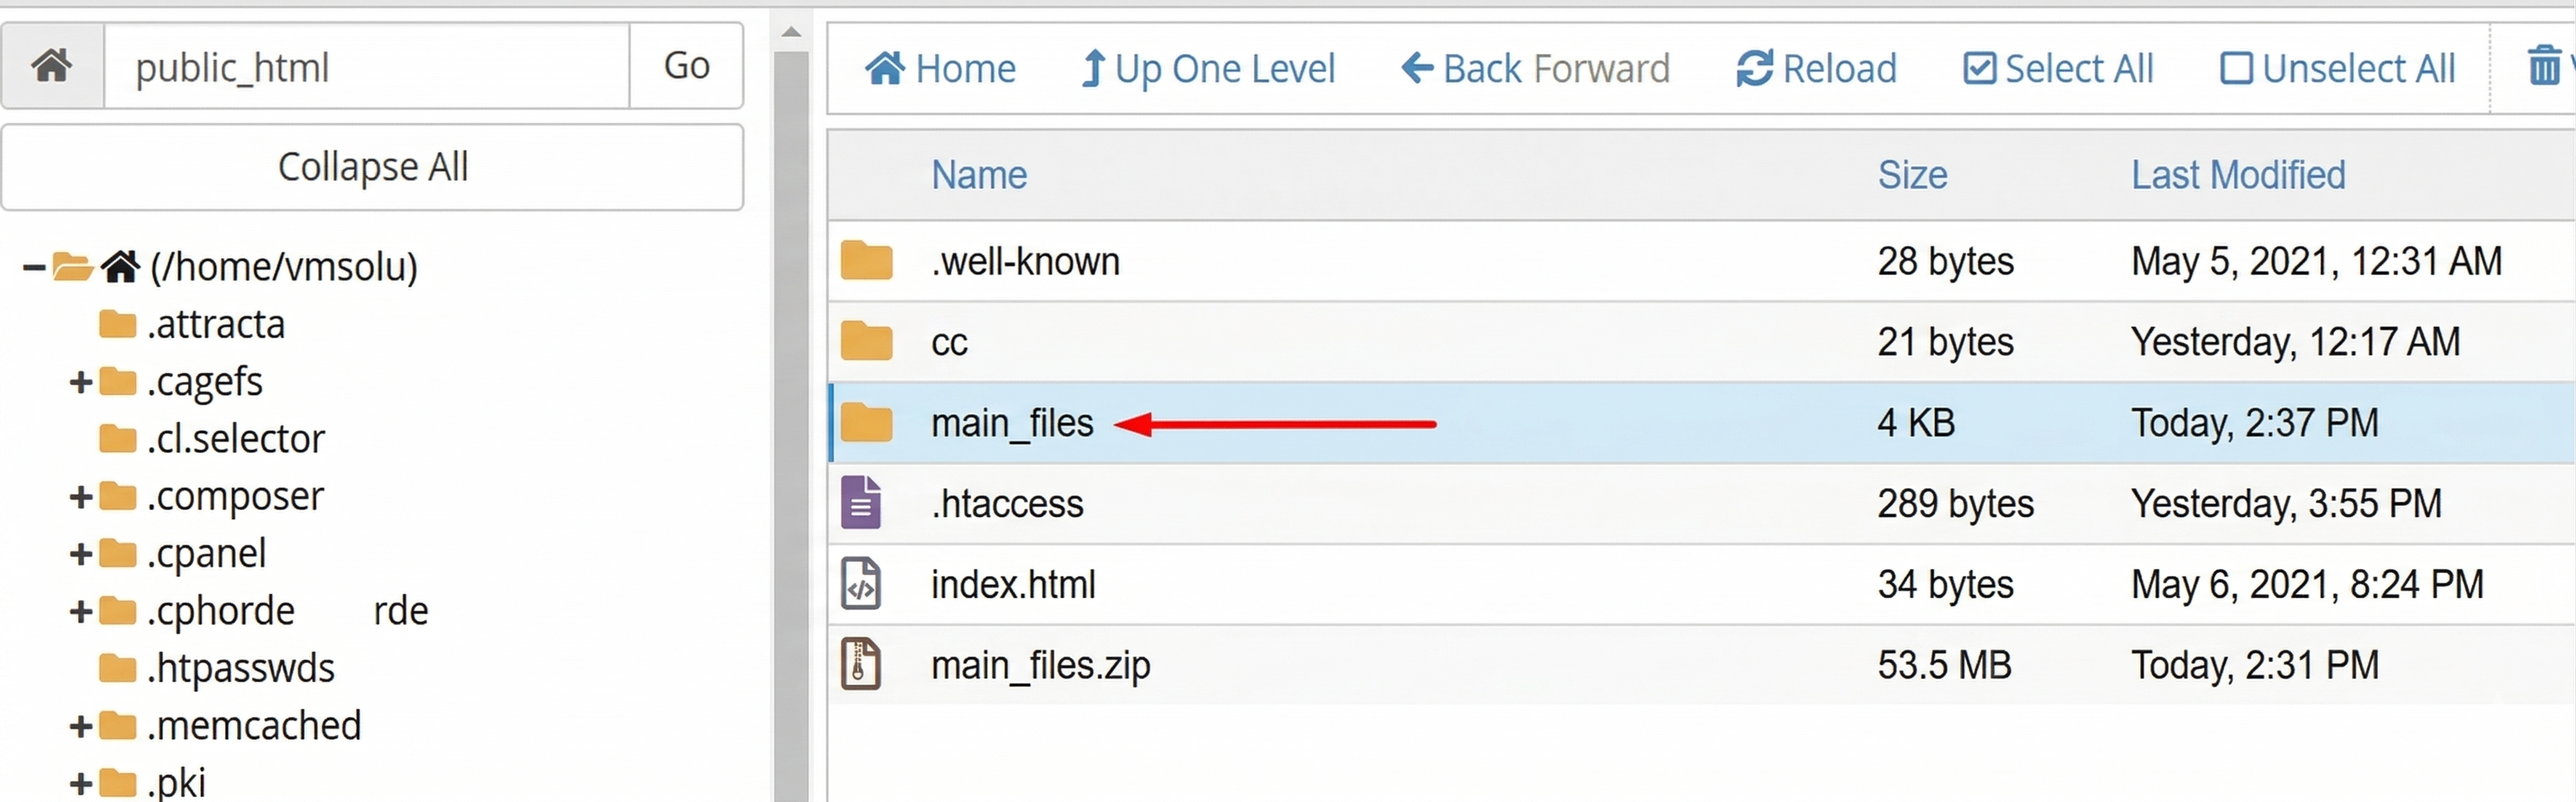
- Now close the upload window. In the public_html section, press on "Go" button to refresh the page. Then you will see the zip file in the right side.
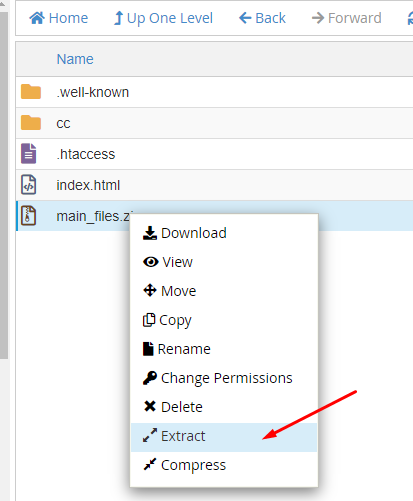
- Do right click on that file and select "Extract" option.
- Press on "Extract Files" button.
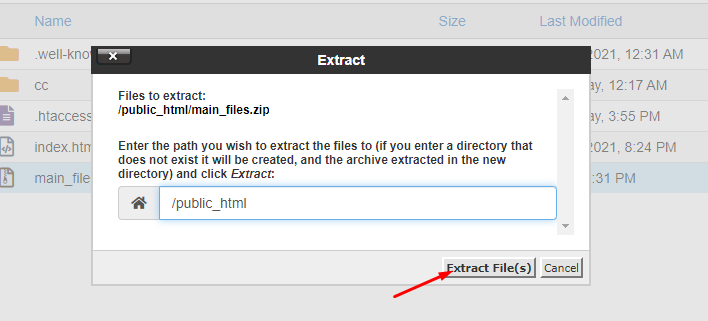
- It will take only a few minutes. After finish, you will get a window like this.
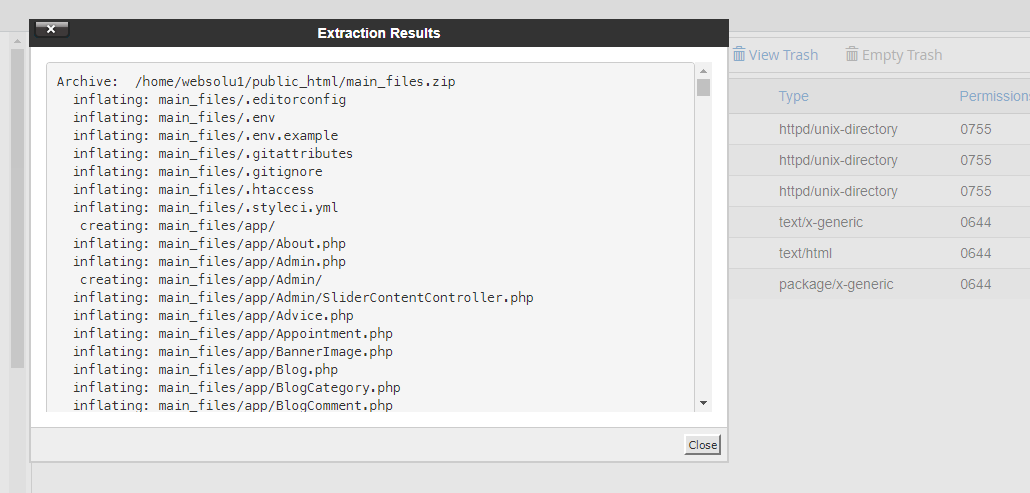
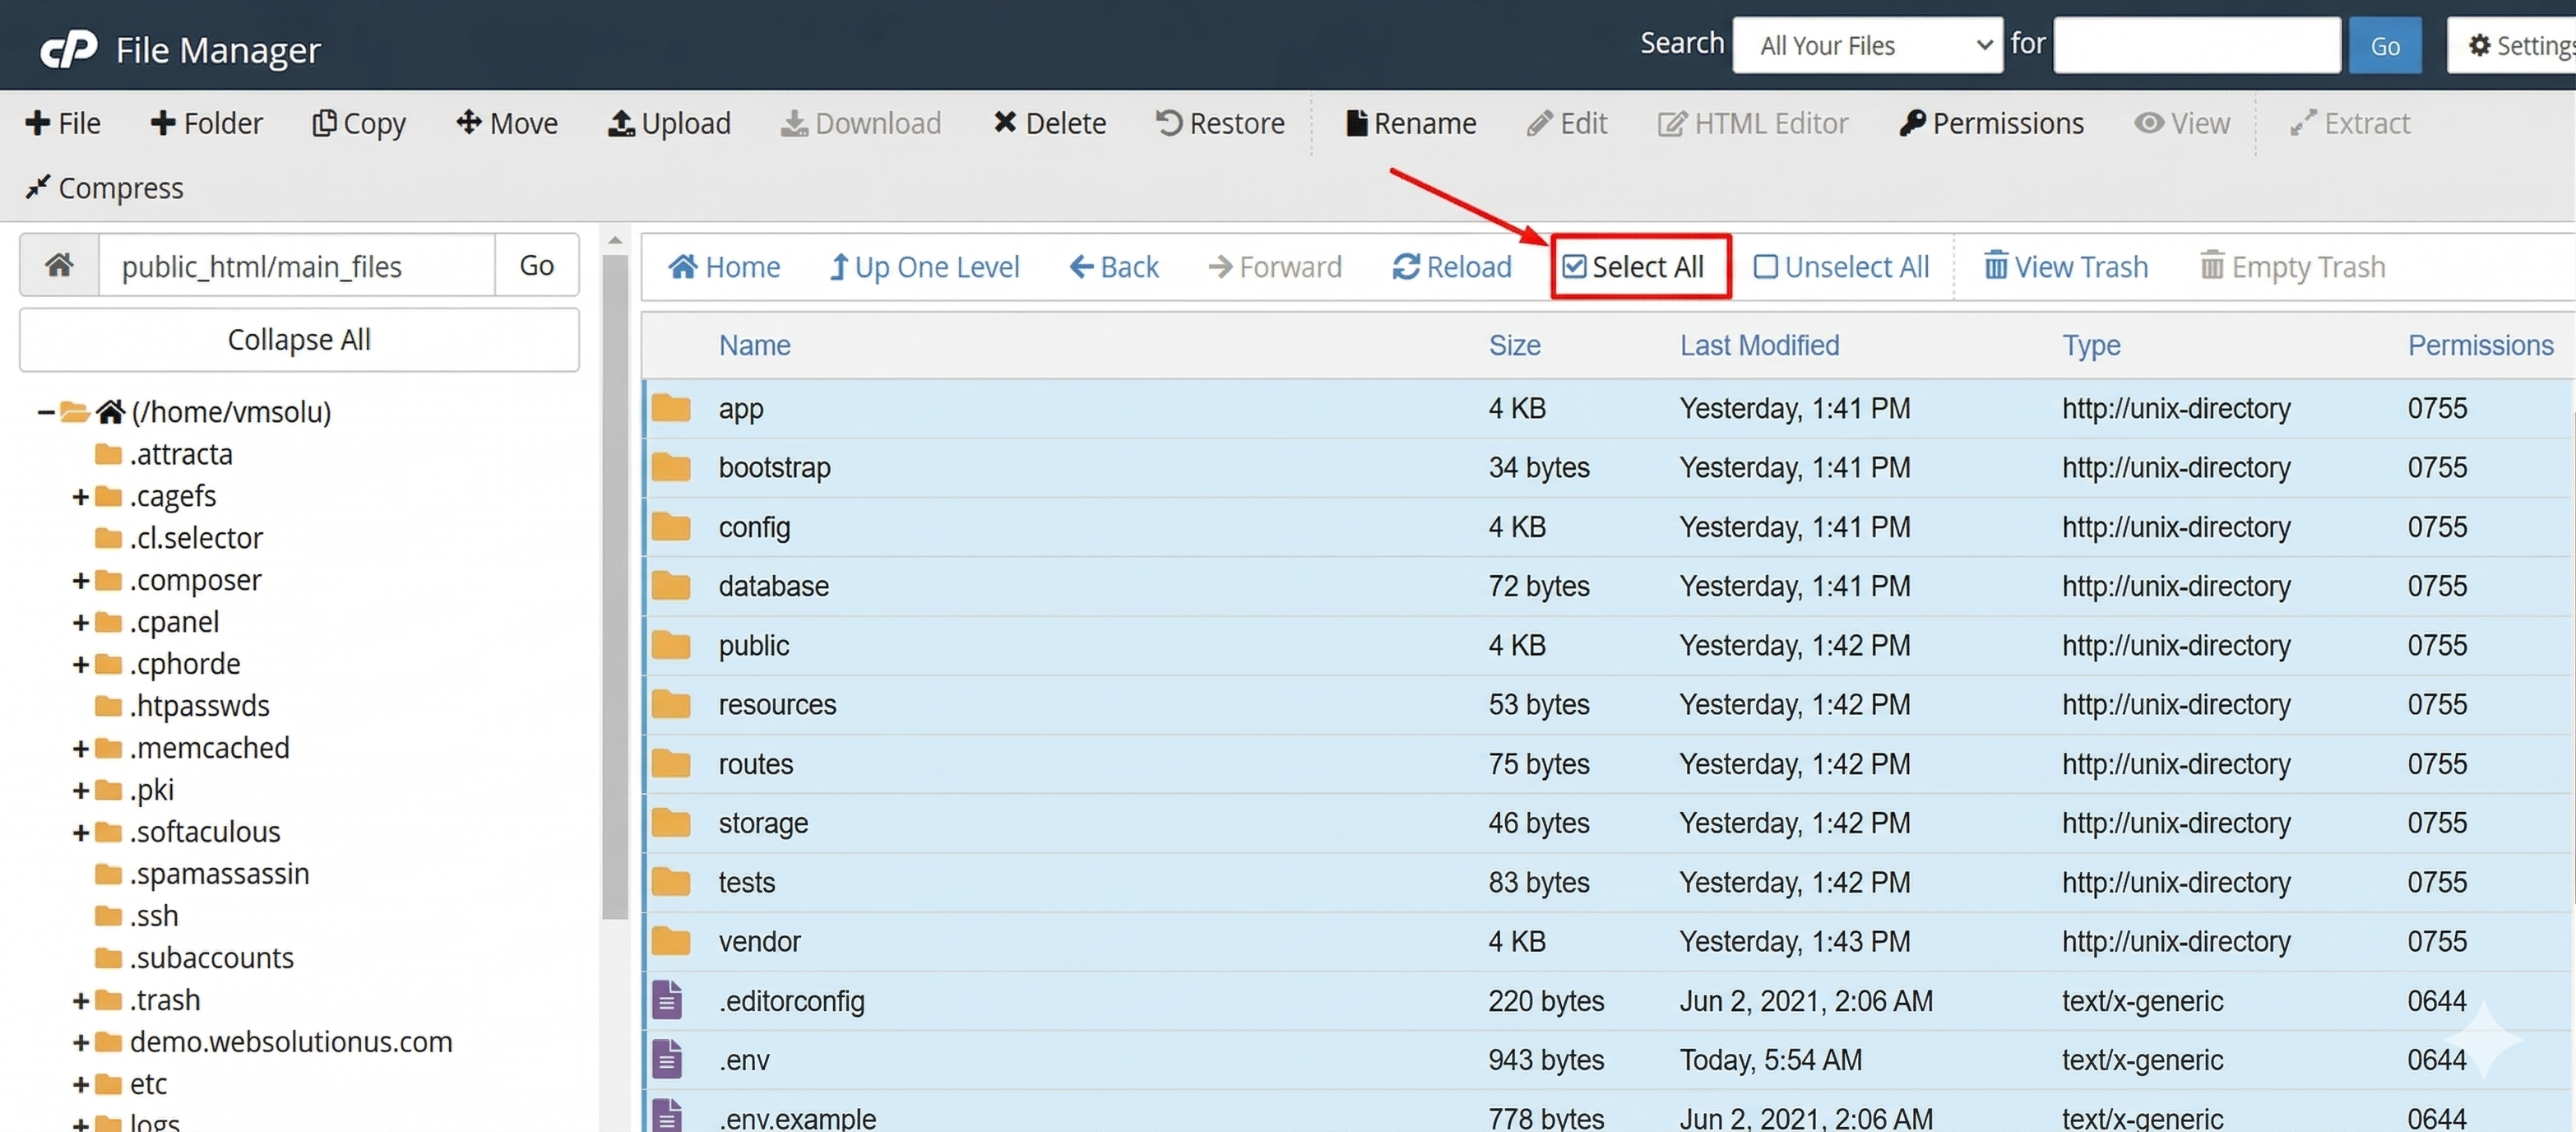
- Just close this window. Then double click on the "main_files" folder and go into there.
- Now click on the "Select All" from top section.
- Click on the "Move" option.
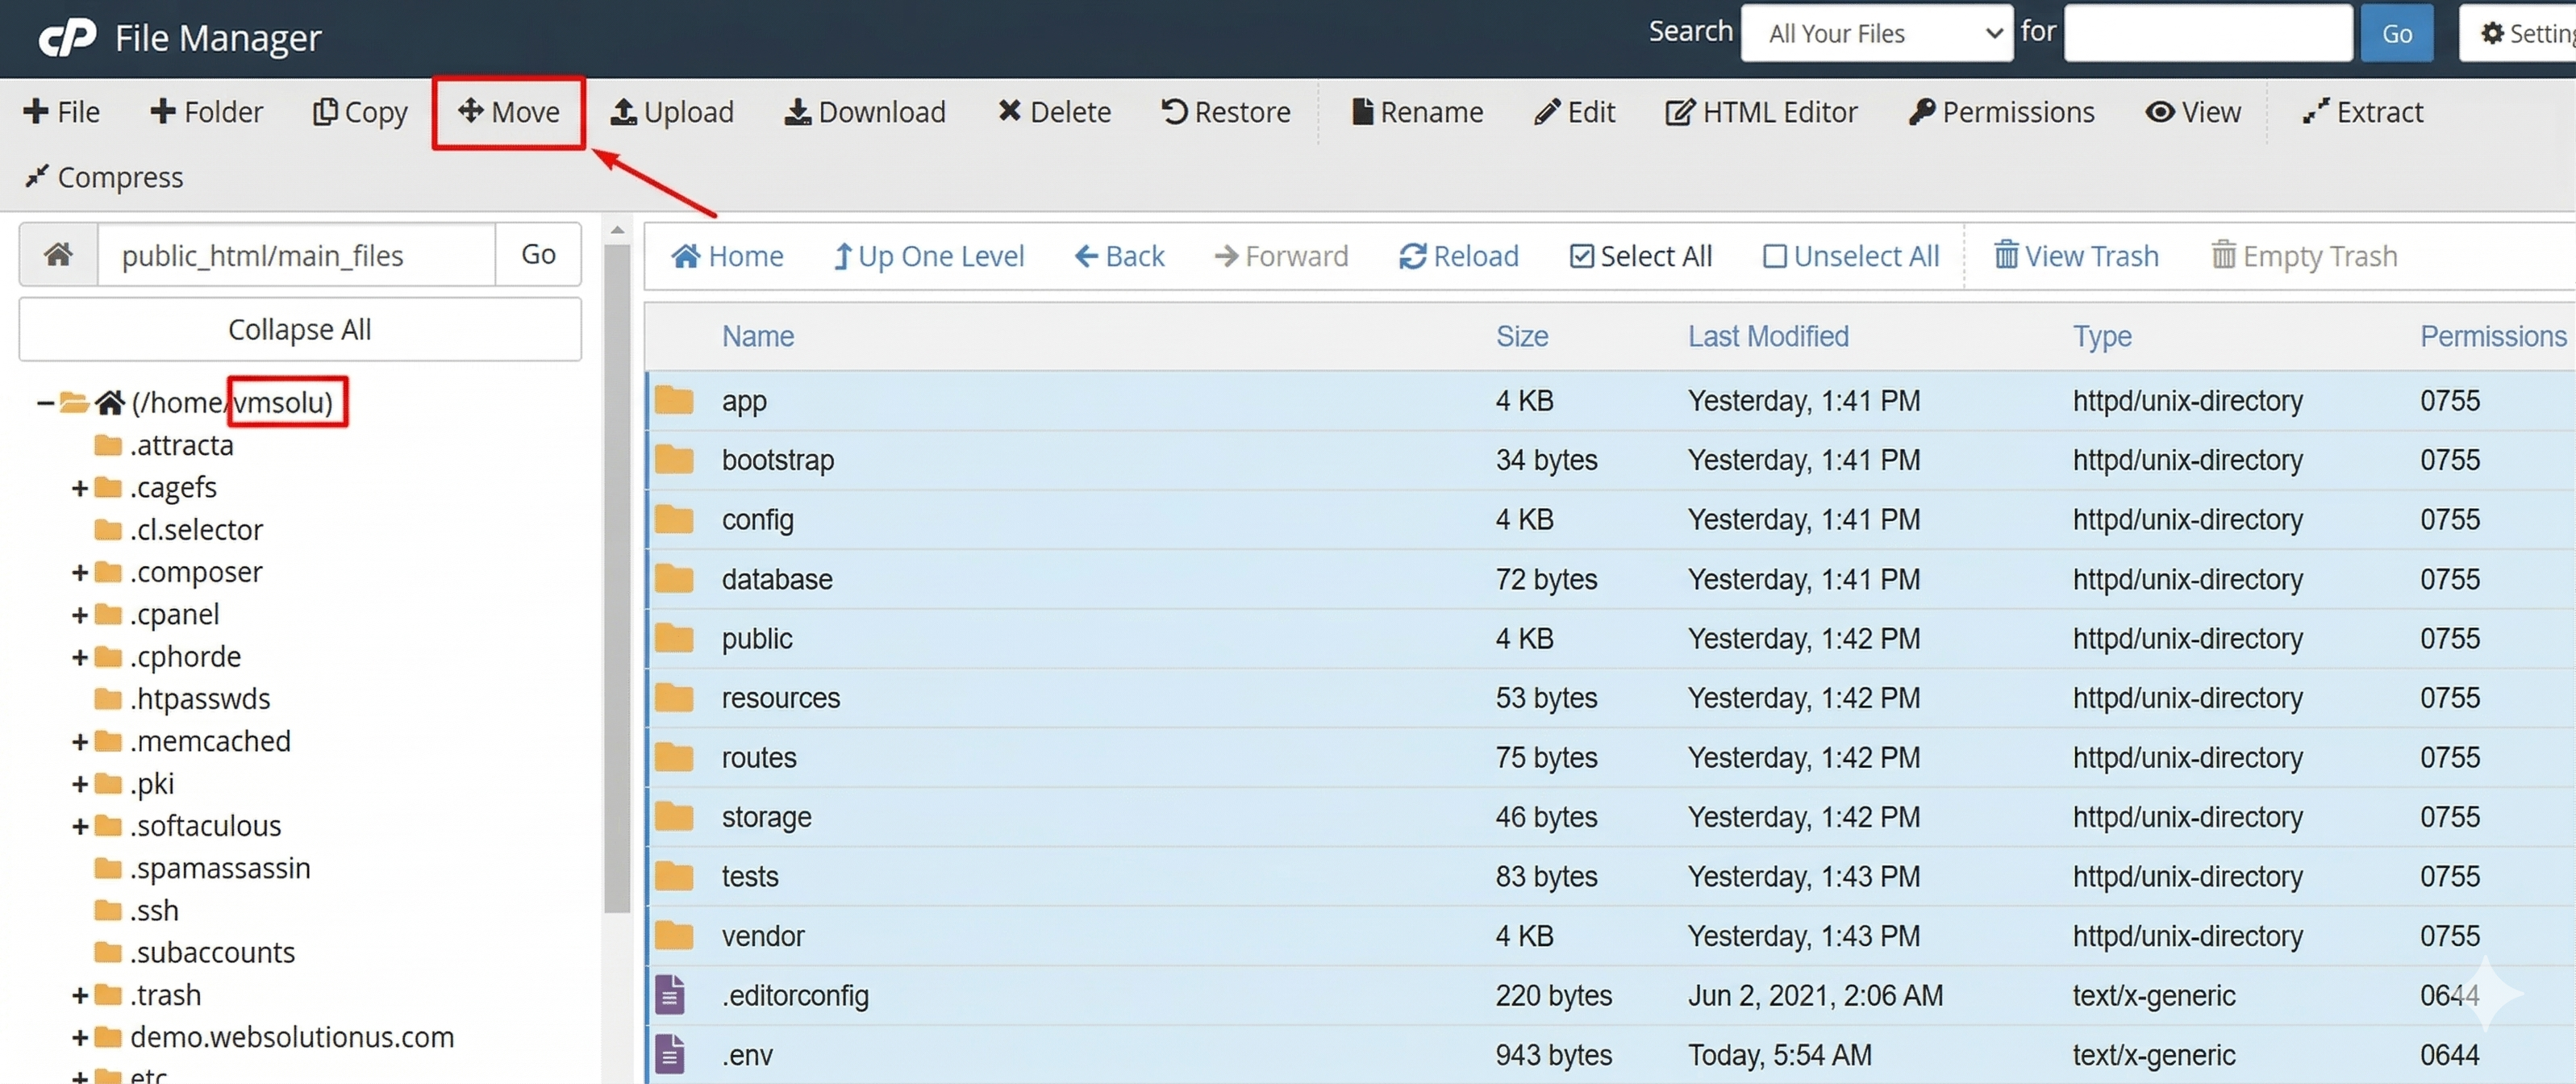
- Delete the "main_files" from the box. Only keep this "/public_html/". Then click on "Move Files".
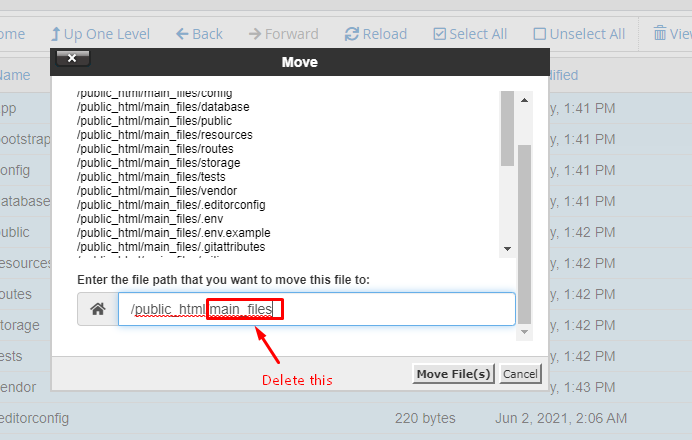
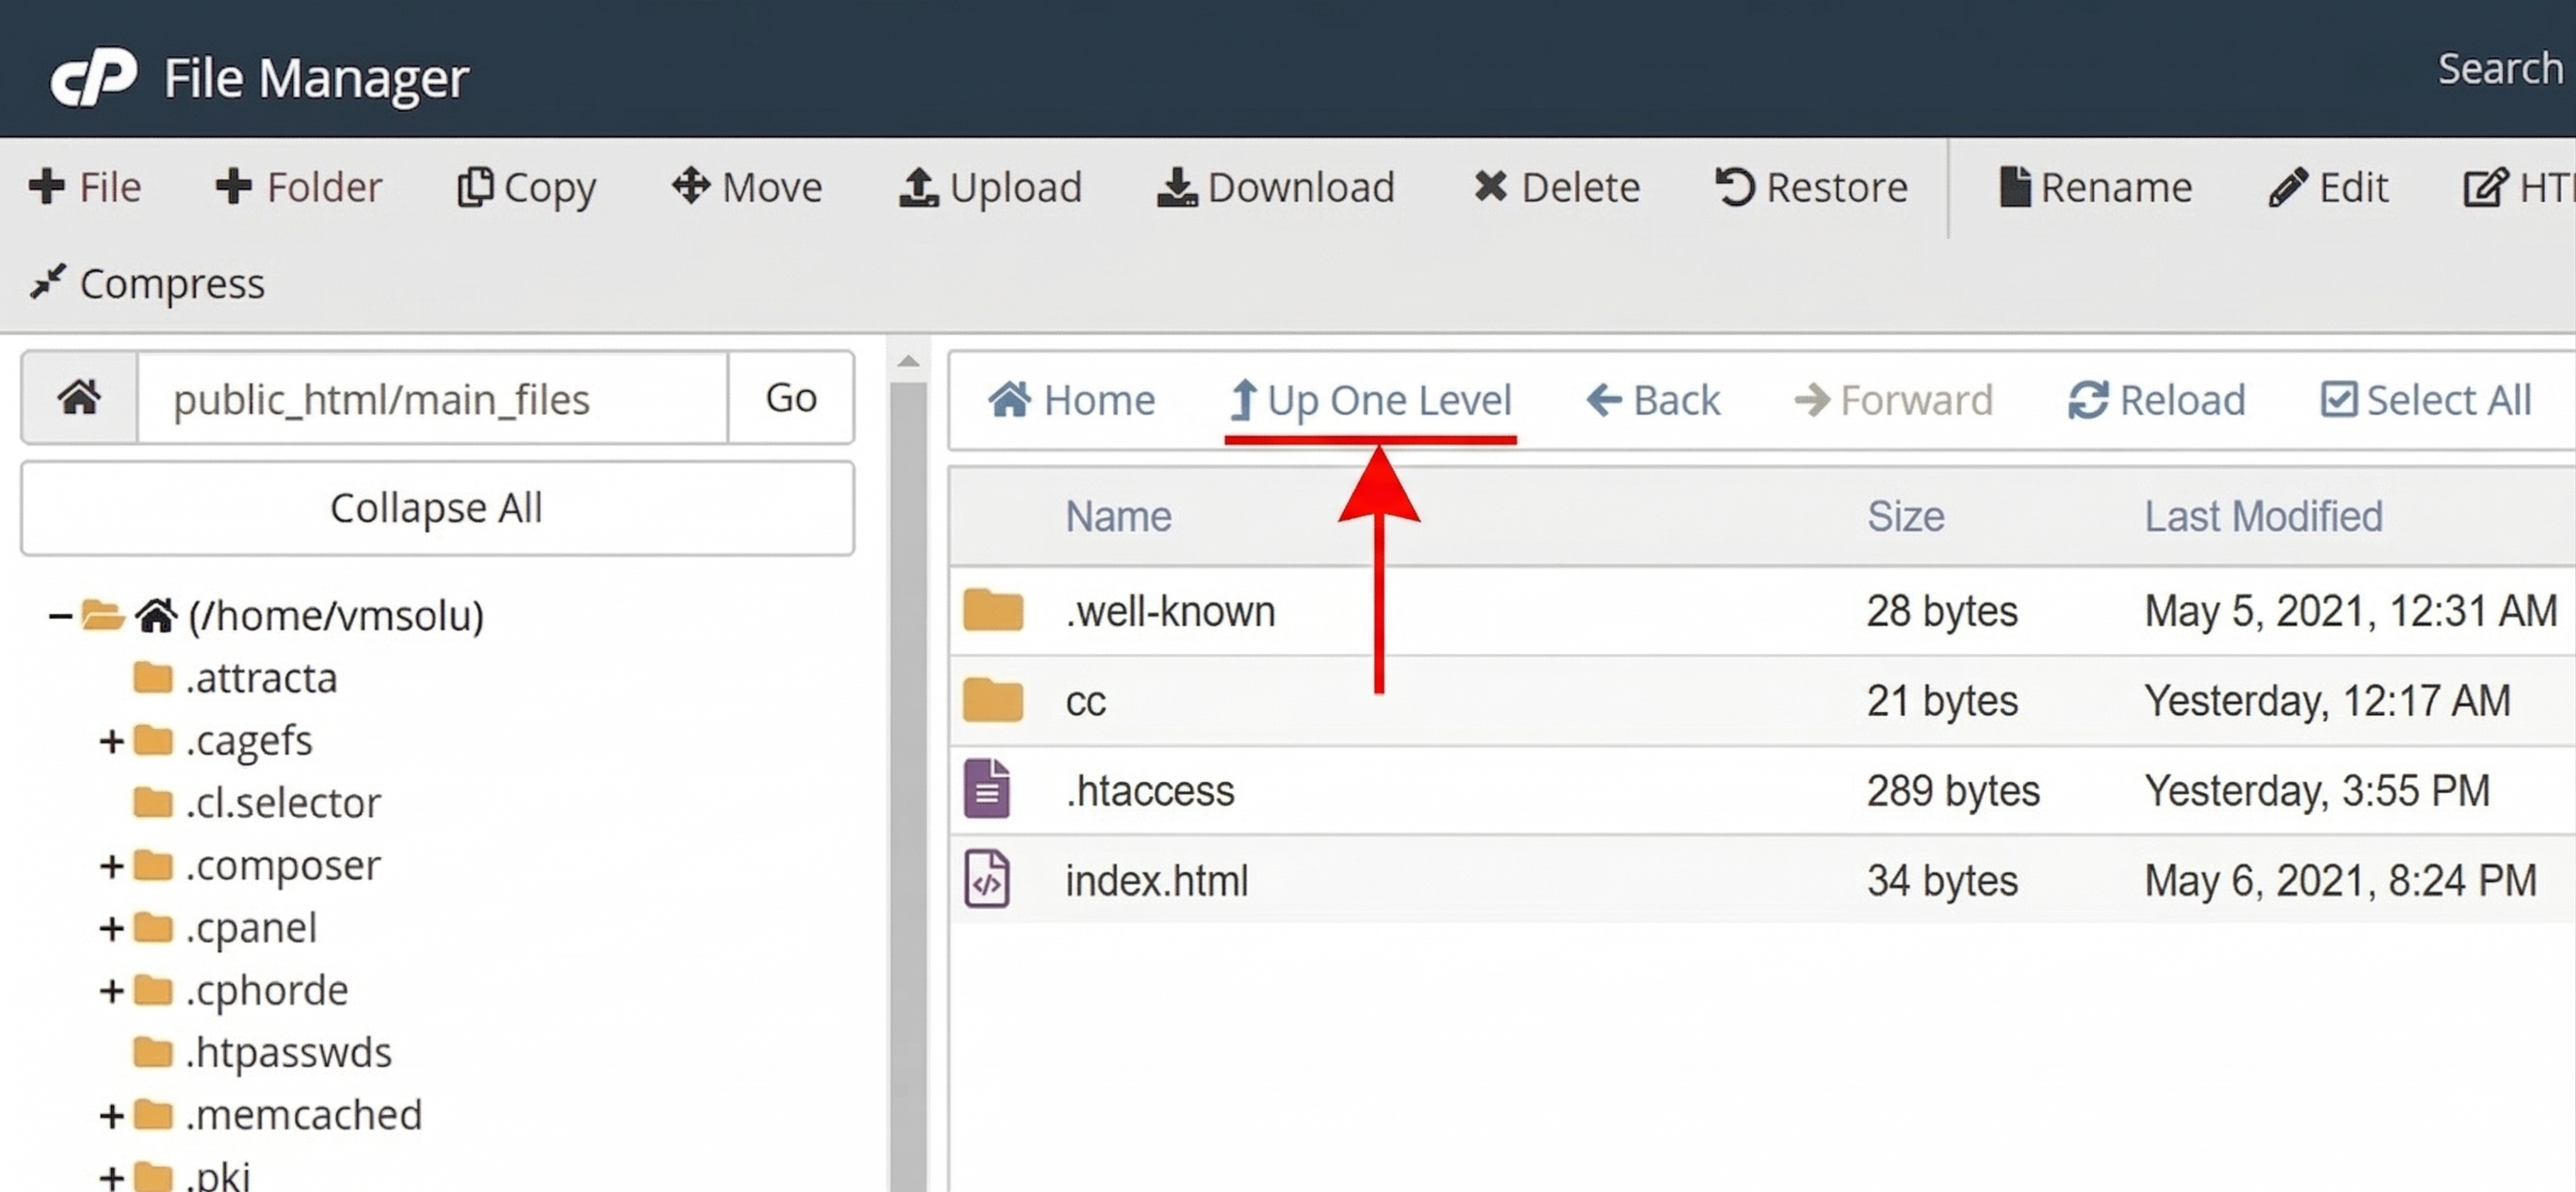
- Now, click on "Up One Level".
Renaming .env.example to .env
Follow these steps to rename the .env.example file to .env:
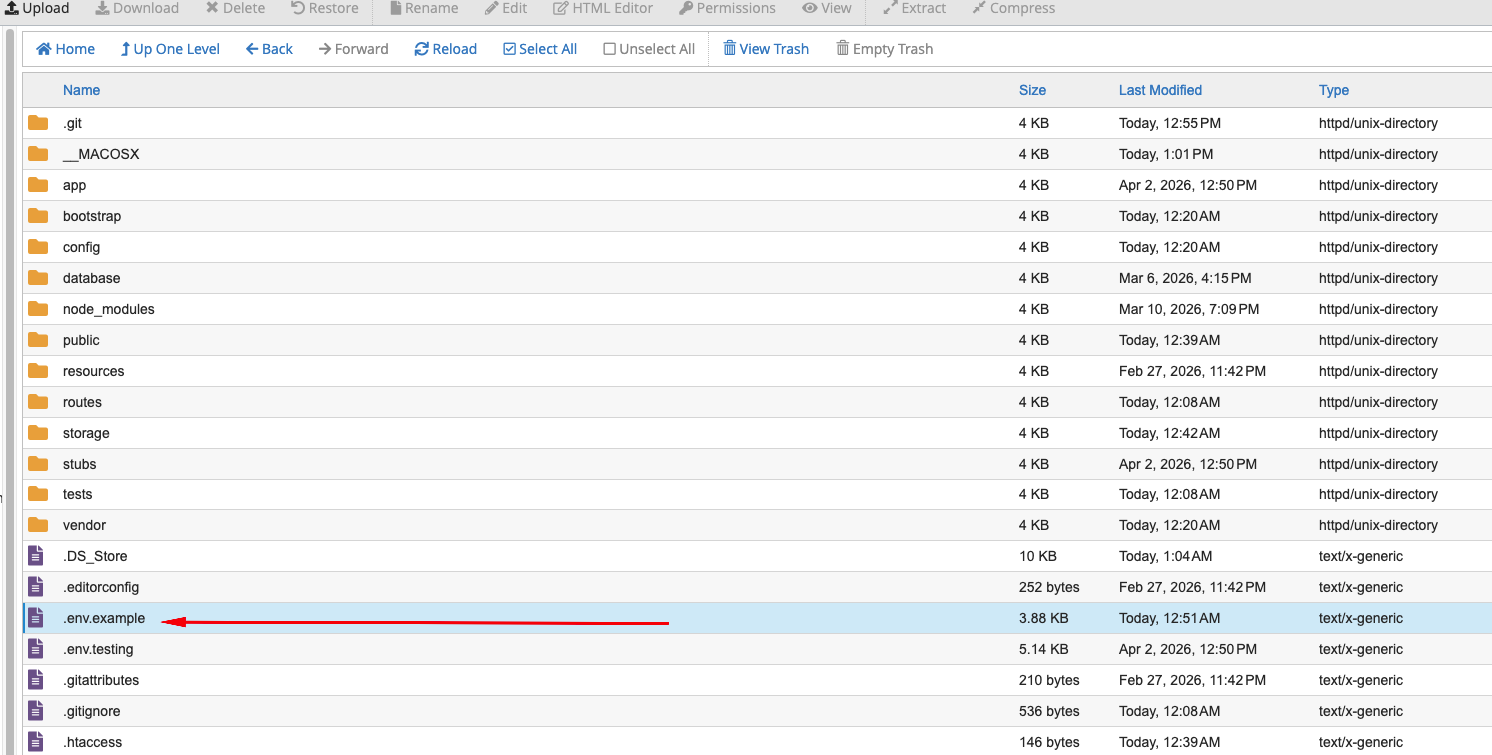
Right click on the .env.example file and click on Rename
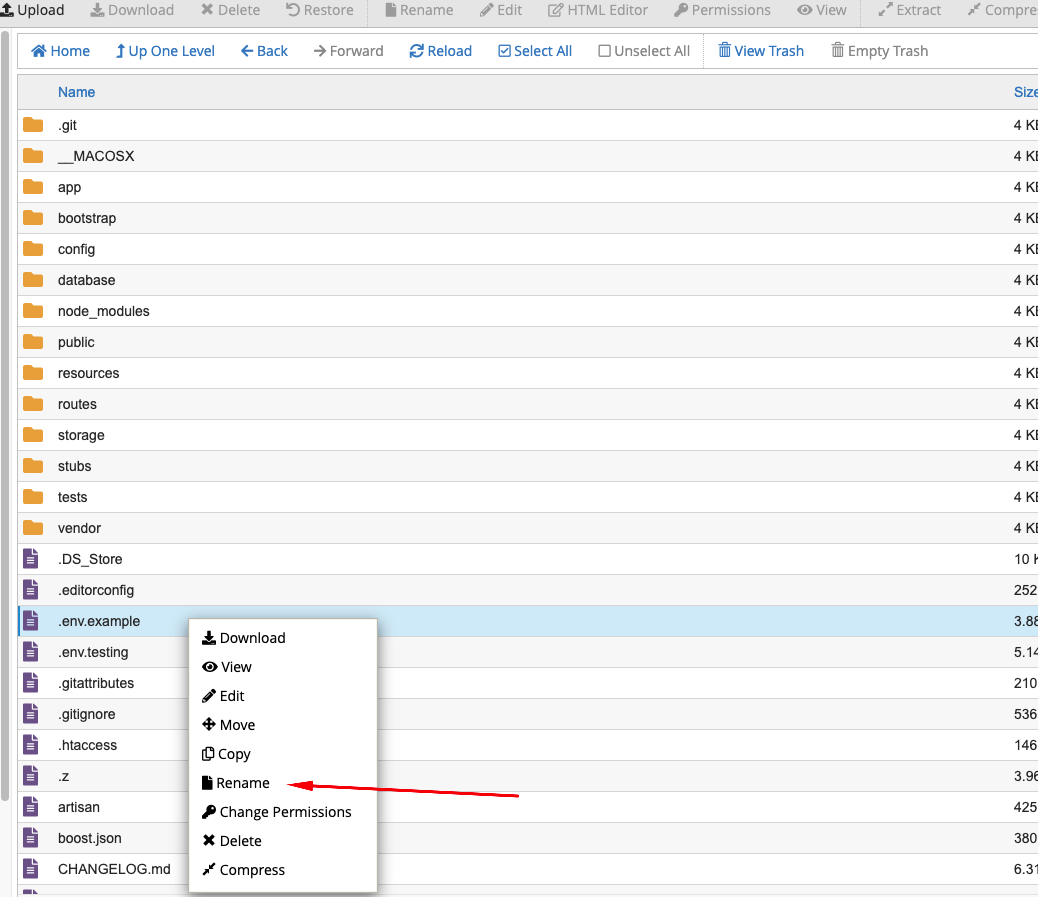
Remove .example and keep only .env
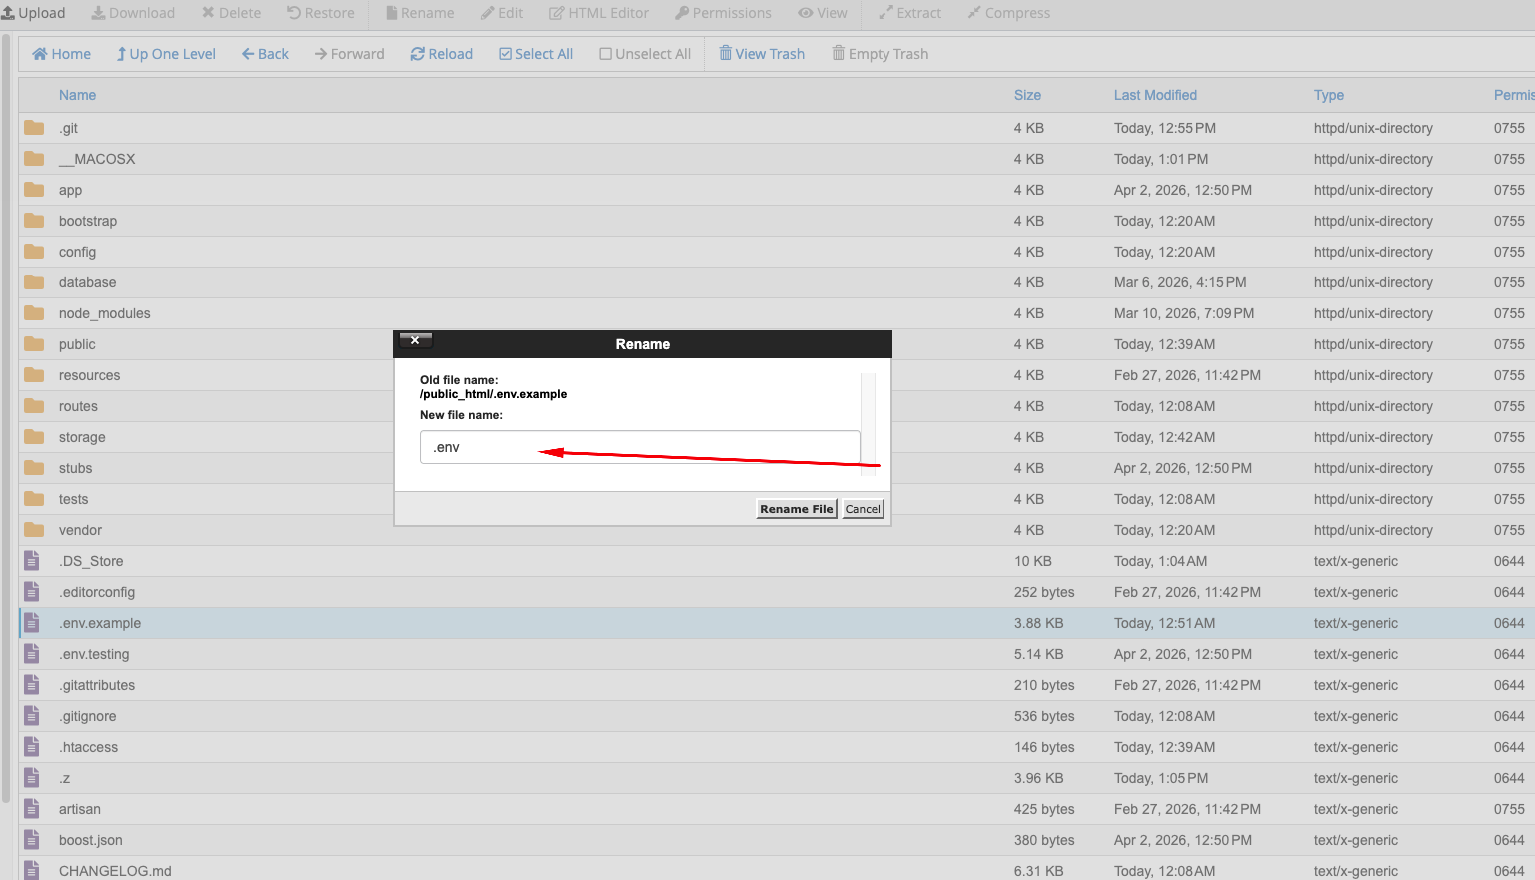
Click Rename File
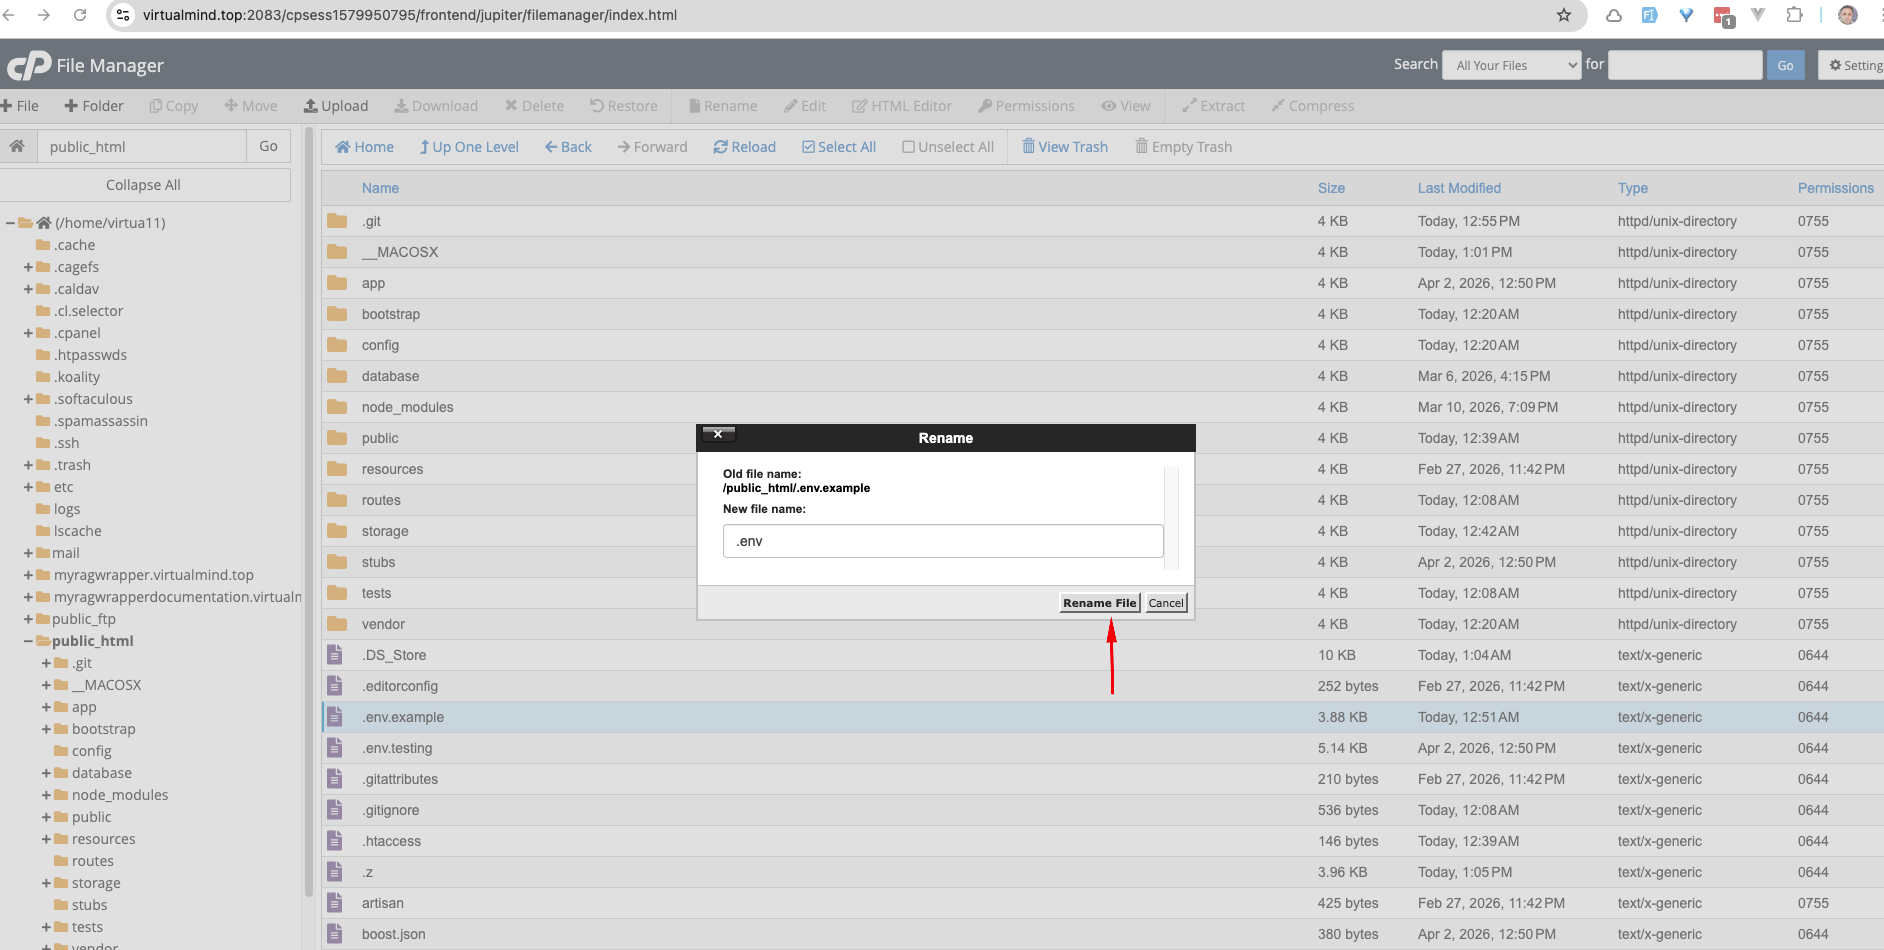
Your task is done and you can use our script without any problem. :)
your-domain.com or your-domain.com/install to access the installation wizard and complete the setup.
Uploading Files using FTP
- Download any FTP client on your computer like "FileZilla". Search on Google by "FileZilla" or go to their website to download: https://filezilla-project.org/
- Use the first option to download
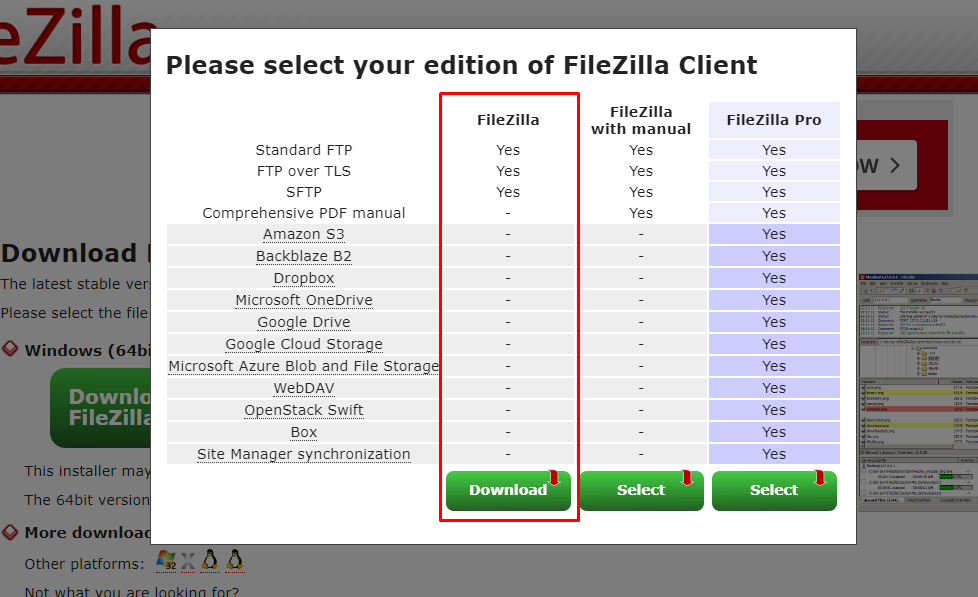
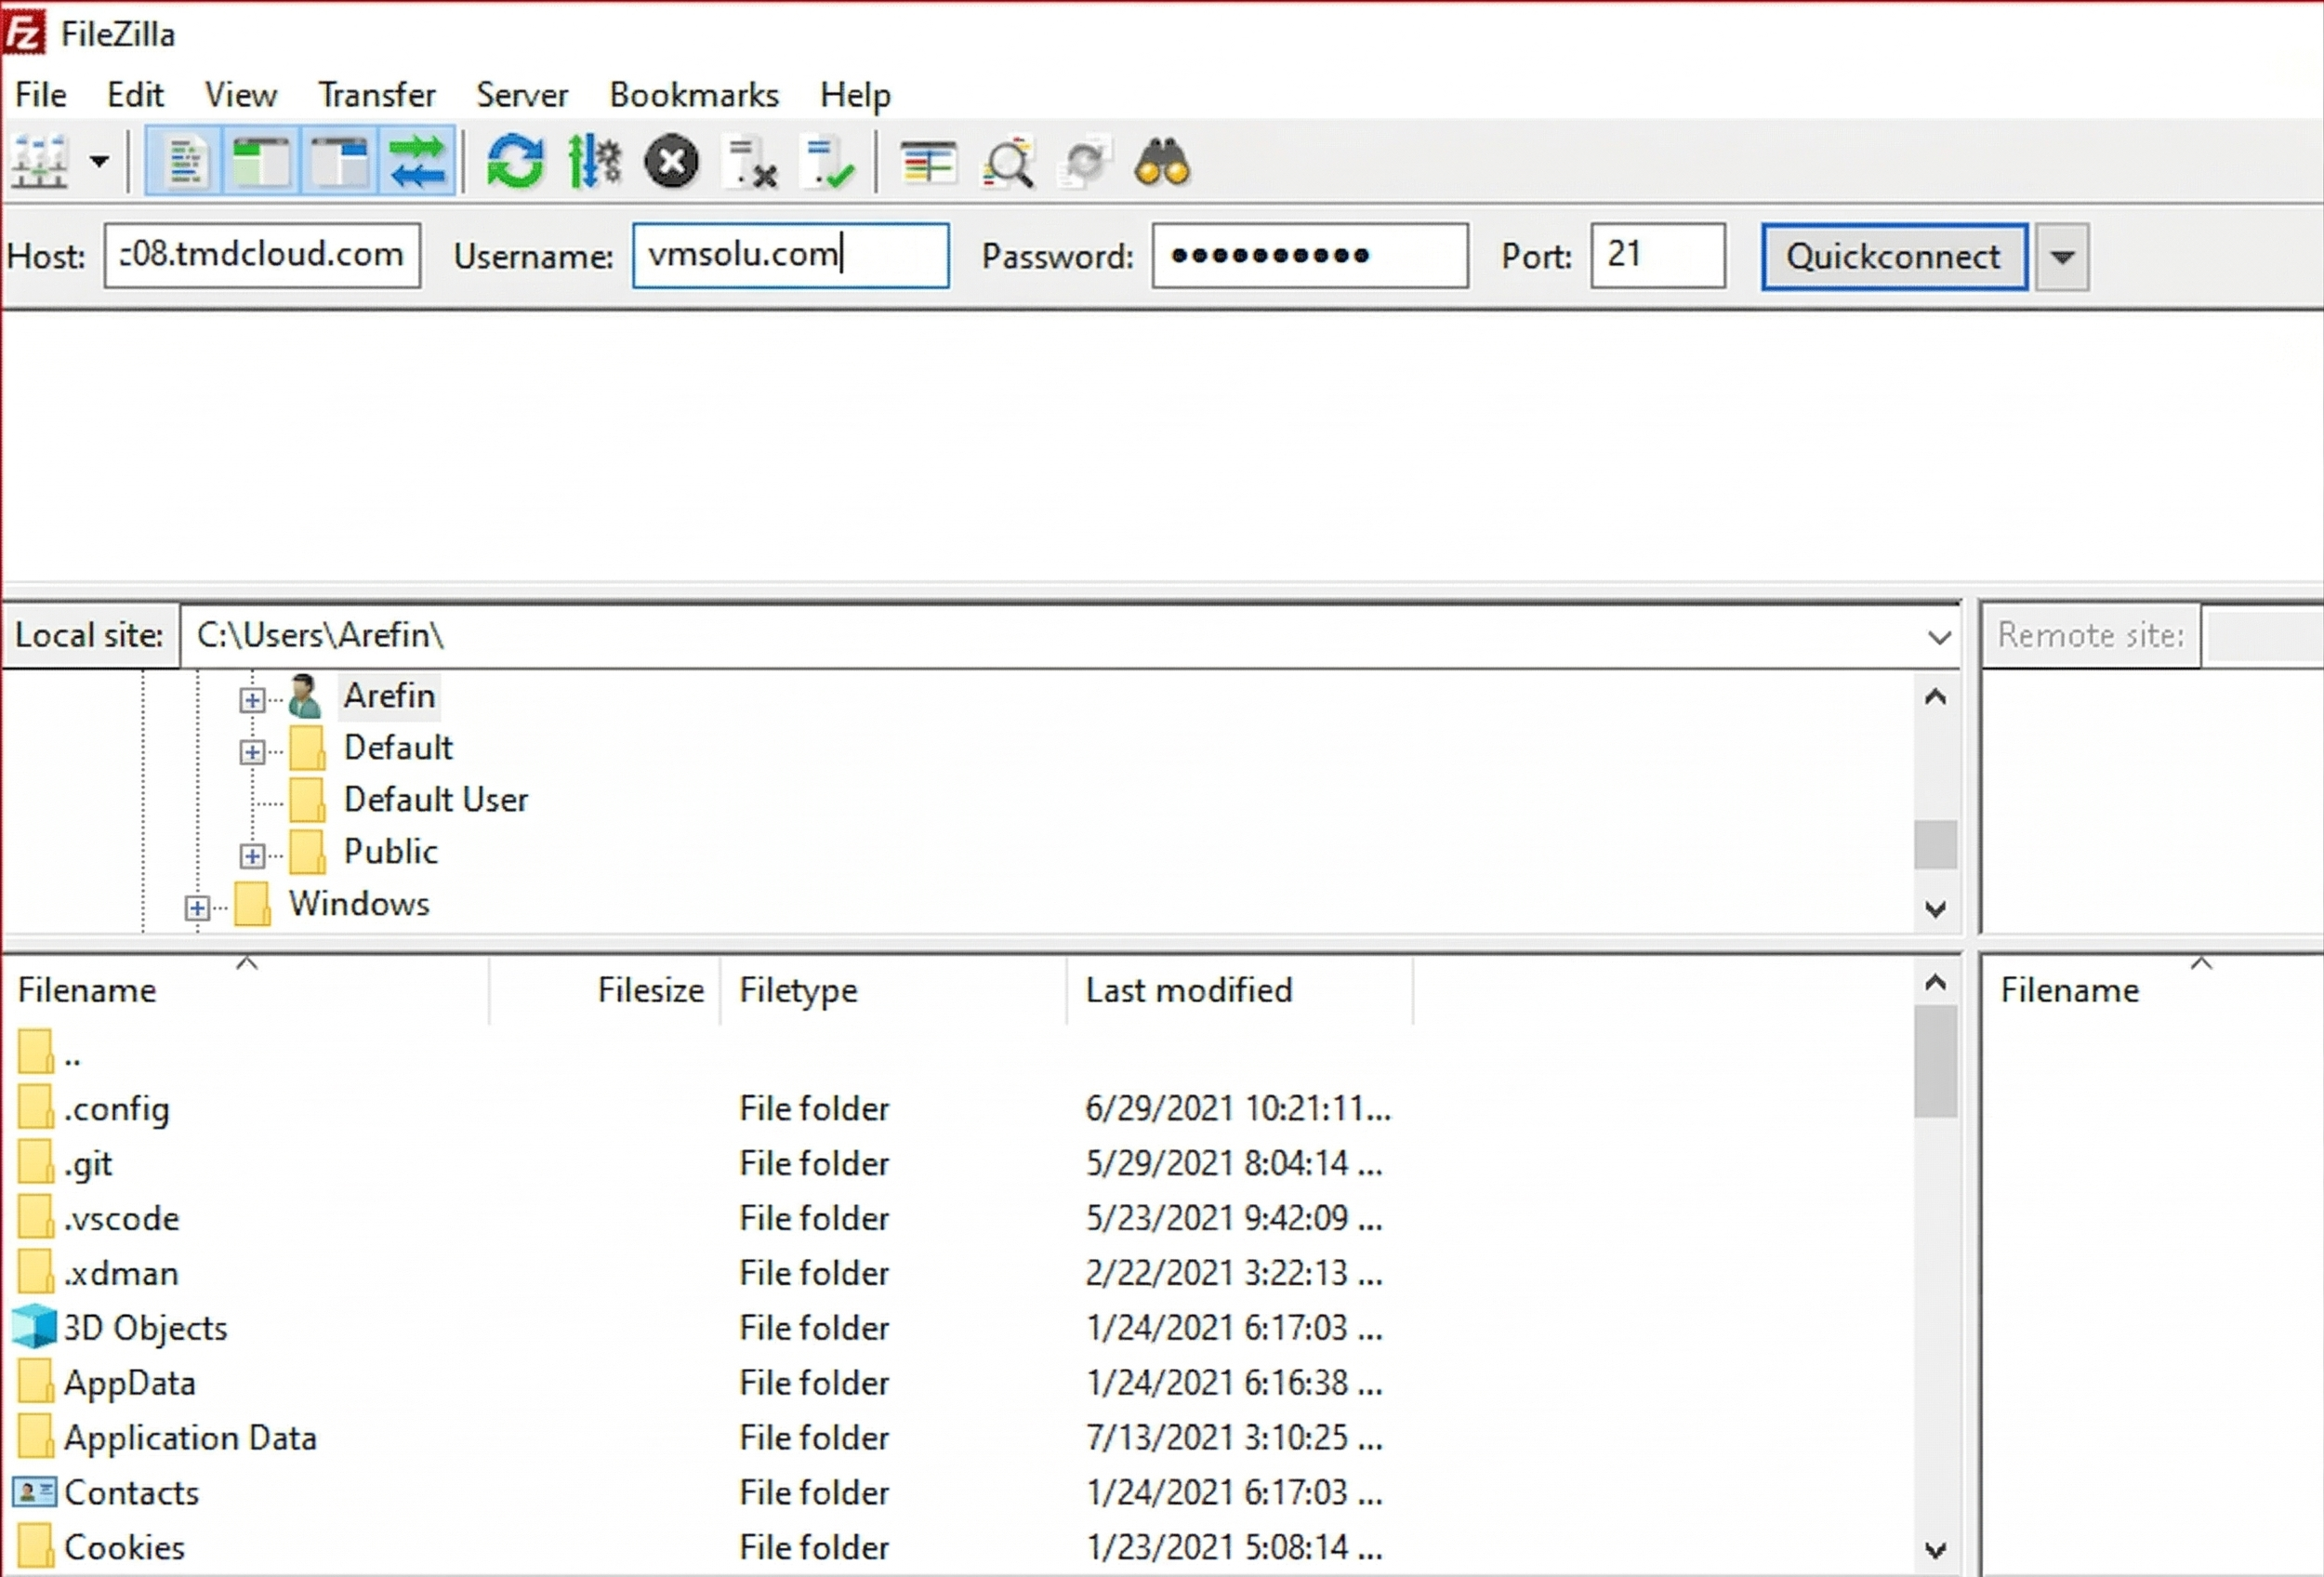
- After download, install it and open. The interface will be like this:

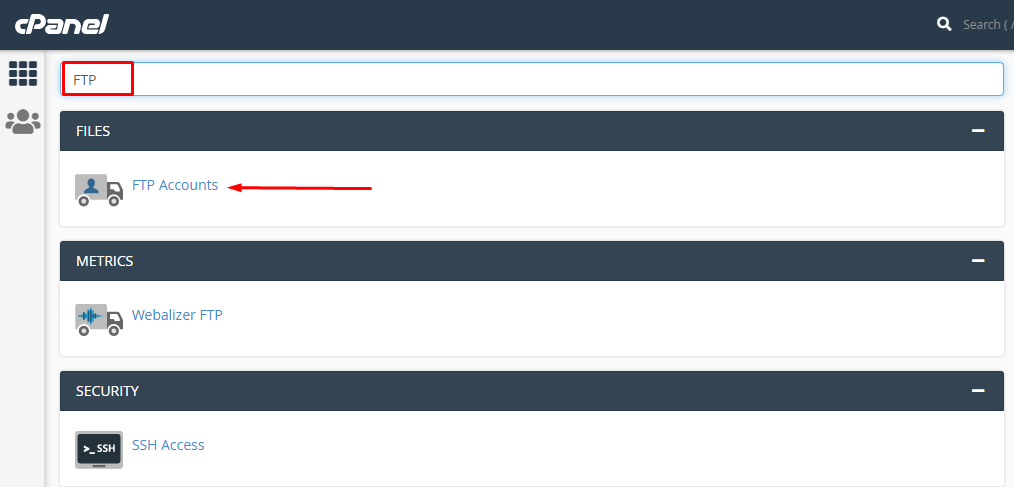
- You can collect your FTP information contacting your hosting provider. Or, going to cpanel, you can create your FTP. In cpanel, search for "FTP".
- Put ftp username, password in the form. Become sure, you delete the marked box data in the following image.
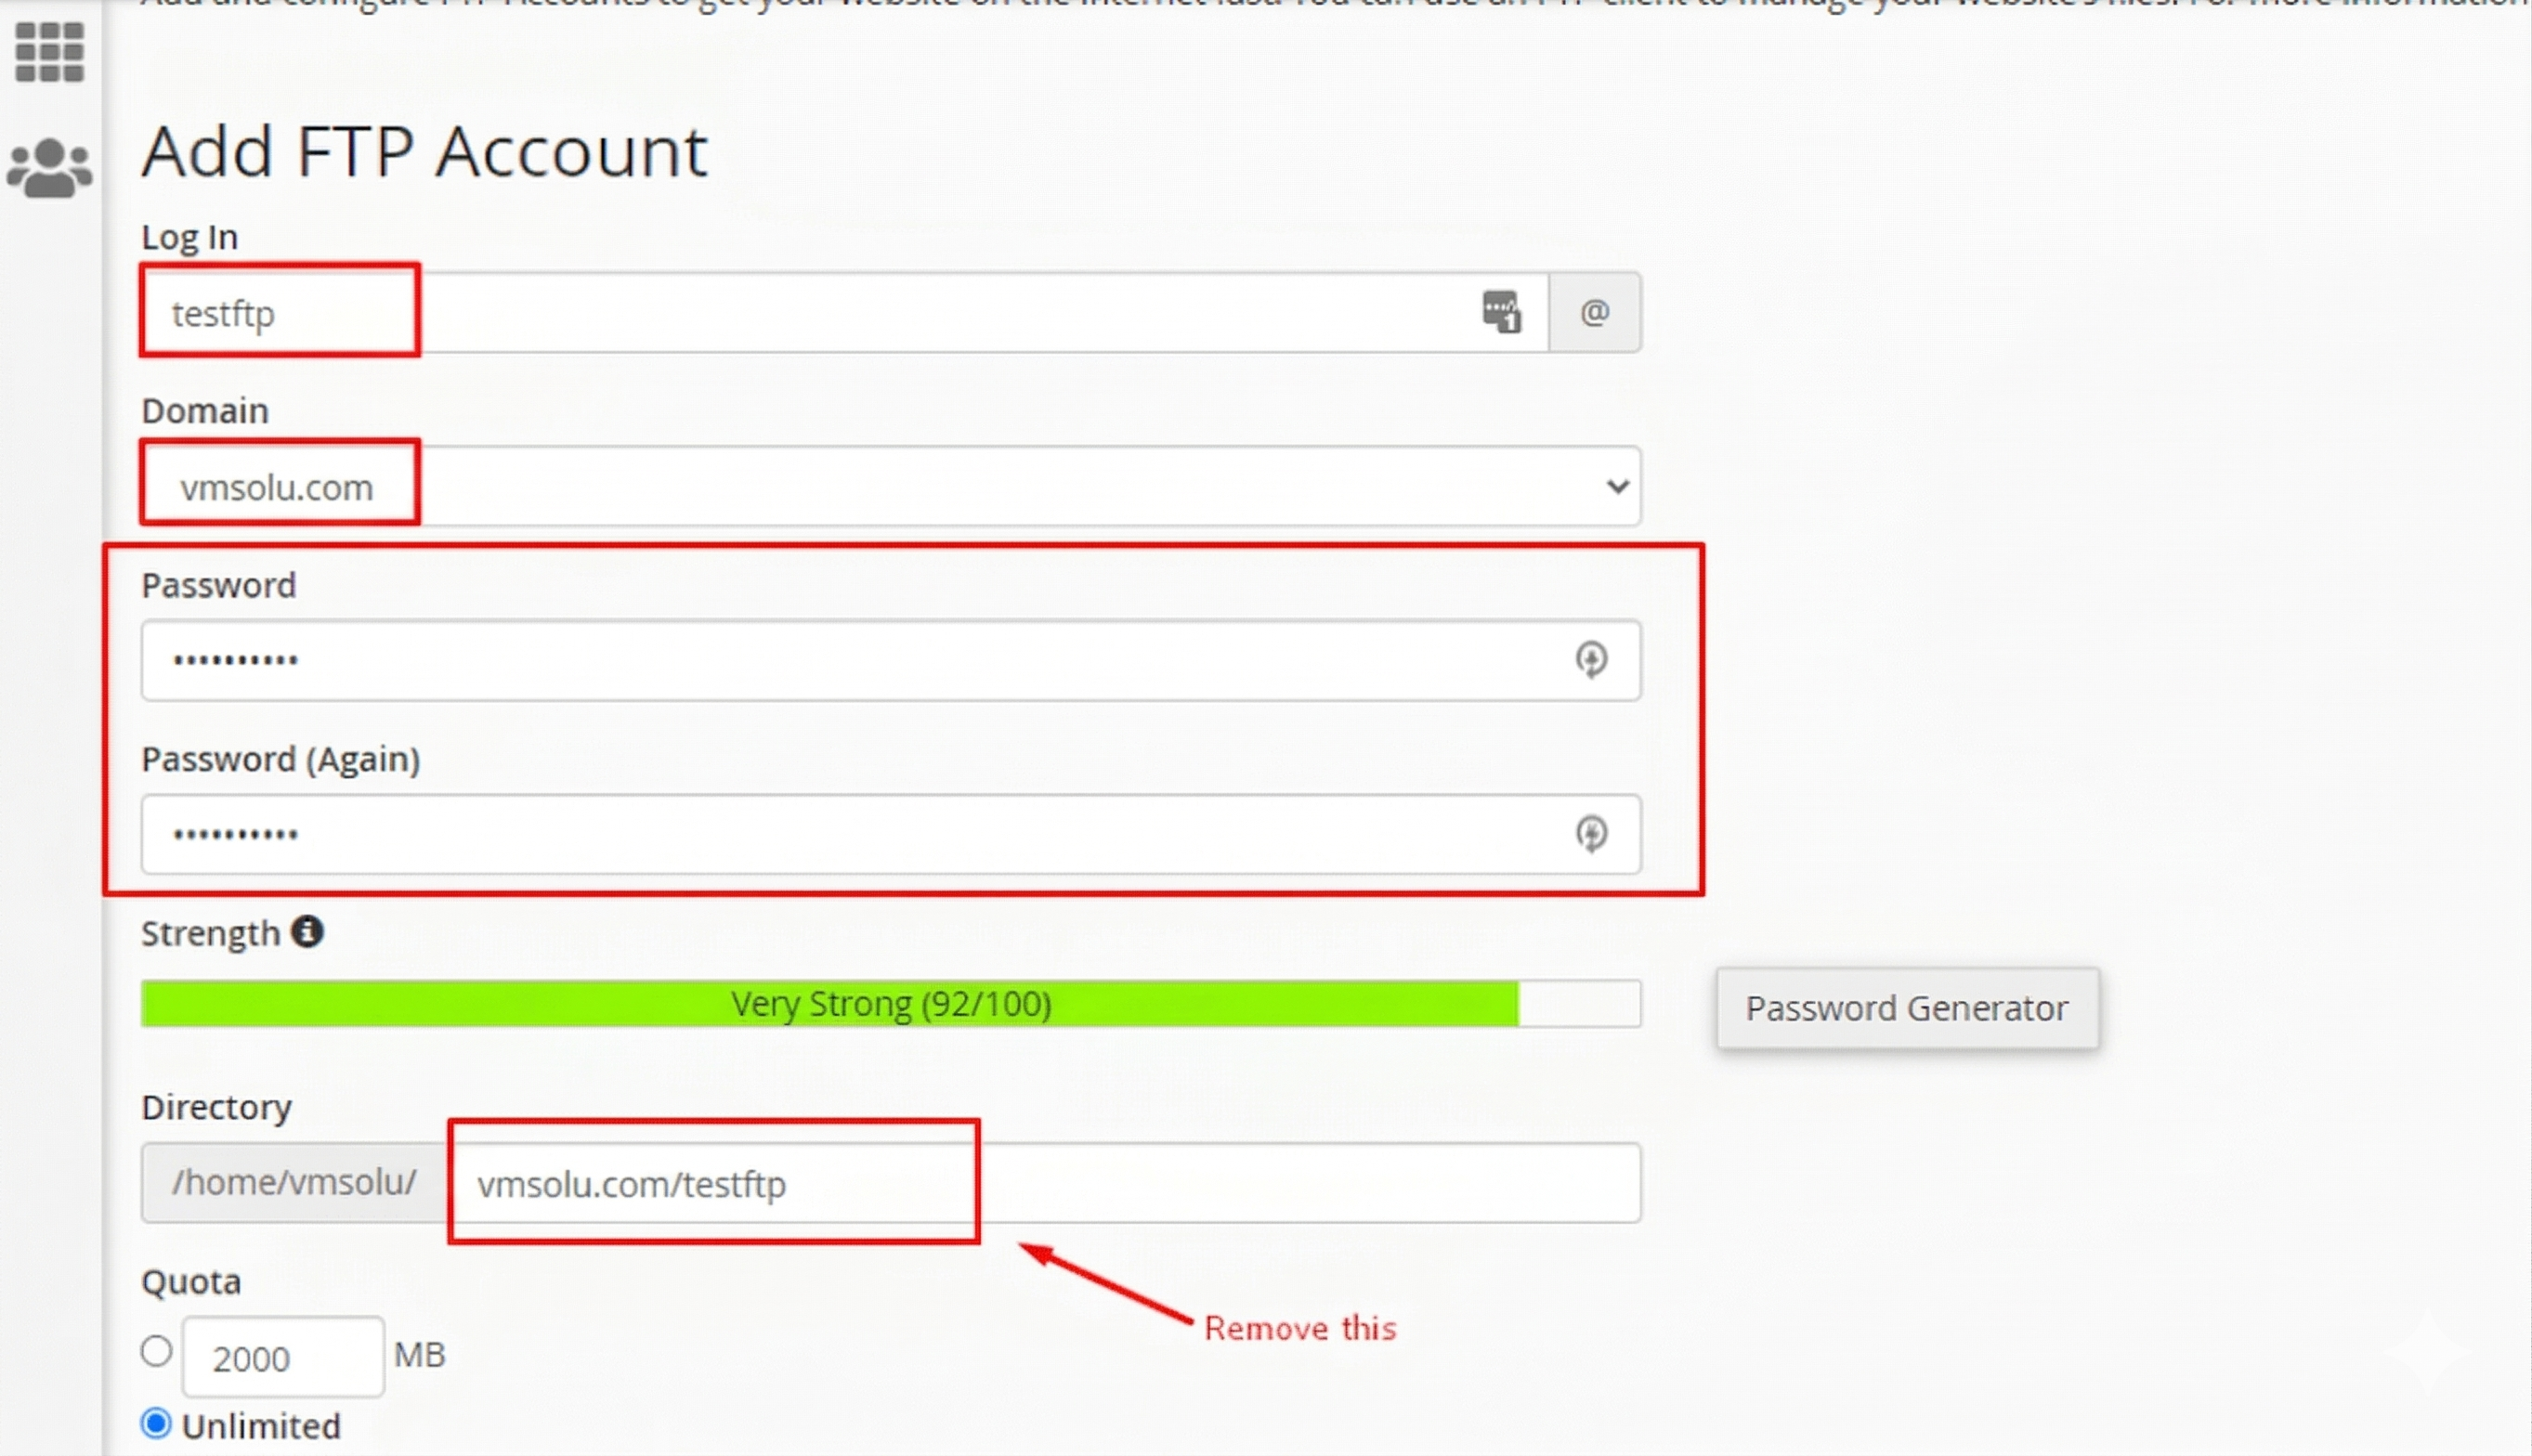
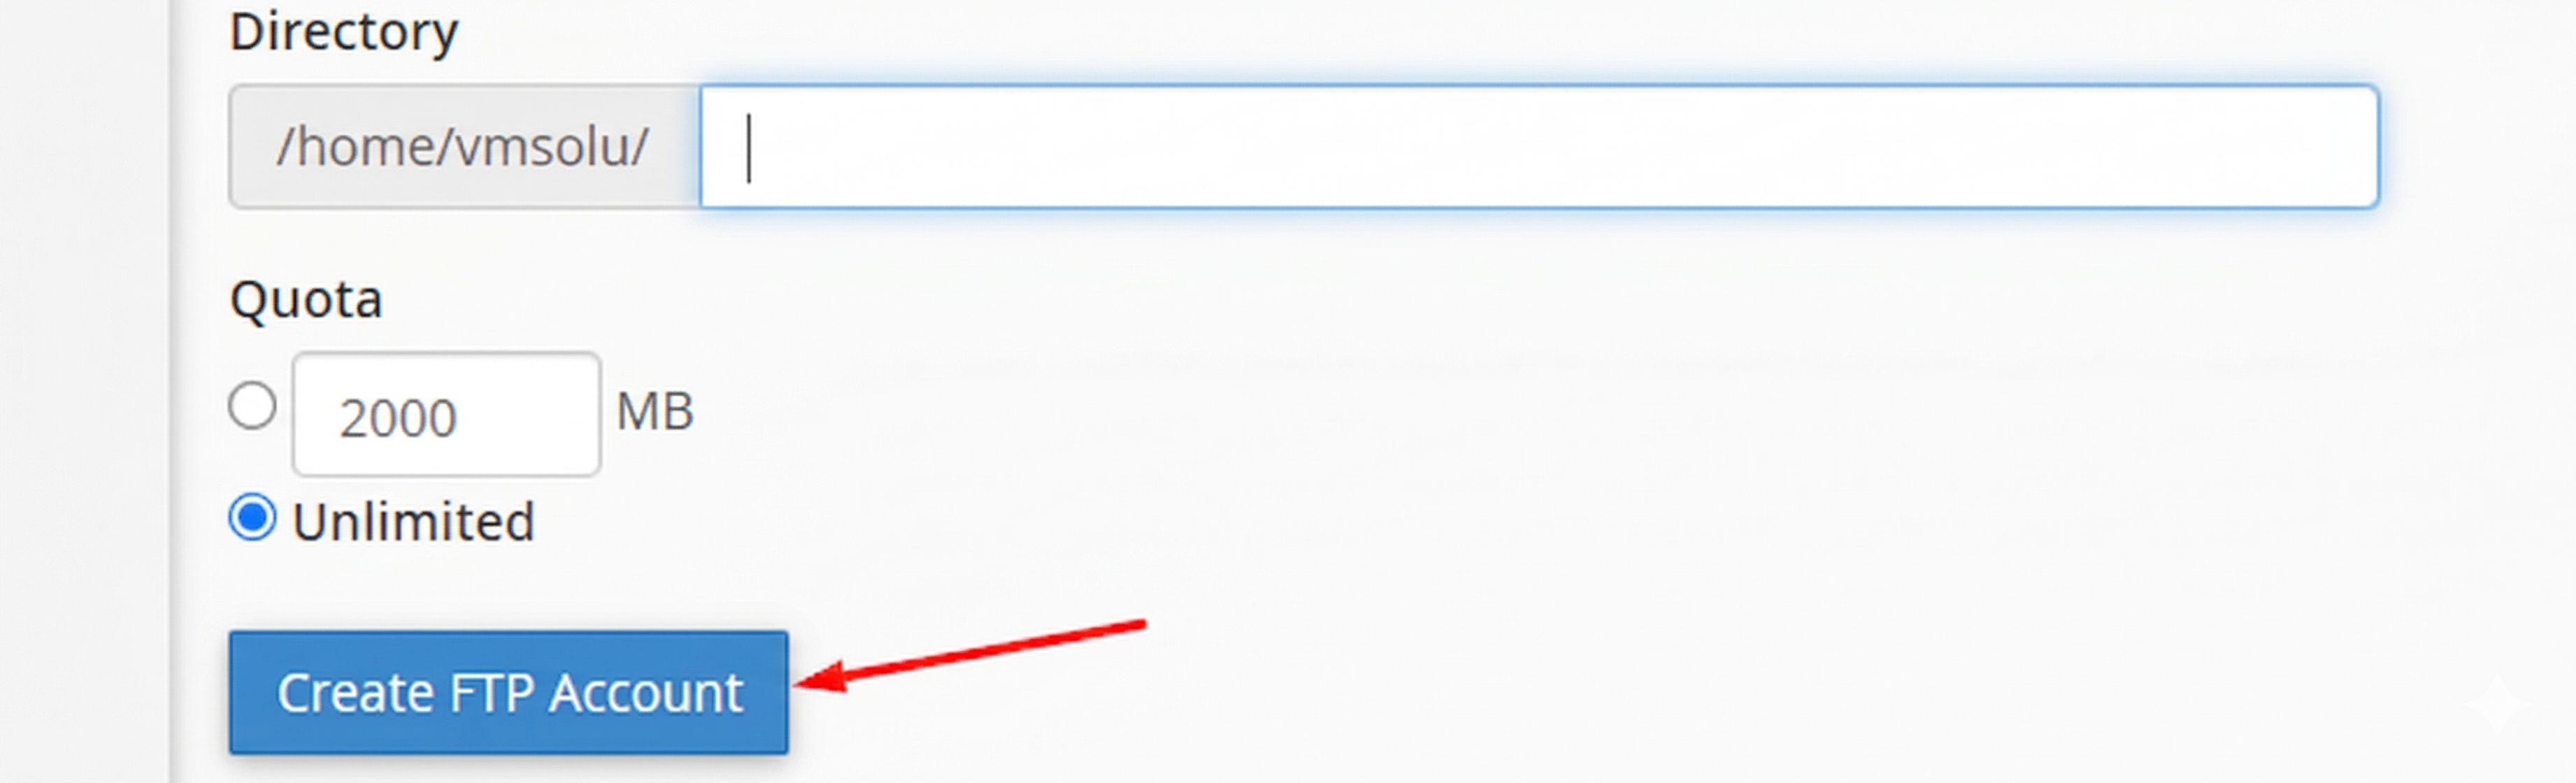
- Click on "Create FTP Account" button.
- Your FTP information will be like this:
FTP Host: {your hosting provider will give you host name}
FTP Port: 21
FTP Username: ftp@domain.com
FTP Password: {that you gave while creating the FTP} - Now in filezilla put those information and click on "Quickconnect" button.
- If connection is successful, you will get an interface like this:
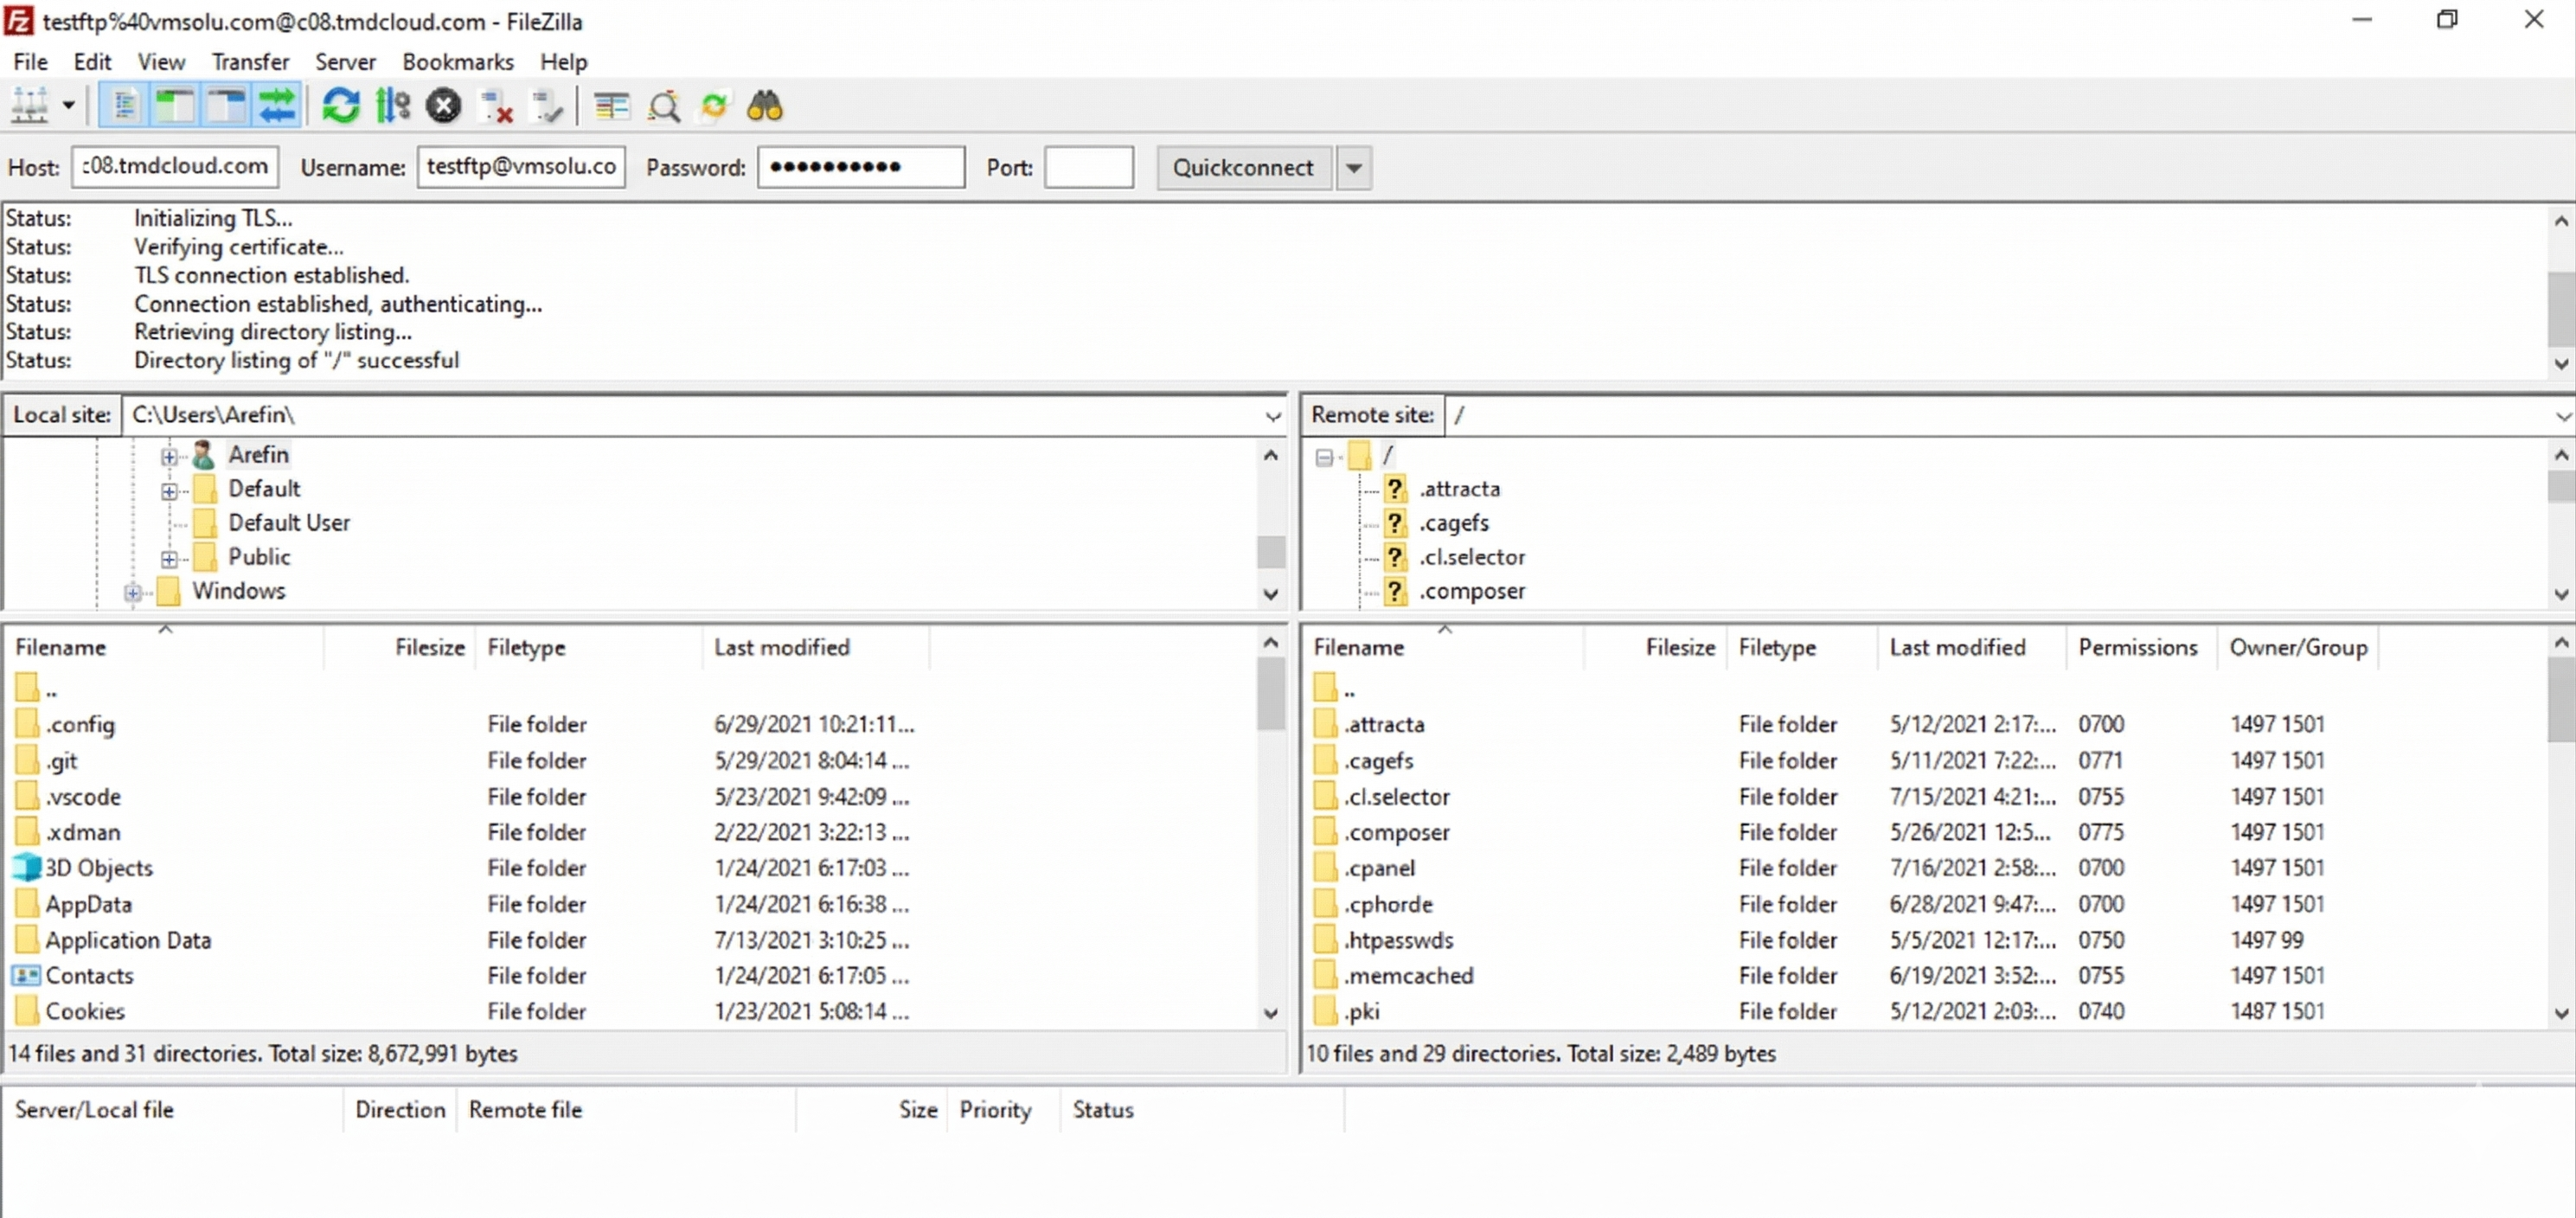
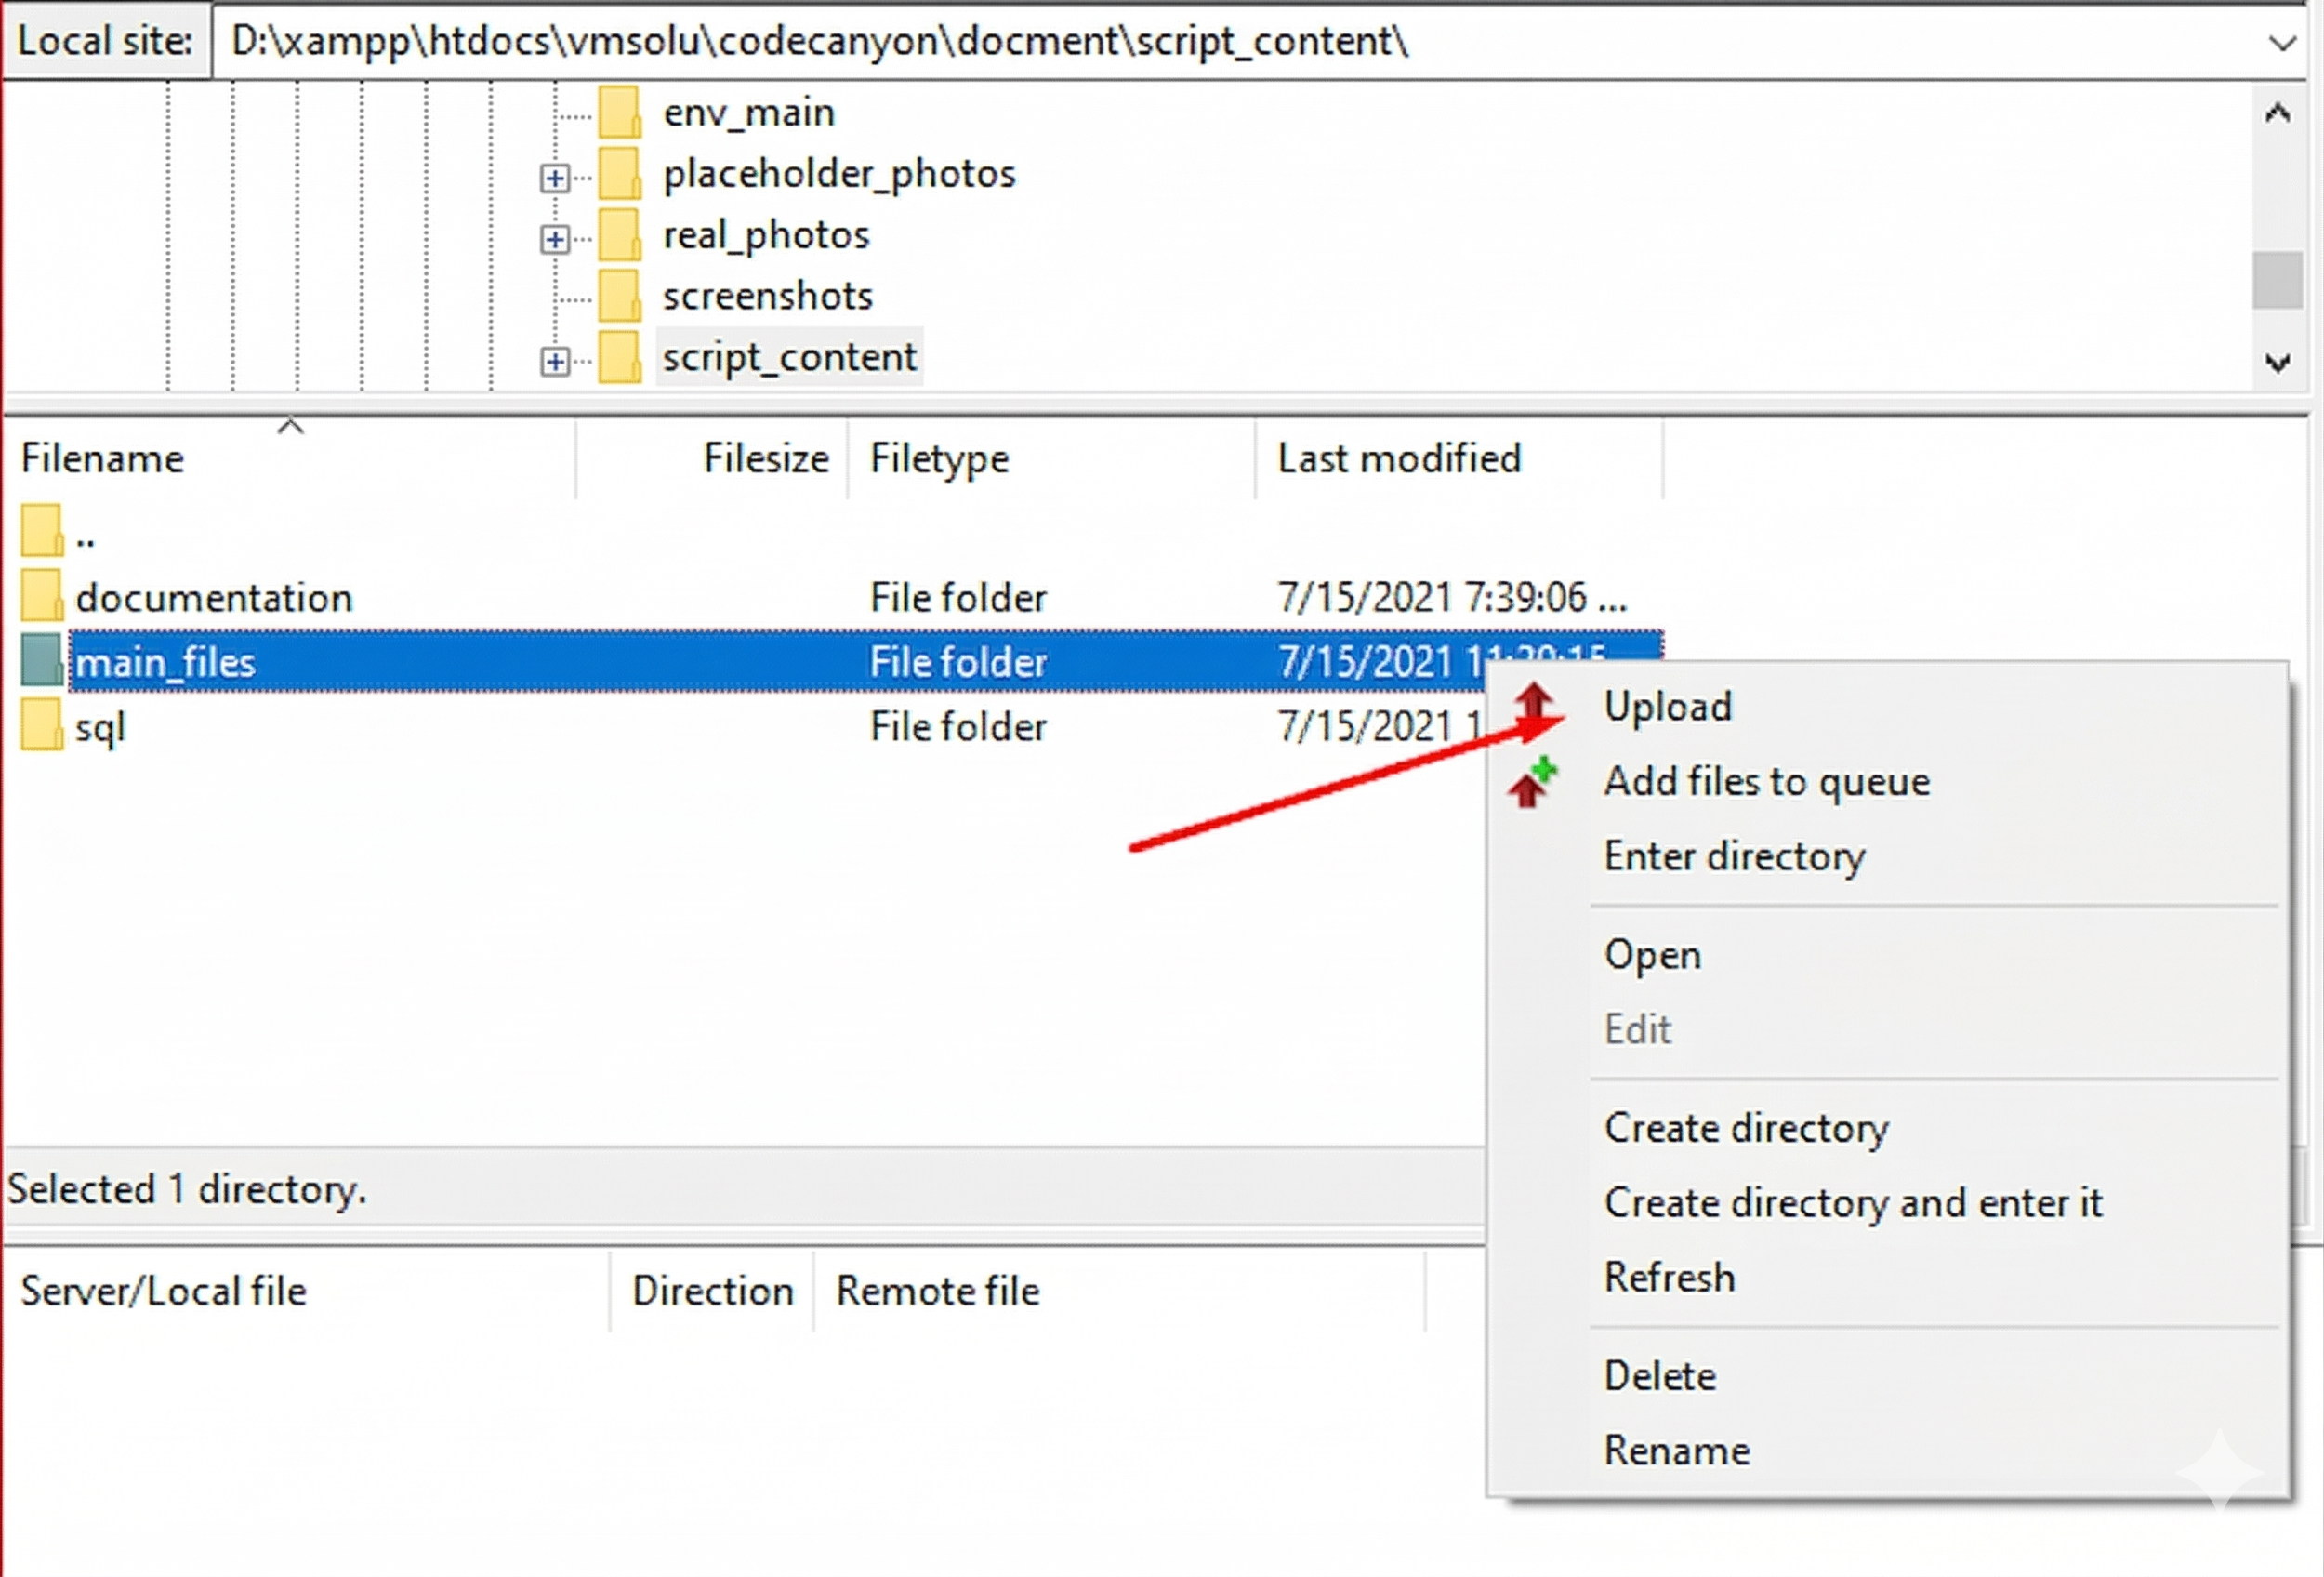
- Now in the left side box, go to the location where you have extracted the script's file. And in the right side, go to public_html.

- Then right click on the "main_files" from left side box and click on "Upload". All the files then will be uploaded into the "public_html" of the right side.
.env.example to .env after uploading. See the cPanel Settings section in the Installation Guide for detailed instructions on how to rename the .env file via cPanel.
Background Processing & Scheduled Tasks (Crucial)
The RAG Engine uses background jobs to process documents. If this is not set up, document ingestion will stay at 0%.
Recommended: Laravel Scheduler (Single Cron Job)
Add this single Cron Job to run every minute. This handles queue processing:
* * * * * /usr/local/bin/php /home/username/public_html/artisan schedule:runThe scheduler automatically manages:
- Queue Processing - Runs every minute to process document jobs
Alternative: Direct Queue Worker
If you prefer not to use the scheduler, run the queue worker directly:
* * * * * /usr/local/bin/php /home/username/public_html/artisan queue:work --stop-when-emptyVPS (Supervisor for Continuous Processing)
For VPS environments, use Supervisor for continuous queue processing:
php artisan queue:work --tries=3Shared Hosting (Cron Job)
Add a Cron Job in cPanel to run every minute:
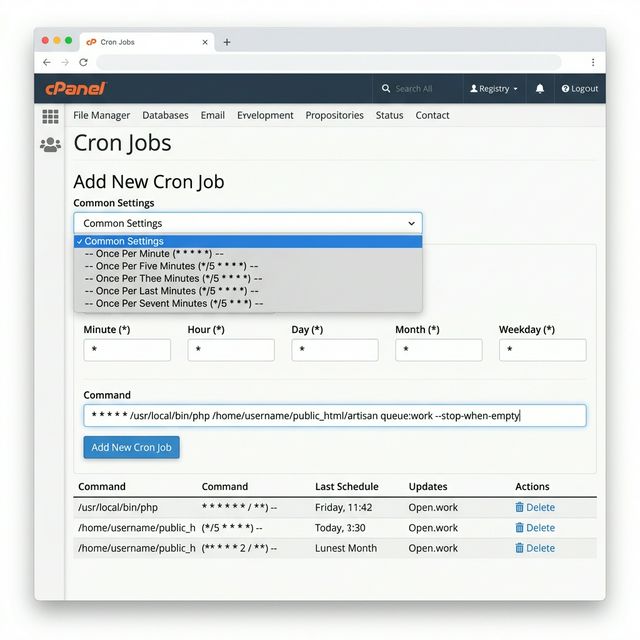
- PHP Path: Replace
/usr/local/bin/phpwith your actual PHP path (e.g.,/usr/bin/php8.3). Find it usingwhereis php - Project Path: Replace
/home/username/public_html/with your actual project path. Most users upload topublic_html/, but if you uploaded to a subfolder, use/home/username/public_html/your-project/artisan
- cPanel (public_html):
/home/username/public_html/artisan - cPanel (subfolder):
/home/username/public_html/myproject/artisan - Plesk (httpdocs):
/var/www/vhosts/username/httpdocs/artisan - DirectAdmin:
/home/username/domains/your-domain.com/public_html/artisan
Installation Wizard Steps
Go to your Domain- your-domain.com and you will see the installation wizard in the your-domain.com/install url. The installation wizard guides you through the setup process in 5 simple steps. Here's what to expect at each stage:
Step 1: Preflight Checks

The system automatically verifies that your server meets all requirements:
- PHP Version (>= 8.3) - Ensures compatibility with modern PHP features
- Required Extensions - Checks for necessary PHP extensions (BCMath, Ctype, Fileinfo, JSON, Mbstring, OpenSSL, PDO, Tokenizer, XML)
- Directory Permissions - Verifies write access to storage and cache directories
- .env File Writable - Confirms the environment file can be modified
Step 2: License Verification

Enter your Envato/CodeCanyon purchase details to verify your license:
- Purchase Code - Enter the license code you received from CodeCanyon (format: XXXX-XXXX-XXXX-XXXX)
- The system will verify this code with the Envato API to ensure it's valid and matches this product
Click Verify License to proceed.
Step 3: Database Configuration
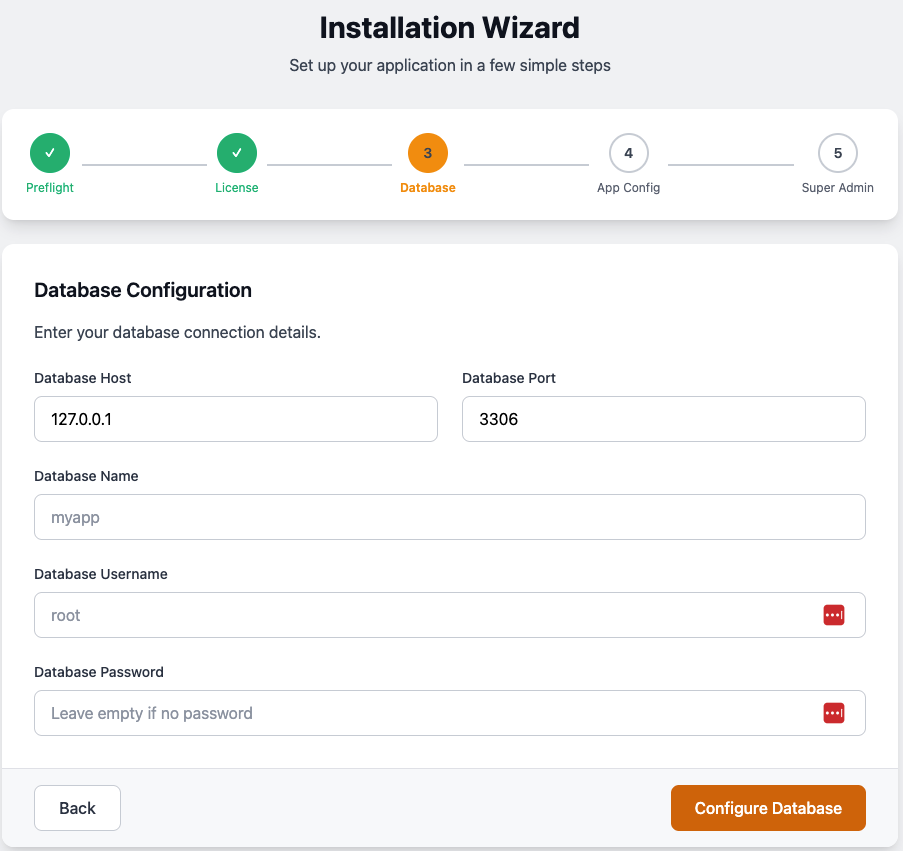
Provide your database connection details:
- Database Host - Typically
127.0.0.1orlocalhost - Database Port - Default MySQL port is
3306 - Database Name - The name of the database you created for this application
- Database Username - Your database username (e.g.,
root) - Database Password - Your database password (leave empty if no password)
Step 4: Application Configuration
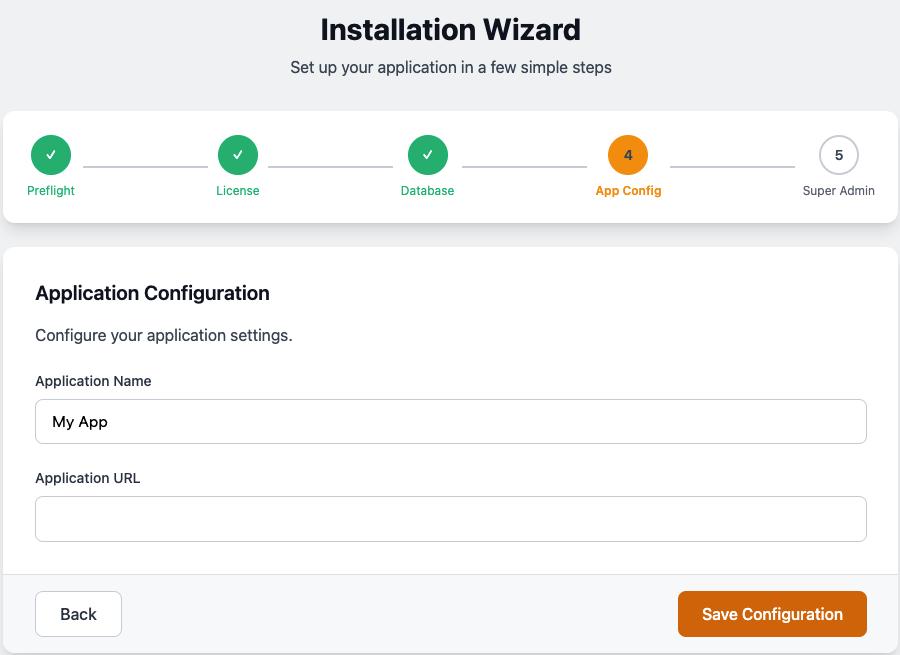
Configure your basic application settings:
- Application Name - The name that will appear in the browser title and throughout the app (e.g., "My App")
- Application URL - The full URL where your application is hosted (e.g.,
https://your-domain.com)
Click Save Configuration to proceed to the final step.
Step 5: Create Super Admin
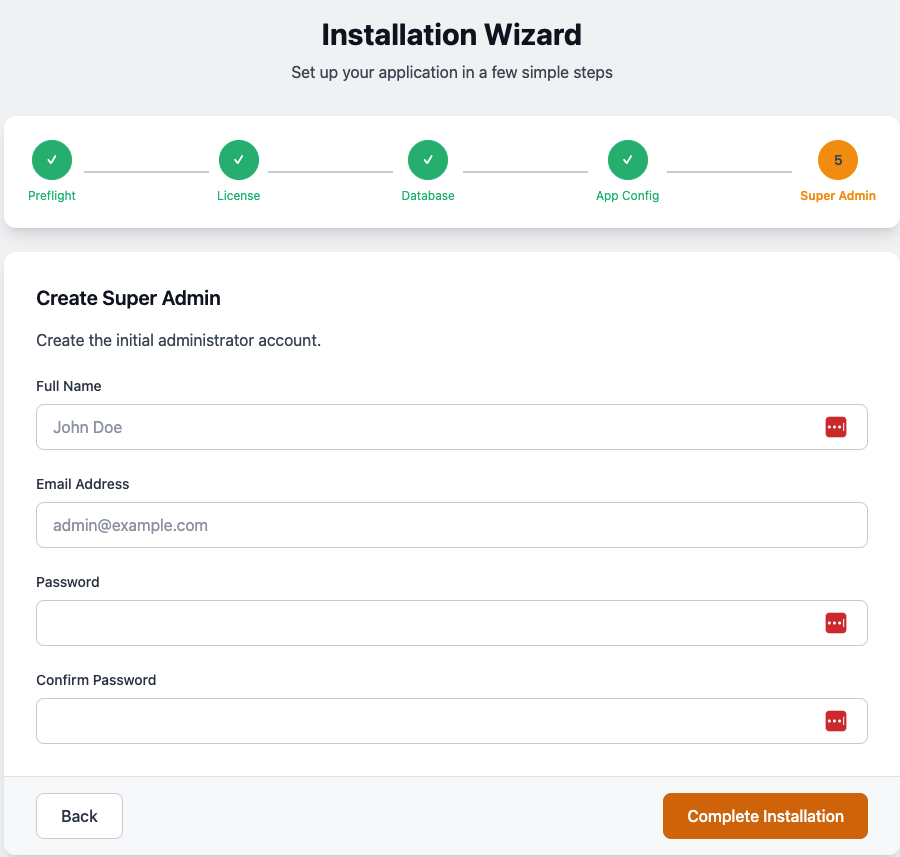
Create the initial administrator account:
- Full Name - Your name or the admin user's name
- Email Address - The admin email (used for login)
- Password - Choose a strong password (minimum 8 characters recommended)
- Confirm Password - Re-enter the same password
super_admin role with full access to all features. Click Complete Installation to finish setup.Installation Complete!
After completing all 5 steps, you'll be redirected to the admin dashboard. You can now:
- Configure AI providers in Settings → RAG Settings
- Upload your first document
- Start using the RAG chat features
php artisan queue:work to enable document processing.
🔧 Troubleshooting
Common issues and their solutions. Check this section before opening a support ticket.
Common Issues
Issue Ingestion stuck at 0%
php artisan queue:work is running. Document processing requires a queue worker to be active.
- Check if queue worker is running:
ps aux | grep queue:work - Restart the queue:
php artisan queue:restartthen start a new worker - Check failed jobs:
php artisan queue:failed
Issue 404 errors on API routes
mod_rewrite is enabled and .htaccess is in the root directory.
- Apache: Enable mod_rewrite (
a2enmod rewriteon Ubuntu) - Ensure
.htaccessfile exists in your public root - Check
AllowOverride Allin Apache config - Nginx: Ensure proper rewrite rules are configured
Issue PDF parsing fails
memory_limit to 512MB in php.ini.
- Edit
php.ini:memory_limit = 512M - Or add to
.htaccess:php_value memory_limit 512M - Or add to
.user.ini:memory_limit = 512M - Restart your web server after changes
Issue "Class not found" errors
composer install --optimize-autoloader to regenerate autoload files.
Issue Permission denied errors
chmod -R 775 storage bootstrap/cache
chown -R www-data:www-data storage bootstrap/cache
Issue Email verification not sending
.env file.
- Set
MAIL_MAILER(smtp, mailgun, ses, etc.) - Configure SMTP credentials if using SMTP
- Test with:
php artisan mail:test
Issue AI responses are slow
- Go to Settings → General Settings
- Toggle Enable Semantic Cache to ON
- Consider using Groq or OpenRouter for faster inference
Getting Help
If you've checked the troubleshooting steps above and still need assistance:
- Check the logs:
storage/logs/laravel.log - Enable debug mode: Set
APP_DEBUG=truetemporarily in.env - Contact support: Include your PHP version, error logs, and steps to reproduce
Admin Dashboard (Filament)
A enterprise-grade administrative suite built with Filament v5 for total system control.
Navigation Structure
| Section | Resources |
|---|---|
| Dashboard | API Health Stats, Latest Documents, Token Counter, Job Monitor |
| Users | User Management, Role Management |
| API Tokens | Manage Sanctum Personal Access Tokens |
| Documents | Document Manager, Knowledge Chunks |
| Settings | General Settings, RAG Settings |
Dashboard Widgets
- API Health Check: Verifies connectivity to configured AI providers and database services with tier detection (Free/Premium).
- API Route Explorer: Interactive search and filtering of all available API endpoints.
- Job Monitor: Visual breakdown of background job success, failures, and execution times.
- Token Counter: Widget displaying token usage statistics.
- Latest Documents: Widget showing recently uploaded and processed documents with status indicators.
- API Health Stats: Real-time statistics on API health check results (healthy, rate-limited, errors).
Management Resources
Complete reference for all administrative resources with their inputs, tables, and available actions.
👥 Users Resource
Complete CRUD interface for managing system users with role assignment and permission management.
Form Inputs (Create/Edit)
| Field | Type | Validation | Description |
|---|---|---|---|
name | Text Input | Required | User's full name |
email | Email Input | Required, Unique, Valid Email | User's email address |
password | Password Input | Required (Create only), Hashed | User's password (auto-hashed) |
roles | Multi-Select | Optional | Assign one or more roles to user |
Table Columns
| Column | Sortable | Searchable | Description |
|---|---|---|---|
| Name | ✓ | ✓ | User's full name |
| ✓ | ✓ | Email address | |
| Roles | - | - | Assigned roles (badge separator) |
| Created/Updated At | ✓ | - | Timestamps (toggleable) |
Available Actions
- View: Slide-over modal with full user details
- Edit: Slide-over modal for quick edits
- Delete: Remove user with confirmation
- Bulk Delete: Delete multiple users at once
API Endpoints
- GET/api/users - List all users (admin only)
- GET/api/users/{user} - Get user details
- POST/api/users - Create user
- PUT/api/users/{user} - Update user
- DELETE/api/users/{user} - Delete user
- GET/api/me - Get current user profile
🔐 Roles Resource (Shield)
Advanced RBAC system with granular permission management via Filament Shield.
Form Inputs (Create/Edit)
| Field | Type | Validation | Description |
|---|---|---|---|
name | Text Input | Required, Unique, Max 255 | Role name (auto-formatted) |
guard_name | Select | Required | Auth guard (web/sanctum) |
team | Select | Optional | Team association (if tenancy enabled) |
Select All | Toggle | - | Select/deselect all permissions |
Permissions | Checkbox Grid | Optional | Granular permissions by resource |
Table Columns
| Column | Sortable | Searchable | Description |
|---|---|---|---|
| Name | - | ✓ | Role name (headline formatted) |
| Guard Name | - | - | Auth guard badge |
| Team | - | ✓ | Team association (if visible) |
| Permissions Count | - | - | Number of assigned permissions |
| Updated At | ✓ | - | Last modification timestamp |
Available Permissions
view- View resourcecreate- Create new recordsupdate- Edit existing recordsdelete- Soft delete recordsrestore- Restore deleted recordsforce-delete- Permanently delete records
API Endpoints
- GET/api/roles - List all roles
- GET/api/roles/{role} - Get role details
- POST/api/roles - Create role
- PUT/api/roles/{role} - Update role
- DELETE/api/roles/{role} - Delete role
- POST/api/roles/{role}/permissions - Sync permissions
- GET/api/permissions - List all permissions
🔑 API Tokens Resource
Manage Laravel Sanctum Personal Access Tokens with full integration into the Shield permission system.
Resource Features
- Revoke Tokens: Instantly invalidate any active API token.
- Ownership Logic: Users can only view and revoke their own tokens (managed via Policy).
- Admin Oversight: Super admins can view and manage all system tokens.
- Shield Integration: Granular permissions controlled via the Roles resource.
Table Columns
| Column | Sortable | Searchable | Description |
|---|---|---|---|
| Name | ✓ | ✓ | Token descriptive name (e.g., "Mobile App") |
| User | - | ✓ | The token owner (email) |
| Last Used At | ✓ | - | Human-readable relative time (e.g., "2 hours ago") |
| Created At | ✓ | - | Formatted creation date |
Available Actions
- Revoke Token: Individual delete action renamed to "Revoke Token" with danger confirmation.
- Bulk Revoke: Revoke multiple tokens at once via bulk actions.
Authorization
Access is strictly controlled via PersonalAccessTokenPolicy and Shield permissions:
ViewAny:PersonalAccessToken- Required to list tokens.Delete:PersonalAccessToken- Required to revoke tokens.
📁 Documents Resource
Manage uploaded files, view processed text chunks, and track ingestion progress in real-time.
Form Inputs (Create/Edit)
| Field | Type | Validation | Description |
|---|---|---|---|
uuid | Text Input | Disabled, Auto-generated | Document ID (auto UUID) |
name | Text Input | Required | Document title/name |
system_prompt | Textarea | Optional | AI behavior definition with template picker |
instructions | Textarea | Optional | AI tool description for document usage |
path | File Upload | Required, PDF/TXT/MD | File upload (local disk, knowledge directory) |
status | Select | Required | Status: pending, processing, completed, failed |
job_batch_id | Text Input | Disabled | Background job batch identifier |
error | Textarea | Disabled | Error message (if failed) |
user_id | Hidden | Auto-filled | Current user ID |
Table Columns
| Column | Sortable | Searchable | Description |
|---|---|---|---|
| Document ID (UUID) | - | ✓ | Copyable UUID with icon |
| Name | - | ✓ | Document filename |
| Status | - | - | Badge with color + icon (animated for processing) |
| Progress | - | - | Real-time percentage (5s polling) |
| User | ✓ | - | Document owner |
| Created At | ✓ | - | Upload timestamp (toggleable) |
Available Actions
- Process: Trigger document ingestion (hidden if processing/completed)
- Chat: Document-specific chat with slide-over modal
- Download: Download original file
- View: Full document details with chunks relation manager
- Edit: Edit document metadata
- Process All: Bulk process all pending/failed documents
- Bulk Delete: Delete multiple documents
Relation Managers
- Chunks: View all knowledge chunks extracted from document
API Endpoints
- GET/api/v1/documents - List all documents
- GET/api/v1/documents/{document} - Get document details
- DELETE/api/v1/documents/{document} - Delete document
- GET/api/v1/documents/batch/{batchId} - Get batch processing status
Resource Response Format
{
    "id": "uuid-string",
    "title": "document-name.pdf",
    "file_type": "pdf",
    "status": "completed",
    "progress": "100%",
    "created_at": "2026-01-01T00:00:00Z",
    "human_readable_size": "1.5 MB"
}
🧩 Knowledge Chunks Resource
Browse and search individual knowledge chunks extracted from documents with search & replace functionality.
Form Inputs (Edit)
| Field | Type | Validation | Description |
|---|---|---|---|
content | Textarea | Required | Chunk text content (full column span) |
source | Text Input | Disabled | Source document reference |
status | Select | Disabled | Status: syncing, synced, failed |
Table Columns
| Column | Sortable | Searchable | Description |
|---|---|---|---|
| Content | - | ✓ | Limited to 100 chars, expandable |
| Status | ✓ | - | Badge with color + icon |
| Source | - | ✓ | Source document (toggleable) |
| Created At | ✓ | - | Creation timestamp (toggleable) |
Filters
- Status Filter: Filter by syncing, synced, or failed status
Available Actions
- Edit: Slide-over modal for chunk editing
- Delete: Remove individual chunk
- Search & Replace: Bulk search and replace across all chunks
- Bulk Delete: Delete multiple chunks
Search & Replace Input
| Field | Type | Validation | Description |
|---|---|---|---|
search | Text Input | Required | Text to find |
replace | Text Input | Required | Replacement text |
💬 RAG Chat Testing
You can test the chat functionality with your uploaded documents by visiting the following URL:
your-domain.com/markdownrag
Settings Panels
Centralized configuration interfaces for system-wide settings.
⚙️ RAG Settings
Configure AI providers, API keys, and RAG pipeline behavior.
Configuration Sections & Inputs
Website Information
| Field | Type | Default | Description |
|---|---|---|---|
APP_NAME | Text Input | Laravel | Application name |
Database Configuration (2 columns)
| Field | Type | Default | Description |
|---|---|---|---|
DB_CONNECTION | Text Input | mysql | Database driver |
DB_HOST | Text Input | 127.0.0.1 | Database host |
DB_PORT | Numeric Input | 3306 | Database port |
DB_DATABASE | Text Input | laravel | Database name |
DB_USERNAME | Text Input | root | Database username |
DB_PASSWORD | Password (Revealable) | - | Database password |
General Configuration (2 columns)
| Field | Type | Description |
|---|---|---|
AI_DEFAULT_PROVIDER | Select (Native: false) | Default LLM provider for chat/completion |
AI_EMBEDDING_PROVIDER | Select (Native: false) | Provider for vector embeddings |
AI Provider Keys (2 columns)
| Field | Type | Provider |
|---|---|---|
OPENAI_API_KEY | Password (Revealable) | OpenAI (GPT-4, GPT-3.5, embeddings) |
ANTHROPIC_API_KEY | Password (Revealable) | Anthropic (Claude) |
GEMINI_API_KEY | Password (Revealable) | Google Gemini (Free tier available) |
GROQ_API_KEY | Password (Revealable) | Groq (Fast inference) |
COHERE_API_KEY | Password (Revealable) | Cohere (Embeddings) |
DEEPSEEK_API_KEY | Password (Revealable) | Deepseek |
MISTRAL_API_KEY | Password (Revealable) | Mistral AI |
OPENROUTER_API_KEY | Password (Revealable) | OpenRouter (Multi-model) |
VOYAGEAI_API_KEY | Password (Revealable) | VoyageAI (Embeddings/Reranking) |
XAI_API_KEY | Password (Revealable) | xAI (Grok) |
JINA_API_KEY | Password (Revealable) | Jina AI (Embeddings) |
ELEVENLABS_API_KEY | Password (Revealable) | ElevenLabs (Voice/Speech) |
OLLAMA_API_KEY | Text Input | Ollama (Local/Self-hosted) |
RAG Pipeline Settings
| Field | Type | Default | Description |
|---|---|---|---|
MARKDOWN_RERANKING | Toggle | false | Enable reranking model for better precision |
MARKDOWN_QUERY_REWRITE | Toggle | false | Rewrite queries to match document content |
MARKDOWN_CHAT_RATE_LIMIT | Numeric Input | 1 | Max requests per minute for chat |
MARKDOWN_EMBEDDING_BATCH_SIZE | Numeric Input | 50 | Documents per embedding request |
MARKDOWN_AI_RETRY_MAX_ATTEMPTS | Numeric Input | 3 | Max retries for AI service calls |
🔧 General Settings
Application-wide configuration for AI behavior, caching, and API rate limiting.
AI Configuration Section
| Field | Type | Default | Description |
|---|---|---|---|
enable_semantic_cache | Toggle | false | Cache identical query responses |
system_prompt | Textarea (4 rows) | null | Global AI system prompt with template picker |
tool_description | Textarea (4 rows) | null | AI tool description with template picker |
enable_stream_effect | Toggle | true | Enable streaming animation for responses |
API Rate Limiting Section
| Field | Type | Default | Description |
|---|---|---|---|
enable_rate_limiting | Toggle | false | Enable API rate limiting |
api_burst_limit | Numeric Input | 60 | Max requests per minute |
api_sustained_limit | Numeric Input | 1000 | Max requests over sustained period |
api_sustained_period | Select | day | Period: hour or day |
Template Pickers
- Prompt Templates: Modal with pre-built system prompt templates
- Tool Templates: Modal with pre-built tool description templates
API Reference (v1)
Complete API documentation with all endpoints, inputs, and response formats.
💡 Pro Tip: Postman Collection Included
We have included a pre-configured Postman Collection in the tests/postman folder. This collection includes:
- Pre-request Scripts: Automatically handle authentication and token management
- Automated Tests: Poll the batch status until 100% completion
- Environment Variables: Pre-configured for easy setup
- Newman Integration: Run automated tests via terminal with
npm run postman:test
🧪 Testing with Postman
We have included a pre-configured Postman collection and environment located in the Extras/Postman/ folder of your download.
- Import both files into Postman.
- The collection is pre-set to use the
postman@test.comaccount created during installation. - Ensure your
{{base_url}}environment variable matches your local installation path.
Authentication Required
All API endpoints require authentication via Laravel Sanctum personal access tokens. Include the token in the Authorization header:
Authorization: Bearer YOUR_API_TOKENAuthentication & Users API
| Method | Endpoint | Description | Permissions |
|---|---|---|---|
| POST | /api/login | User authentication | Public |
| POST | /api/users | User registration | Public |
| GET | /api/me | Get current user profile | Auth |
| GET | /api/users | List all users | Admin (viewAny) |
| GET | /api/users/{user} | Get user details | Admin or Self (view) |
| PUT | /api/users/{user} | Update user | Admin or Self (update) |
| PATCH | /api/users/{user} | Update user (partial) | Admin or Self (update) |
| DELETE | /api/users/{user} | Delete user | Admin (delete) |
User Roles Management
| Method | Endpoint | Description | Permissions |
|---|---|---|---|
| GET | /api/users/{user}/roles | List user roles | Admin or Self (update) |
| POST | /api/users/{user}/roles | Assign role to user | Admin or Self (update) |
| DELETE | /api/users/{user}/roles/{role} | Detach role from user | Admin or Self (update) |
Roles & Permissions API
| Method | Endpoint | Description | Permissions |
|---|---|---|---|
| GET | /api/roles | List all roles | Admin (viewAny) |
| GET | /api/roles/{role} | Get role details | Admin (view) |
| POST | /api/roles | Create new role | Super Admin (create) |
| PUT | /api/roles/{role} | Update role | Admin (update) |
| PATCH | /api/roles/{role} | Update role (partial) | Admin (update) |
| DELETE | /api/roles/{role} | Delete role | Admin (delete) |
| POST | /api/roles/{role}/permissions | Sync role permissions | Super Admin (create) |
| GET | /api/permissions | List all permissions | Admin |
Documents & RAG API (v1)
| Method | Endpoint | Description | Permissions |
|---|---|---|---|
| GET | /api/v1/documents | List all documents | Auth (viewAny) |
| GET | /api/v1/documents/{document} | Get document details | Auth (view) |
| DELETE | /api/v1/documents/{document} | Delete document | Auth (delete) |
| GET | /api/v1/documents/batch/{batchId} | Get batch status | Auth (owner or admin) |
| POST | /api/v1/ingest | Trigger document processing | Auth (create) |
| POST | /api/v1/chat/ask | RAG chat with SSE streaming | Auth + Throttle (viewAny) |
Chat Request Input
| Field | Type | Required | Description |
|---|---|---|---|
query | String | ✓ | User's question or message |
document_id | String (UUID) | Optional | Specific document to query |
SSE Stream Response Format
data: {"text": "AI response chunk"}

data: {"text": "continuing response..."}

data: {"text": "final part of response"}
Error Response
data: {"error": "Error message"}Token Management API (v1)
| Method | Endpoint | Description |
|---|---|---|
| GET | /api/v1/tokens | List personal access tokens |
| POST | /api/v1/tokens | Create new access token |
| DELETE | /api/v1/tokens/{token} | Revoke access token |
POST /api/v1/tokens, the API returns the plain_text_token. This is shown only once. Ensure you save it securely; if lost, the token must be revoked and recreated.
Rate Limiting
The /api/v1/chat/ask endpoint uses the rag-api throttle middleware with configurable limits:
- Burst Limit: 60 requests per minute (default)
- Sustained Limit: 1000 requests per day (default)
Configure in Settings > General Settings > API Rate Limiting.
Supported AI Providers
📊 AI Provider Model Comparison
Help choosing the right model for your use case:
| Purpose | Recommended Model | Provider | Benefit |
|---|---|---|---|
| Embeddings | text-embedding-004 | Gemini | Free and high accuracy ⭐ |
| Fast Chat | qwen/qwen-3.5-9b | OpenRouter | Incredible speed/cost ratio |
| Complex Logic | openai/gpt-4o | OpenAI | Best for difficult document reasoning |
| Budget Chat | deepseek-chat | Deepseek | Very low cost, good quality |
| Ultra Fast | llama-3.1-70b | Groq | Fastest inference available |
| Long Context | claude-3-5-sonnet | Anthropic | 200K context window |
LLM Providers (Chat/Completion)
| Provider | Models | Config Field |
|---|---|---|
| OpenAI | GPT-4, GPT-3.5-turbo | OPENAI_API_KEY |
| Anthropic | Claude 3, Claude 2 | ANTHROPIC_API_KEY |
| Google Gemini | Gemini Pro, Gemini Ultra | GEMINI_API_KEY |
| Groq | Llama, Mixtral (Fast) | GROQ_API_KEY |
| Cohere | Command, Command-R | COHERE_API_KEY |
| Deepseek | Deepseek Chat | DEEPSEEK_API_KEY |
| Mistral | Mistral Large, Medium | MISTRAL_API_KEY |
| OpenRouter | Multi-model access | OPENROUTER_API_KEY |
| xAI | Grok-1, Grok-2 | XAI_API_KEY |
| Ollama | Local models | OLLAMA_API_KEY |
Embedding Providers
| Provider | Models | Tier |
|---|---|---|
| Gemini ⭐ | text-embedding-004 | Free tier available |
| OpenAI | text-embedding-3-small/large | Paid |
| Ollama | nomic-embed-text, mxbai-embed | Free (Self-hosted) |
| Jina AI | jina-embeddings-v2 | Free tier |
| Cohere | embed-english-v3.0 | Paid |
| Mistral | mistral-embed | Paid |
| VoyageAI | voyage-2, voyage-3 | Paid |
Specialized Providers
| Provider | Purpose | Config Field |
|---|---|---|
| VoyageAI | Embeddings & Reranking | VOYAGEAI_API_KEY |
| Jina AI | Embeddings | JINA_API_KEY |
| ElevenLabs | Voice/Speech | ELEVENLABS_API_KEY |
🔑 How to Configure AI Provider APIs
Step-by-Step Guide to Adding API Keys
Follow these steps to configure your AI providers through the Filament admin panel:
Log in to your admin panel and click on Settings in the left sidebar, then select RAG Settings from the dropdown menu.
Scroll down to the AI Providers section. You'll see configuration fields for each supported provider (OpenAI, Gemini, Anthropic, Groq, etc.).
For each provider you want to use:
- Find the provider name (e.g., "OpenAI API Key", "Gemini API Key")
- Click on the input field and paste your API key
- The field is masked for security (shown as dots)
- Use the reveal icon (eye icon) to verify your entry if needed
In the General Configuration section:
- Default AI Provider: Select your preferred LLM provider from the dropdown (e.g., OpenAI, Gemini, Anthropic)
- Default Embedding Provider: Select your embedding provider (Gemini recommended for free tier)
- Default Model: Choose the specific model to use (e.g., gpt-4, gemini-pro)
Toggle these features on/off as needed:
- Enable Reranking: Improves search precision (requires VoyageAI or compatible provider)
- Enable Query Rewriting: Optimizes queries for better results
- Enable Semantic Caching: Reduces API costs by caching similar queries
Click the Save button at the bottom of the page. The system will:
- Validate your API keys with the respective providers
- Clear the configuration cache automatically
- Display success/error messages for each provider
After saving, navigate to API Health Check page to verify:
- All configured providers show as "Healthy"
- API keys are valid and working
- Response times are acceptable
- Tier information (Free/Premium) is displayed
- Getting Started: Use Gemini for both embeddings and chat (free tier available)
- Best Value: Gemini embeddings + OpenRouter chat (qwen models)
- Maximum Privacy: Use Ollama for local, self-hosted models
- API Key Security: Never share or commit API keys to version control
- Multiple Providers: You can configure multiple providers simultaneously and switch between them
- Invalid API Key error: Double-check your key and ensure it's active in your provider's dashboard
- Provider not working: Check API Health page for detailed error messages
- Changes not saving: Ensure your
.envfile has proper write permissions - Rate limit errors: Check your provider's usage limits and upgrade plan if needed
RAG Engine Configuration
Pipeline Flow
┌─────────────────────┐
│  User Query         │
└──────────┬──────────┘
           │
           ▼
┌─────────────────────┐
│  Semantic Cache     │ ← Check for similar cached queries
└──────────┬──────────┘
           │ (miss)
           ▼
┌─────────────────────┐
│  Query Rewriting    │ ← Optional: Rewrite for better match
└──────────┬──────────┘
           │
           ▼
┌─────────────────────┐
│  Vector Search      │ ← Retrieve relevant chunks
└──────────┬──────────┘
           │
           ▼
┌─────────────────────┐
│  Reranking          │ ← Optional: Re-order by relevance
└──────────┬──────────┘
           │
           ▼
┌─────────────────────┐
│  LLM Generation     │ ← Generate response with context
└──────────┬──────────┘
           │
           ▼
┌─────────────────────┐
│  Stream Response    │ ← SSE typewriter effect
└─────────────────────┘
Configuration Options
| Setting | Env Variable | Default | Description |
|---|---|---|---|
| Chunk Size | - | 1000 chars | Text splitter chunk size |
| Chunk Overlap | - | 100 chars | Overlap between chunks |
| Embedding Batch Size | MARKDOWN_EMBEDDING_BATCH_SIZE | 50 | Chunks per embedding request |
| Chat Rate Limit | MARKDOWN_CHAT_RATE_LIMIT | 1 | Previous messages in context |
| Retry Max Attempts | MARKDOWN_AI_RETRY_MAX_ATTEMPTS | 3 | AI provider retry count |
| Retry Delay | - | 2000ms | Exponential backoff delay |
| Cache TTL | - | 24 hours | Semantic cache expiration |
Inputs & Forms Reference
Complete list of all input types used across the application.
Input Types
| Type | Usage | Features |
|---|---|---|
| Text Input | Names, titles, identifiers | Validation, required, unique, max length |
| Email Input | User emails | Email validation, unique check |
| Password Input | Passwords, API keys | Masked, revealable, hashed on save |
| Numeric Input | Ports, limits, counts | Number-only validation, min/max |
| Textarea | Prompts, descriptions | Multiple rows, nullable, template pickers |
| Select (Dropdown) | Status, providers, roles | Native/non-native, searchable, multi-select |
| Toggle | Boolean flags | On/off, default values |
| File Upload | Document uploads | File type validation, disk selection, directory |
| Date/Time Picker | Timestamps | Calendar picker, timezone support |
| Multi-Select | Roles, permissions | Multiple selection, preload options |
| Checkbox Grid | Permissions matrix | Bulk select, grouped by resource |
| Hidden Input | Auto-filled values | Default values, user_id injection |
Special Input Features
Template Pickers (Modal)
Used in system prompts and tool descriptions. Opens a modal with pre-built templates:
- Prompt Templates: Legal expert, Medical advisor, Technical support, etc.
- Tool Templates: Document retrieval, FAQ bot, Knowledge base search
Copyable Fields
UUIDs and identifiers with one-click copy functionality:
- Document UUID (with copy icon and confirmation message)
Disabled/Read-Only Fields
Auto-populated fields that cannot be manually edited:
- UUID (auto-generated)
- Job Batch ID (auto-assigned)
- Error messages (auto-filled on failure)
- Source (auto-linked to document)
- Status (auto-updated by jobs)
Tables & Filters Reference
All data tables with their columns, sorting, searching, and filtering capabilities.
Table Features
- Polling: Documents table refreshes every 5 seconds for real-time progress
- Sortable Columns: Click column headers to sort ascending/descending
- Searchable: Search icon enables text filtering on marked columns
- Toggleable: Click table settings to show/hide optional columns
- Record Actions: Per-row action buttons (view, edit, delete, custom)
- Bulk Actions: Select multiple records for batch operations
- Header Actions: Table-level actions (Process All, Search & Replace)
Documents Table
| Column | Type | Sortable | Searchable | Toggleable | Special Features |
|---|---|---|---|---|---|
| UUID | Text | - | ✓ | - | Copyable, copy message |
| Name | Text | - | ✓ | - | - |
| Status | Badge | - | - | - | Color-coded, animated icon, error tooltip |
| Progress | Text | - | - | - | Real-time via batch lookup |
| User | Relation | ✓ | - | - | Displays owner name |
| Created At | DateTime | ✓ | - | ✓ | Hidden by default |
Users Table
| Column | Type | Sortable | Searchable | Toggleable |
|---|---|---|---|---|
| Name | Text | - | ✓ | - |
| Text | - | ✓ | - | |
| Roles | Badge List | - | - | - |
| Created At | DateTime | ✓ | - | ✓ |
| Updated At | DateTime | ✓ | - | ✓ |
Roles Table
| Column | Type | Sortable | Searchable | Special Features |
|---|---|---|---|---|
| Name | Text | - | ✓ | Headline formatted |
| Guard Name | Badge | - | - | Color: warning |
| Team | Badge | - | ✓ | Visible if tenancy enabled |
| Permissions Count | Badge | - | - | Counts relationship |
| Updated At | DateTime | ✓ | - | - |
Knowledge Chunks Table
| Column | Type | Sortable | Searchable | Toggleable | Special Features |
|---|---|---|---|---|---|
| Content | Text | - | ✓ | - | Limited to 100 chars |
| Status | Badge | ✓ | - | - | Color-coded with icon |
| Source | Text | - | ✓ | ✓ | Document reference |
| Created At | DateTime | ✓ | - | ✓ | - |
Available Filters
- Status Filter: Select by syncing, synced, or failed
Record Actions (Per Row)
| Resource | Actions |
|---|---|
| Documents | Process, Chat, Download, View, Edit |
| Users | View (slide-over), Edit (slide-over), Delete |
| Roles | Edit, Delete |
| Chunks | Edit (slide-over), Delete |
Header Actions (Table-Level)
| Resource | Action | Description |
|---|---|---|
| Documents | Process All | Process all pending/failed documents |
| Chunks | Search & Replace | Bulk find/replace across all chunks |
Bulk Actions
| Resource | Available Bulk Actions |
|---|---|
| Documents | Delete (via Bulk Action Group) |
| Users | Delete (via Bulk Action Group) |
| Roles | Delete (via Bulk Action Group) |
| Chunks | Delete (via Bulk Action Group) |
Security & Identity
Authentication Features
- Two-Factor Authentication (2FA): (Currently Disabled) Optional TOTP-based secondary verification for enhanced security.
- Session Management: View and logout of active sessions on other devices.
- Email Verification: Required email verification workflow for new users.
- Password Reset: Secure password recovery via email tokens.
Authorization System
- Token-Based Auth: Secure API access via Laravel Sanctum with role-based abilities.
- Role-Based Access Control (RBAC): Comprehensive permission system via Filament Shield.
- Granular Permissions: Fine-grained control over view, create, update, delete, restore, and force-delete actions.
- Custom Roles: Create custom roles with specific permission sets for different user types.
- Guard System: Separate guards for web (Filament) and sanctum (API) authentication.
Security Best Practices
- UUID Identifiers: Non-sequential identifiers for documents and sensitive resources.
- Cascade Deletion: Automatic cleanup of related data to prevent orphaned records.
- Rate Limiting: Configurable API throttling to prevent abuse.
- Environment Isolation: Separate configurations for development, testing, and production.
- Password Hashing: BCrypt hashing for all user passwords.
- CSRF Protection: Built-in CSRF token validation for state-changing requests.
Support & Policy
📋 Item Support Policy
I am committed to providing high-quality support for the AI RAG Wrapper. Please review the following guidelines to understand what assistance is available.
✅ What's Included in Support
- Answering technical questions about the item's features
- Assistance with reported bugs and issues
- Help with the included Installation Wizard
- Configuration guidance for AI providers
- API integration assistance
- Troubleshooting document processing issues
❌ What's NOT Included
- Customization services or adding new features
- Installation on your server (available as paid service)
- Issues caused by 3rd party plugins
- Hardware or server limitations
- Hosting-specific configuration (cPanel, VPS setup)
- PHP/MySQL server configuration
🕐 Support Hours & Response Time
I am based in Khulna, Bangladesh (GMT+6). I usually respond within 24 hours during business days (Sunday - Thursday). Messages received on Friday-Saturday (weekend in Bangladesh) will be addressed on Sunday.
📞 Contact Support
📧 Email: support@virtualmind.top
⏱️ Response Time: 24 hours during business days
⚠️ Before Opening a Support Ticket
Please ensure you have completed the following steps to help us assist you faster:
- Read the documentation - All features and setup steps are documented
- Check the Troubleshooting section - Common issues have documented solutions
- Verify system requirements - PHP 8.3+, MySQL 8.0+, required extensions
- Ensure queue worker is running -
php artisan queue:workmust be active - Check error logs - Review
storage/logs/laravel.logfor errors
When Contacting Support, Include:
- Your Envato Purchase Code
- PHP version (run:
php -v) - Error logs from
storage/logs/laravel.log - Steps to reproduce the issue
- Screenshots if applicable
- Your server environment (Shared hosting / VPS / Local)
💼 Paid Services Available
Need help beyond standard support? I offer the following paid services:
- Server Installation - Full setup on your hosting/VPS
- Custom Modifications - Feature additions or UI changes
- Third-party Integrations - Connect with your existing systems
- Priority Support - Expedited response (4 hours)
Contact me for a custom quote based on your requirements.
🙏 Third-Party Credits & Licenses
This project makes use of various third-party libraries, frameworks, and assets. We are grateful to the amazing developers behind these tools. Below is a complete list with attribution links and license information.
🌐 Core Framework & Platform
| Project | Version | License | Link |
|---|---|---|---|
| Laravel | 12.x | MIT License | laravel.com |
| PHP | 8.3+ | PHP License 3.01 | php.net |
🎨 Admin Panel & UI Components
| Project | Version | License | Link |
|---|---|---|---|
| Filament | 5.x | MIT License | filamentphp.com |
| Livewire | 4.x | MIT License | livewire.laravel.com |
| Flux UI | 2.9+ | Commercial License | fluxui.dev |
| Tailwind CSS | 4.x | MIT License | tailwindcss.com |
🔐 Authentication & Security
| Project | Version | License | Link |
|---|---|---|---|
| Laravel Sanctum | 4.x | MIT License | GitHub |
| Laravel Fortify | 1.x | MIT License | GitHub |
| Filament Shield | 4.1+ | MIT License | GitHub |
🤖 AI & RAG Engine
| Project | Version | License | Link |
|---|---|---|---|
| Laravel Markdown RAG | 0.2+ | MIT License | GitHub |
| PDF Parser | 2.12+ | LGPL-3.0 | pdfparser.org |
| Laravel AI | Latest | MIT License | GitHub |
📊 Monitoring & Utilities
| Project | Version | License | Link |
|---|---|---|---|
| Filament Jobs Monitor | 4.1+ | MIT License | GitHub |
| Laravel Pail | 1.2+ | MIT License | GitHub |
| Laravel Boost | 2.0+ | MIT License | GitHub |
🧪 Testing & Development
| Project | Version | License | Link |
|---|---|---|---|
| Pest PHP | 4.x | MIT License | pestphp.com |
| Pest Plugin Laravel | 4.1+ | MIT License | GitHub |
| Laravel Pint | 1.24+ | MIT License | GitHub |
| Faker | 1.23+ | MIT License | fakerphp.github.io |
| Mockery | 1.6+ | BSD-3-Clause | docs.mockery.io |
| Newman | 6.1+ | MIT License | GitHub |
🔧 Build Tools
| Project | Version | License | Link |
|---|---|---|---|
| Vite | 7.x | MIT License | vite.dev |
| Laravel Vite Plugin | Latest | MIT License | GitHub |
| Autoprefixer | 10.4+ | MIT License | GitHub |
| Axios | 1.7+ | MIT License | axios-http.com |
| Concurrently | 9.0+ | MIT License | GitHub |
✨ Fonts & Icons
| Project | Version | License | Link |
|---|---|---|---|
| Inter Font | Latest | SIL Open Font License 1.1 | rsms.me/inter |
| Outfit Font | Latest | SIL Open Font License 1.1 | outfit.style |
| Heroicons | Latest | MIT License | heroicons.com |
📦 Additional Dependencies
The following packages are also used under their respective open-source licenses:
- Laravel Sail - MIT License
- Laravel Tinker - MIT License
- Livewire Blaze - MIT License
- Tailwind CSS Oxide - MIT License
- LightningCSS - MPL 2.0
- Rollup - MIT License
📜 License Summary
Most dependencies in this project use permissive open-source licenses:
Permissive, allows commercial use, modification, distribution, and private use.
Permissive with patent rights and attribution requirements.
Free font license, allows commercial use and modification.
Allows linking to proprietary software with dynamic linking.
Changelog
Version 1.0.0 🚀 - Initial Release
Release Date: 2026-04-02
Core Features
- Complete RAG pipeline with smart chunking and vector embeddings
- Multi-provider AI support (12+ LLM providers)
- Filament v5 admin dashboard with monitoring widgets
- RESTful API v1 with SSE streaming
- Document management with background processing
- Role-based access control via Filament Shield
- Personal Access Token Management Resource
Pipeline Optimizations
- Semantic caching for reduced API costs
- Optional reranking for improved precision
- Query rewriting for better retrieval
- Exponential backoff retry logic
Developer Tools
- Postman collection with automated tests
- Interactive API documentation
- Comprehensive test suite with Pest 4
- Laravel Pint code formatting